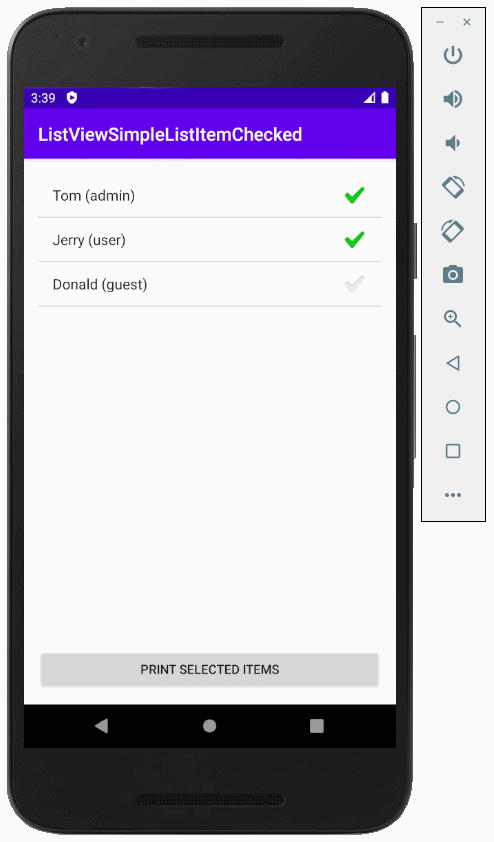
Android ListView avec Checkbox en utilisant ArrayAdapter
1. Exemple
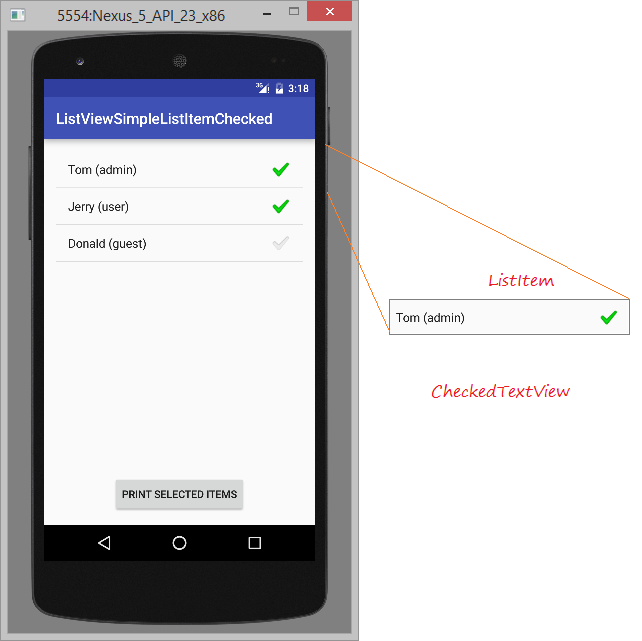
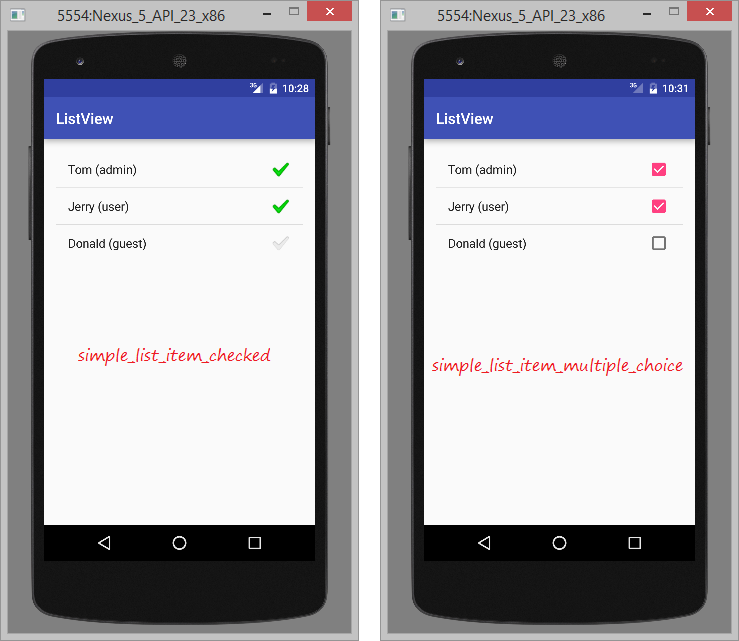
Android pré-construit un Layout simple dont ListItem est fait par un CheckedTextView. Dans cet exemple, je vais vous montrer comment utiliser ArrayAdapter et android.R.layout.simple_list_item_checked. (Ou android.R.layout.simple_list_item_multiple_choice)
Créez un nouveau projet Android :
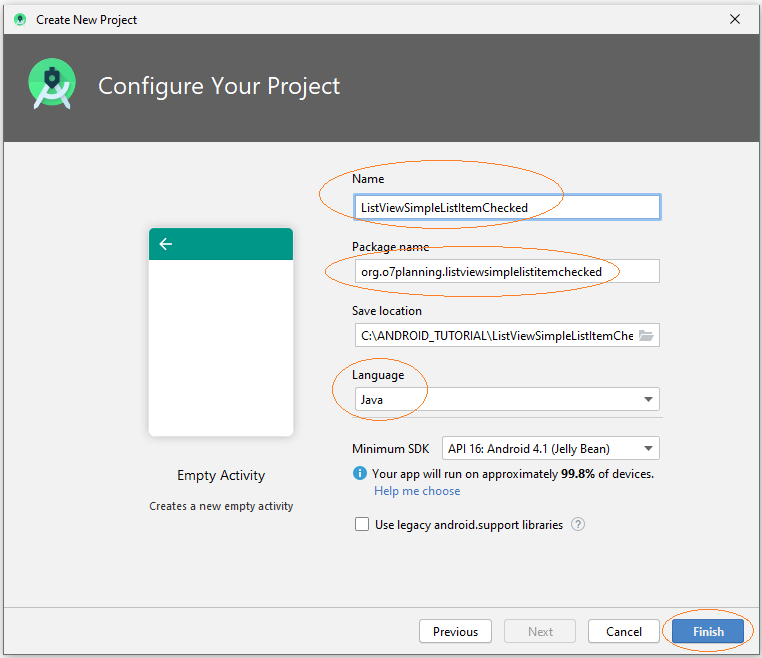
- ListViewSimpleListItemChecked
- Name: ListViewSimpleListItemChecked
- Package name: org.o7planning.listviewsimplelistitemchecked
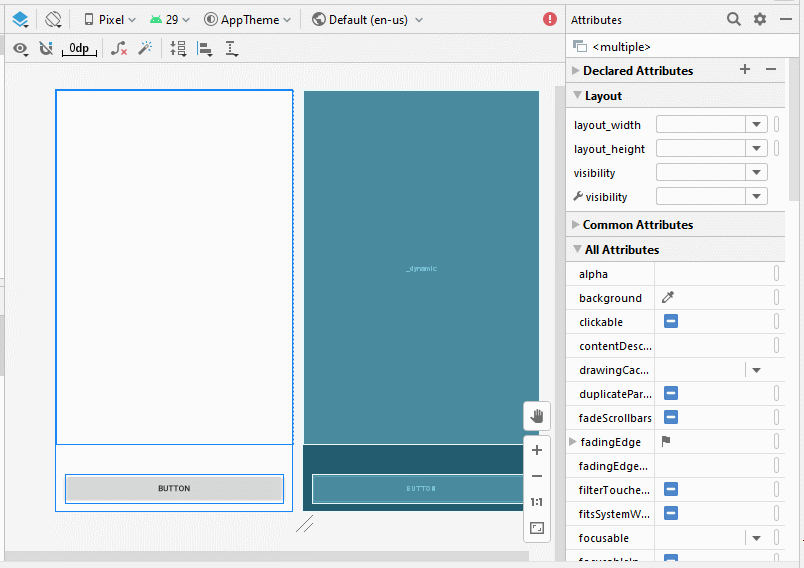
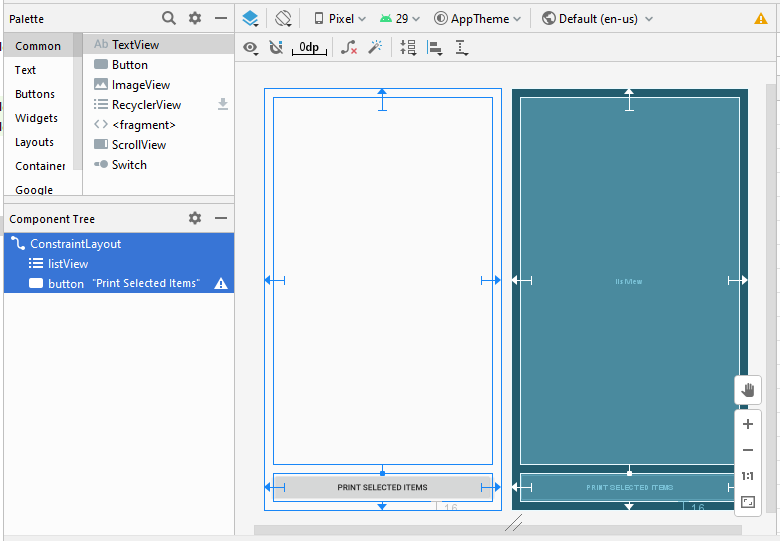
Concevez l'interface :
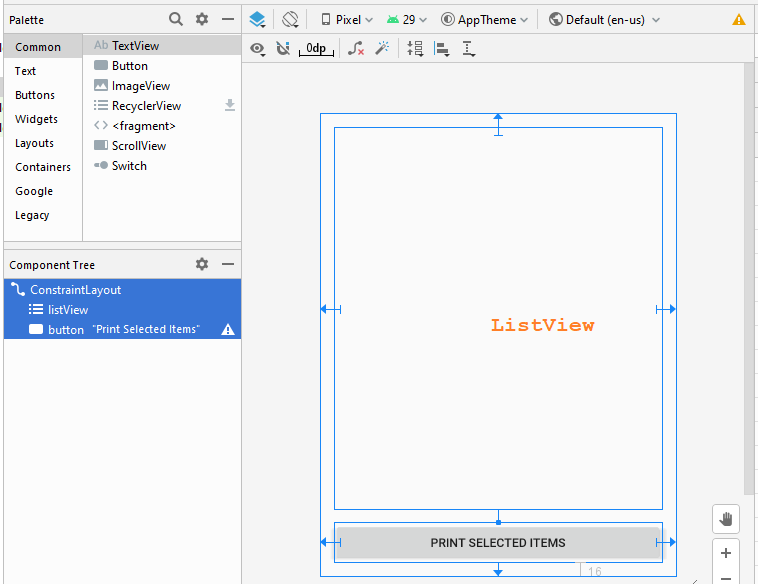
If you are interested in the steps to design this application interface, please see the appendix at the end of the article.
activity_main.xml
<?xml version="1.0" encoding="utf-8"?>
<androidx.constraintlayout.widget.ConstraintLayout
    xmlns:android="http://schemas.android.com/apk/res/android"
    xmlns:app="http://schemas.android.com/apk/res-auto"
    xmlns:tools="http://schemas.android.com/tools"
    android:layout_width="match_parent"
    android:layout_height="match_parent"
    tools:context=".MainActivity">

    <ListView
        android:id="@+id/listView"
        android:layout_width="0dp"
        android:layout_height="0dp"
        android:layout_marginStart="16dp"
        android:layout_marginLeft="16dp"
        android:layout_marginTop="16dp"
        android:layout_marginEnd="16dp"
        android:layout_marginRight="16dp"
        android:layout_marginBottom="16dp"
        app:layout_constraintBottom_toTopOf="@+id/button"
        app:layout_constraintEnd_toEndOf="parent"
        app:layout_constraintStart_toStartOf="parent"
        app:layout_constraintTop_toTopOf="parent" />

    <Button
        android:id="@+id/button"
        android:layout_width="0dp"
        android:layout_height="46dp"
        android:layout_marginStart="16dp"
        android:layout_marginLeft="16dp"
        android:layout_marginEnd="16dp"
        android:layout_marginRight="16dp"
        android:layout_marginBottom="16dp"
        android:text="Print Selected Items"
        app:layout_constraintBottom_toBottomOf="parent"
        app:layout_constraintEnd_toEndOf="parent"
        app:layout_constraintStart_toStartOf="parent" />
</androidx.constraintlayout.widget.ConstraintLayout>
UserAccount.java
package org.o7planning.listviewsimplelistitemchecked;

import java.io.Serializable;

public class UserAccount implements Serializable {

    private String userName;
    private String userType;

    private boolean active;

    public UserAccount(String userName, String userType)  {
        this.userName= userName;
        this.userType = userType;
        this.active= true;
    }

    public UserAccount(String userName, String userType, boolean active)  {
        this.userName= userName;
        this.userType = userType;
        this.active= active;
    }

    public String getUserType() {
        return userType;
    }

    public void setUserType(String userType) {
        this.userType = userType;
    }

    public String getUserName() {
        return userName;
    }

    public void setUserName(String userName) {
        this.userName = userName;
    }

    public boolean isActive() {
        return active;
    }

    public void setActive(boolean active) {
        this.active = active;
    }

    @Override
    public String toString() {
        return this.userName +" ("+ this.userType+")";
    }

}
MainActivity.java
package org.o7planning.listviewsimplelistitemchecked;

import android.os.Bundle;
import android.util.Log;
import android.util.SparseBooleanArray;
import android.view.View;
import android.widget.AdapterView;
import android.widget.ArrayAdapter;
import android.widget.Button;
import android.widget.CheckedTextView;
import android.widget.ListView;
import android.widget.Toast;
import androidx.appcompat.app.AppCompatActivity;

public class MainActivity extends AppCompatActivity {

    public static final String TAG = "ListViewExample";

    private ListView listView;
    private Button button;

    @Override
    protected void onCreate(Bundle savedInstanceState) {
        super.onCreate(savedInstanceState);
        setContentView(R.layout.activity_main);

        this.listView = (ListView)findViewById(R.id.listView);
        this.button = (Button)findViewById(R.id.button);

        // CHOICE_MODE_NONE: (Default)
        // (listView.setItemChecked(..) doest not work with CHOICE_MODE_NONE).
        // CHOICE_MODE_SINGLE:
        // CHOICE_MODE_MULTIPLE:
        // CHOICE_MODE_MULTIPLE_MODAL:
        this.listView.setChoiceMode(ListView.CHOICE_MODE_MULTIPLE);

        this.listView.setOnItemClickListener(new AdapterView.OnItemClickListener() {

            @Override
            public void onItemClick(AdapterView<?> parent, View view, int position, long id) {
                Log.i(TAG, "onItemClick: " +position);
                CheckedTextView v = (CheckedTextView) view;
                boolean currentCheck = v.isChecked();
                UserAccount user = (UserAccount) listView.getItemAtPosition(position);
                user.setActive(!currentCheck);
            }
        });
        //

        this.button.setOnClickListener(new View.OnClickListener() {
            @Override
            public void onClick(View v) {
                printSelectedItems();
            }
        });

         this.initListViewData();
    }

    private void initListViewData()  {
        UserAccount tom = new UserAccount("Tom","admin");
        UserAccount jerry = new UserAccount("Jerry","user");
        UserAccount donald = new UserAccount("Donald","guest", false);

        UserAccount[] users = new UserAccount[]{tom,jerry, donald};

        // android.R.layout.simple_list_item_checked:
        // ListItem is very simple (Only one CheckedTextView).
        ArrayAdapter<UserAccount> arrayAdapter
                = new ArrayAdapter<UserAccount>(this, android.R.layout.simple_list_item_checked , users);

        this.listView.setAdapter(arrayAdapter);

        for(int i=0;i< users.length; i++ )  {
            this.listView.setItemChecked(i,users[i].isActive());
        }
    }

    // When user click "Print Selected Items".
    public void printSelectedItems()  {

        SparseBooleanArray sp = listView.getCheckedItemPositions();

        StringBuilder sb= new StringBuilder();

        for(int i=0;i<sp.size();i++){
            if(sp.valueAt(i)==true){
                UserAccount user= (UserAccount) listView.getItemAtPosition(i);
                // Or:
                // String s = ((CheckedTextView) listView.getChildAt(i)).getText().toString();
                //
                String s= user.getUserName();
                sb = sb.append(" "+s);
            }
        }
        Toast.makeText(this, "Selected items are: "+sb.toString(), Toast.LENGTH_LONG).show();
    }

}
Exécutez cet exemple :
Android vous fournit également un Layout similaire à simple_list_item_checked qui est simple_list_item_multiple_choice.
La différence absolue entre les deux Layout est le style visuel de l'indicateur sélectionné qui apparaît sur un élément lorsqu'il est marqué comme sélectionné. Celui de android.R.layout.simple_list_item_item_multiple_choice est supposé mieux adapté à une sélection à choix multiples, tandis que celui de android.R.layout.simple_list_item_checked est plus adapté aux scénarios touch-and-go. Cela dit, tout est relatif aux goûts de chacun, et de plus vous pourrez y faire passer votre propre mise en page en fonction de vos envies.

Tutoriels de programmation Android
- Configurer Android Emulator en Android Studio
- Le Tutoriel de Android ToggleButton
- Créer un File Finder Dialog simple dans Android
- Le Tutoriel de Android TimePickerDialog
- Le Tutoriel de Android DatePickerDialog
- De quoi avez-vous besoin pour démarrer avec Android?
- Installer Android Studio sur Windows
- Installer Intel® HAXM pour Android Studio
- Le Tutoriel de Android AsyncTask
- Le Tutoriel de Android AsyncTaskLoader
- Tutoriel Android pour débutant - Exemples de base
- Comment connaître le numéro de téléphone d'Android Emulator et le changer?
- Le Tutoriel de Android TextInputLayout
- Le Tutoriel de Android CardView
- Le Tutoriel de Android ViewPager2
- Obtenir un numéro de téléphone dans Android à l'aide de TelephonyManager
- Le Tutoriel de Android Phone Call
- Le Tutoriel de Android Wifi Scanning
- Le Tutoriel de programmation de jeux Android 2D pour débutant
- Le Tutoriel de Android DialogFragment
- Le Tutoriel de Android CharacterPickerDialog
- Le Tutoriel Android pour débutant - Hello Android
- Utiliser Android Device File Explorer
- Activer USB Debugging sur un appareil Android
- Le Tutoriel de Android UI Layouts
- Le Tutoriel de Android SMS
- Le Tutoriel de Android et SQLite Database
- Le Tutoriel de Google Maps Android API
- Le Tutoriel de texte pour parler dans Android
- Le Tutoriel de Android Space
- Le Tutoriel de Android Toast
- Créer un Android Toast personnalisé
- Le Tutoriel de Android SnackBar
- Le Tutoriel de Android TextView
- Le Tutoriel de Android TextClock
- Le Tutoriel de Android EditText
- Le Tutoriel de Android TextWatcher
- Formater le numéro de carte de crédit avec Android TextWatcher
- Le Tutoriel de Android Clipboard
- Créer un File Chooser simple dans Android
- Le Tutoriel de Android AutoCompleteTextView et MultiAutoCompleteTextView
- Le Tutoriel de Android ImageView
- Le Tutoriel de Android ImageSwitcher
- Le Tutoriel de Android ScrollView et HorizontalScrollView
- Le Tutoriel de Android WebView
- Le Tutoriel de Android SeekBar
- Le Tutoriel de Android Dialog
- Le Tutoriel de Android AlertDialog
- Tutoriel Android RatingBar
- Le Tutoriel de Android ProgressBar
- Le Tutoriel de Android Spinner
- Le Tutoriel de Android Button
- Le Tutoriel de Android Switch
- Le Tutoriel de Android ImageButton
- Le Tutoriel de Android FloatingActionButton
- Le Tutoriel de Android CheckBox
- Le Tutoriel de Android RadioGroup et RadioButton
- Le Tutoriel de Android Chip et ChipGroup
- Utilisation des Image assets et des Icon assets d'Android Studio
- Configuration de la Carte SD pour Android Emulator
- Exemple ChipGroup et Chip Entry
- Comment ajouter des bibliothèques externes à Android Project dans Android Studio?
- Comment désactiver les autorisations déjà accordées à l'application Android?
- Comment supprimer des applications de Android Emulator?
- Le Tutoriel de Android LinearLayout
- Le Tutoriel de Android TableLayout
- Le Tutoriel de Android FrameLayout
- Le Tutoriel de Android QuickContactBadge
- Le Tutoriel de Android StackView
- Le Tutoriel de Android Camera
- Le Tutoriel de Android MediaPlayer
- Le Tutoriel de Android VideoView
- Jouer des effets sonores dans Android avec SoundPool
- Le Tutoriel de Android Networking
- Analyser JSON dans Android
- Le Tutoriel de Android SharedPreferences
- Le Tutorial de stockage interne Android (Internal Storage)
- Le Tutoriel de Android External Storage
- Le Tutoriel de Android Intents
- Exemple d'une Android Intent explicite, appelant une autre Intent
- Exemple de Android Intent implicite, ouvrez une URL, envoyez un email
- Le Tutoriel de Android Service
- Le Tutoriel Android Notifications
- Le Tutoriel de Android DatePicker
- Le Tutoriel de Android TimePicker
- Le Tutoriel de Android Chronometer
- Le Tutoriel de Android OptionMenu
- Le Tutoriel de Android ContextMenu
- Le Tutoriel de Android PopupMenu
- Le Tutoriel de Android Fragment
- Le Tutoriel de Android ListView
- Android ListView avec Checkbox en utilisant ArrayAdapter
- Le Tutoriel de Android GridView
Show More