Comment ajouter des bibliothèques externes à Android Project dans Android Studio?
1. The ways to use external libraries
Vous développez une application Android sur Android Studio, parfois vous souhaitez utiliser une bibliothèque externe pour votre projet, par exemple un fichier jar.

Common langs est une bibliothèque java avec code source ouvert qui est fourni par Apache, il dispose de méthodes utilitaires pour travailler avec String, les nombres, concurrency...
Supposons que vous souhaitez utiliser cette bibliothèque pour votre projet Android. Et en utilisant l'une de ses méthodes utilitaires pour tester si une chaîne est un numéro ou non.
import org.apache.commons.lang3.StringUtils;

public class CheckNumeric {

   public void test() {
       String text1 = "0123a4";
       String text2 = "01234";

       boolean result1 = StringUtils.isNumeric(text1);
       boolean result2 = StringUtils.isNumeric(text2);

       System.out.println(text1 + " is a numeric? " + result1);
       System.out.println(text2 + " is a numeric? " + result2);

   }

}
In this document I will guide you 3 ways to use the external library:
- Ajouter vos fichiers jar et le dossier libs du projet et le déclarer comme une bibliothèque à utiliser.
- Créer un Android Module et copier votre fichier jar à ce module, ensuite, déclarer votre projet utilisant le module qui vient d'être créé.
- Déclarer et utiliser une bibliothèque distante.
2. Way 1 - Copy external library to libs folder
Créer un projet nommé AddLibsDemo:
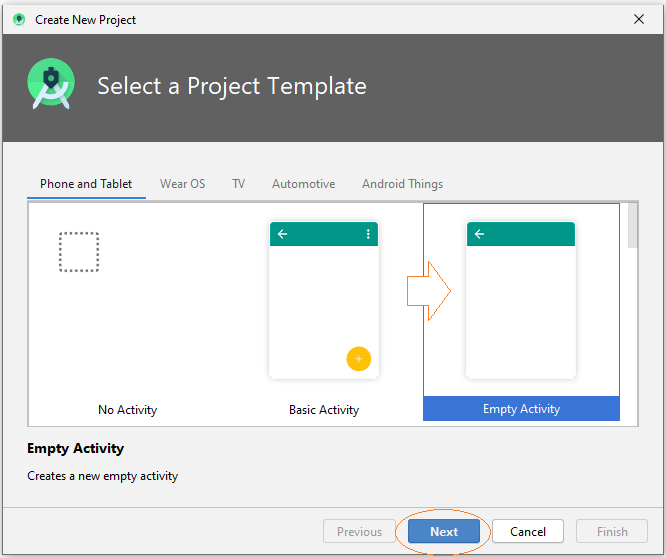
OK, votre projet est créé.
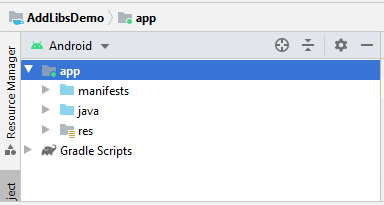
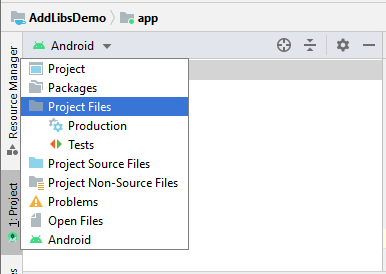
Changez à l'onglet Project:
Vous devez copier le fichier jar et le coller dans le dossier libs:
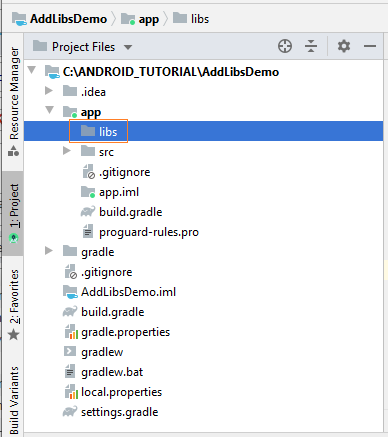
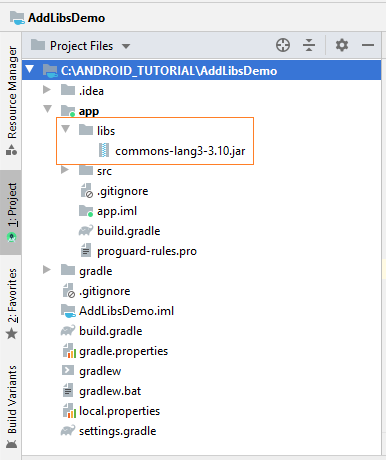
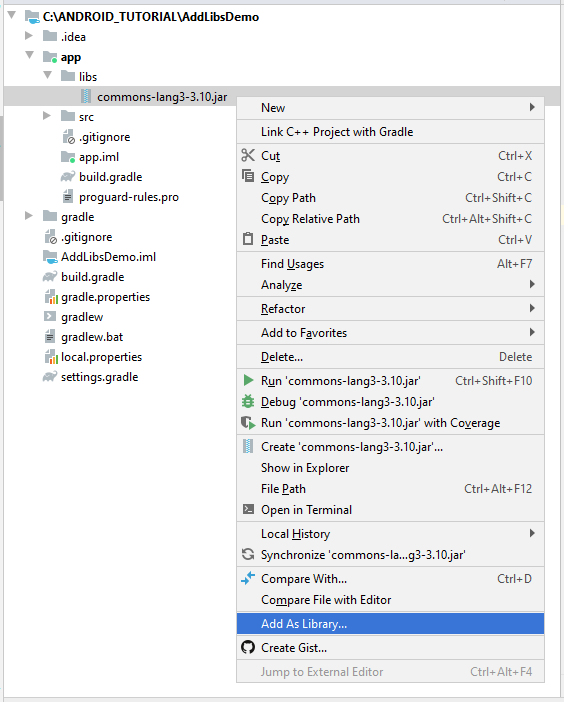
Cliquez sur le bouton droit des fichiers jar, sélectionnez "Add as Library..":
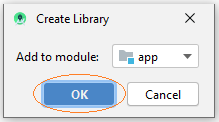
Retournez à l'onglet "Android", vous pouvez voir que votre bibliothèque a été déjà déclaré dans build.grade (Module: app)
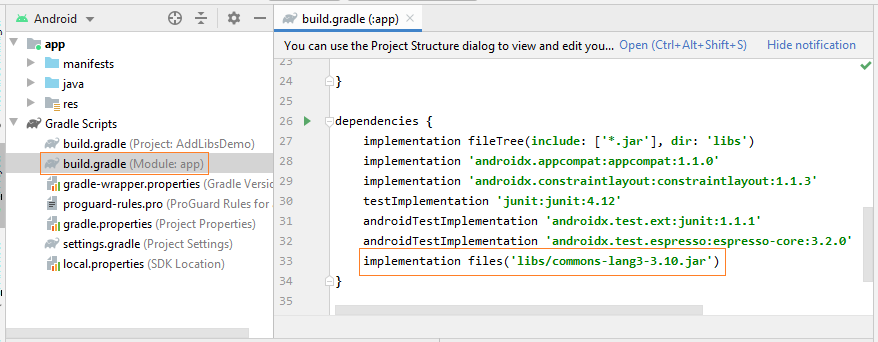
OK lmaintenant votre bibliothèque est prête à utiliser.
3. Way 2 - Using the module library
Supposons que vous avez un projet AddLibsDemo2, et vous voulez utiliser la bibliothèque common-lang3-3.4.jar pour ce projet.
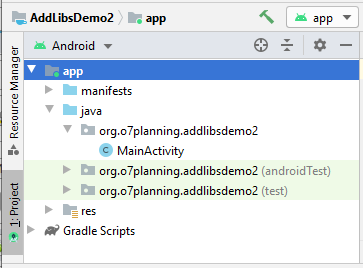
Créez un Android Module:
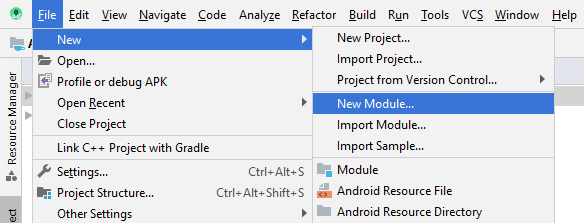
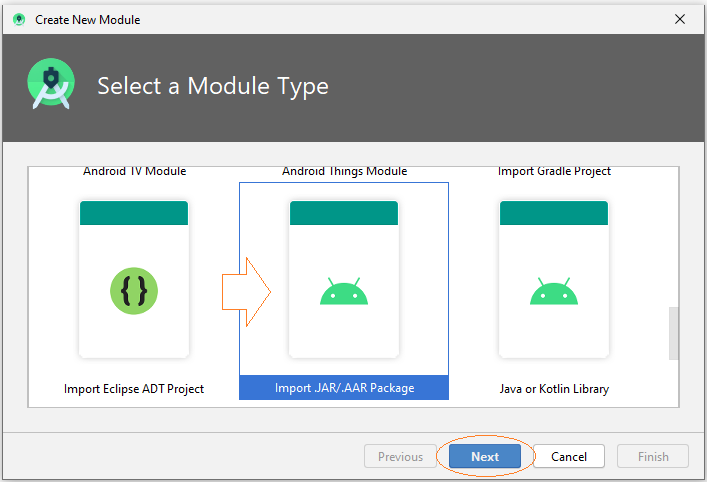
Indiquez l'emplacement de la bibliothèque.
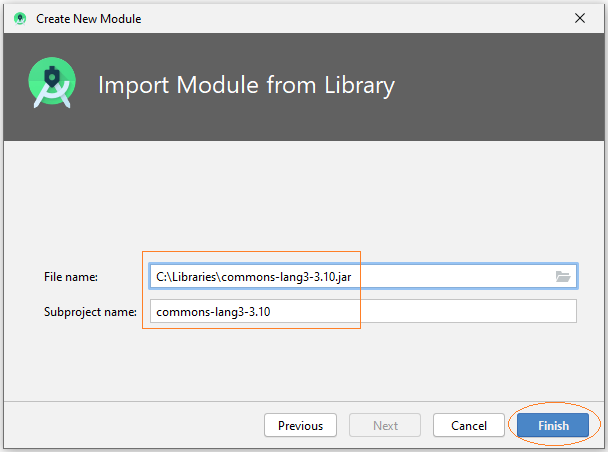
La bibliothèque de module a été créée:
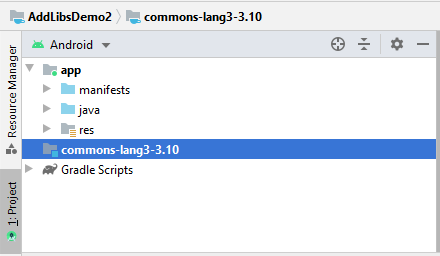
Ensuite, vous devez déclarer la dépendance du projet principal dans le module nouvellement créé.
- File/Project Structure
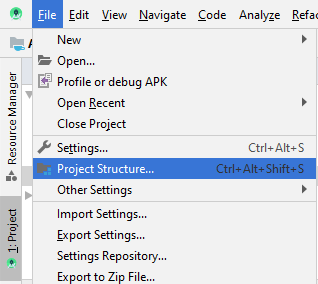
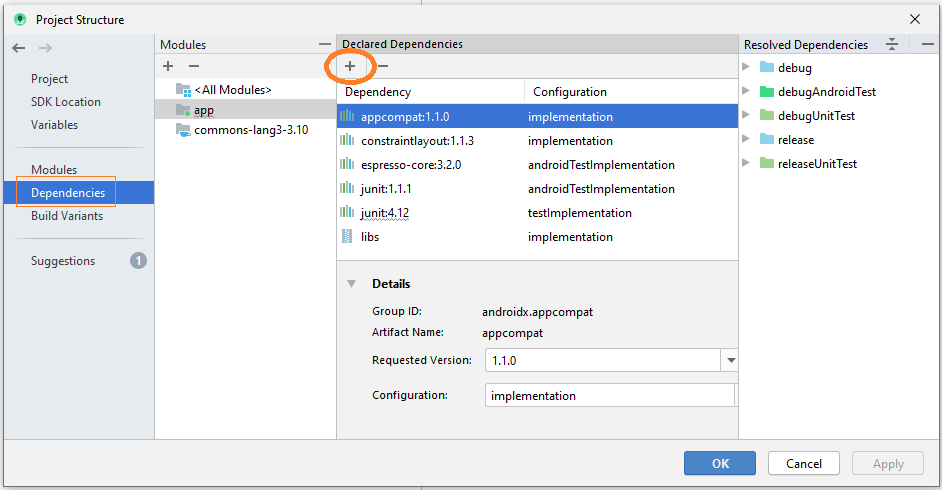
Ajoutez des dépendances de module:
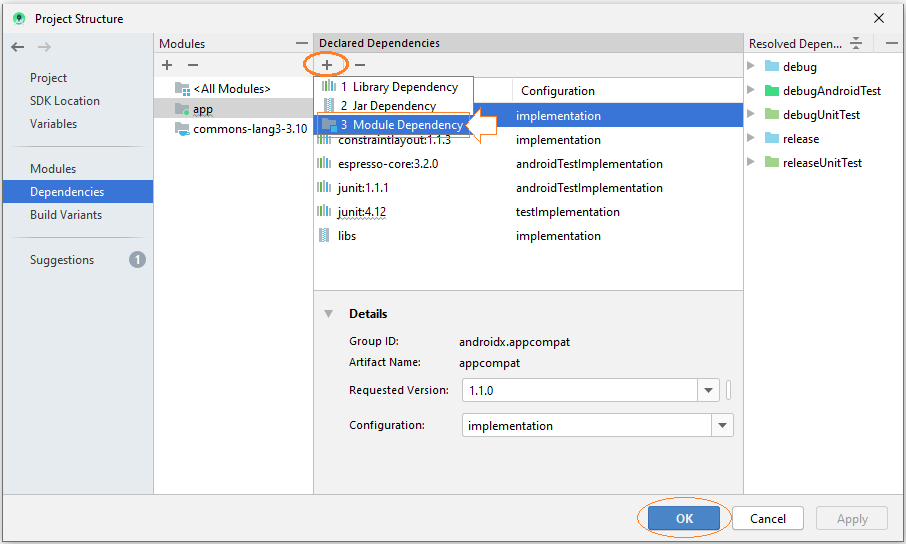
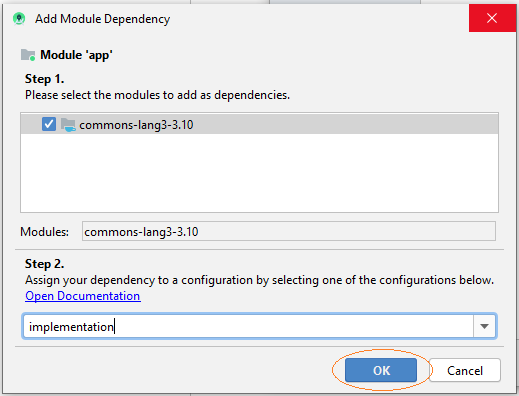
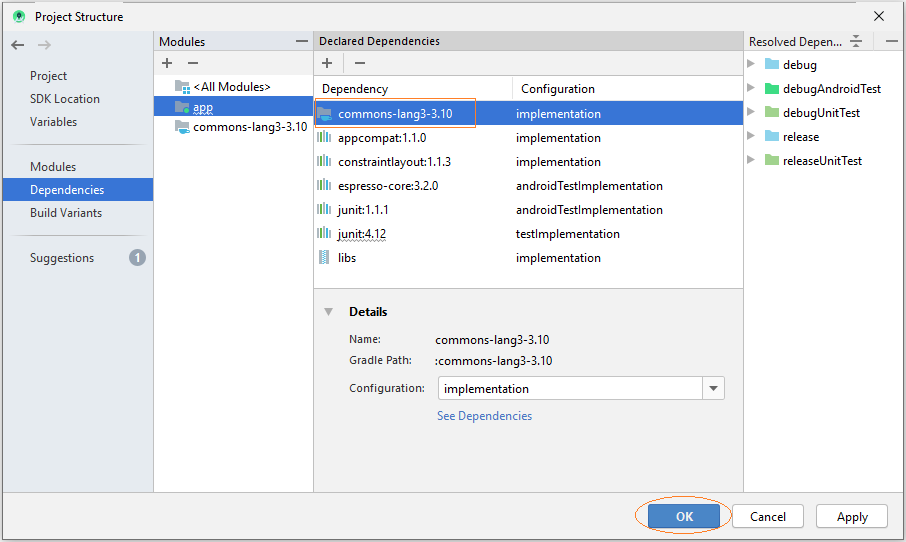
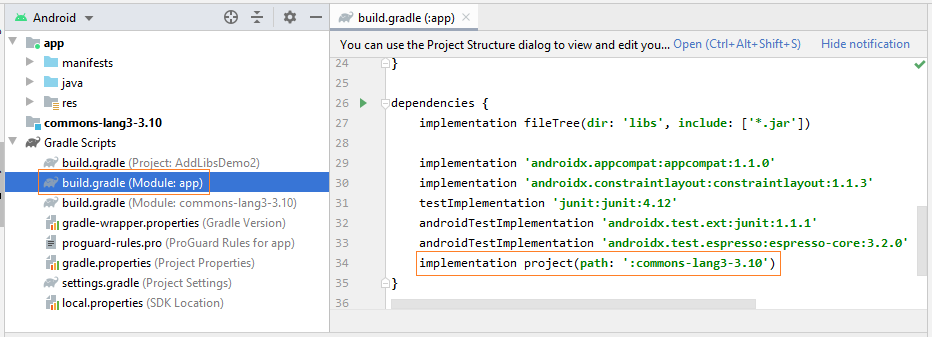
Vous pouvez vérifier votre Module qui a été déclaré dans build.grade (Module: app).
4. Way 3 - Using remote library
Android Studio peut utiliser la bibliothèque sur un réseau, il est situé dans un répertoire (repository) sur Internet. Supposons que vous ayez le projet AddLibDemo3, et que vous devez ajouter la bibliothèque distante à votre projet.
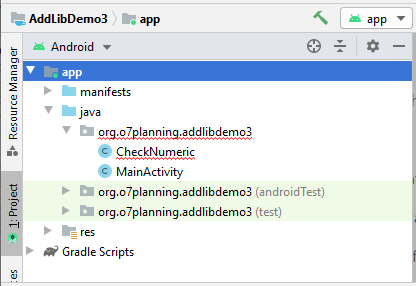
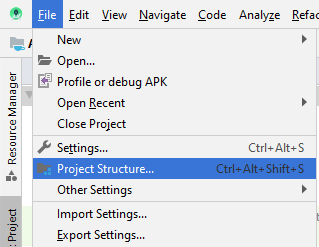
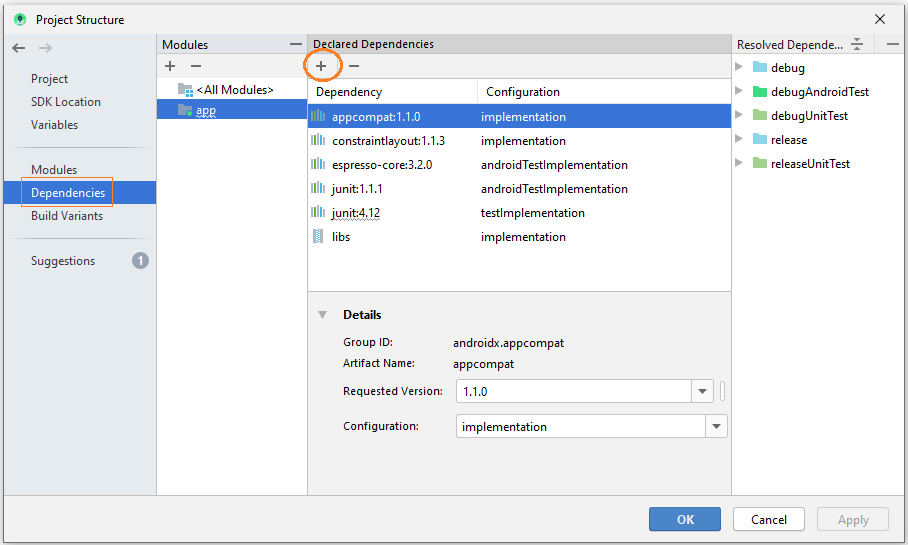
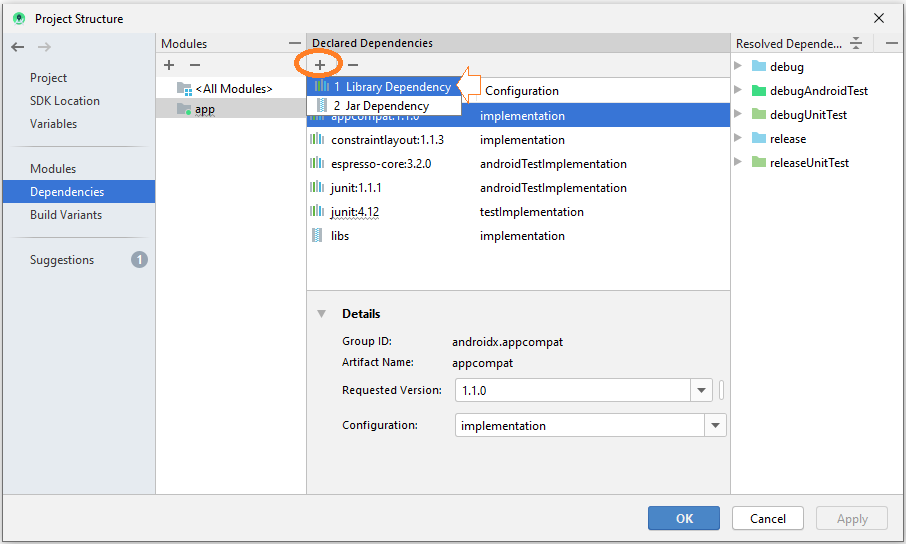
Cherchez la bibliothèque:
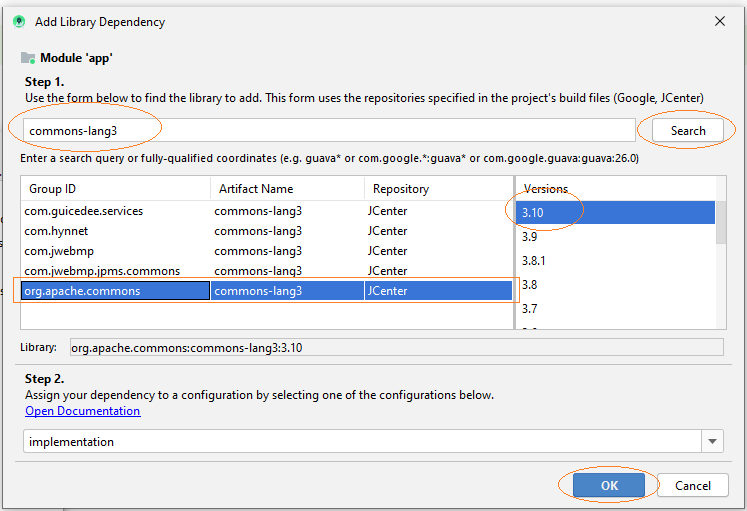
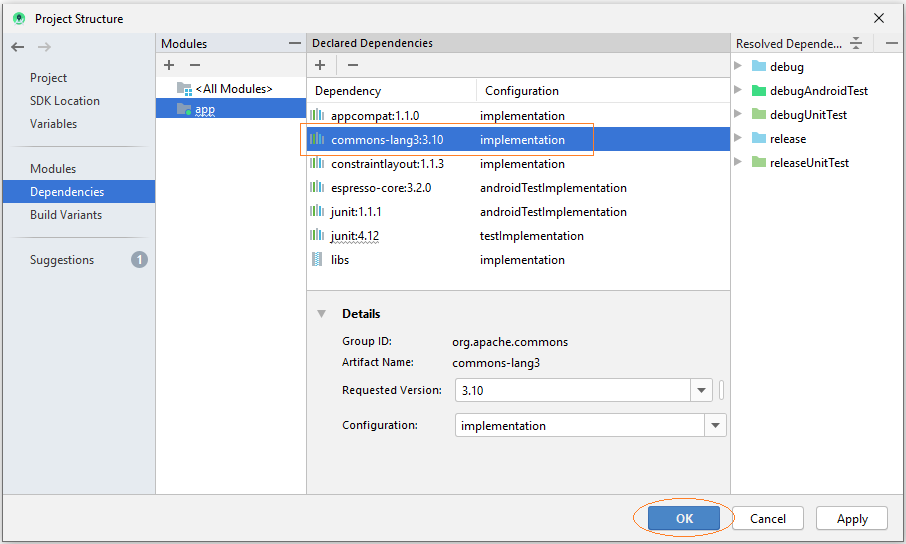
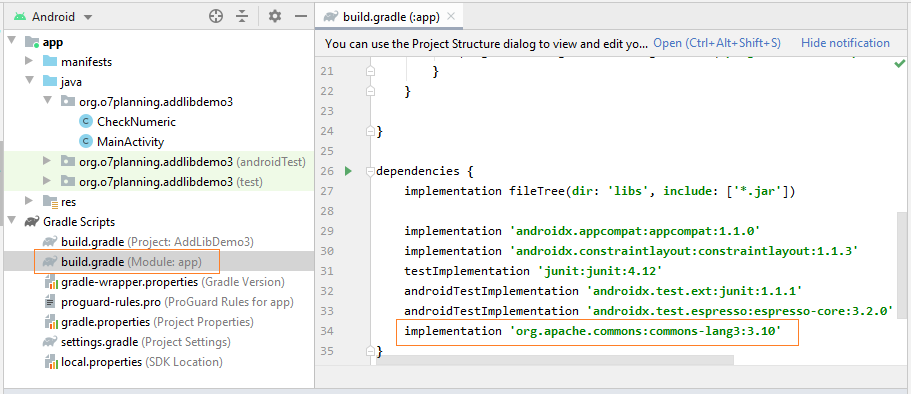
OK, la bibliothèque a été ajoutée au projet, vous pouvez voir sur build.grade (Module: app).
Tutoriels de programmation Android
- Configurer Android Emulator en Android Studio
- Le Tutoriel de Android ToggleButton
- Créer un File Finder Dialog simple dans Android
- Le Tutoriel de Android TimePickerDialog
- Le Tutoriel de Android DatePickerDialog
- De quoi avez-vous besoin pour démarrer avec Android?
- Installer Android Studio sur Windows
- Installer Intel® HAXM pour Android Studio
- Le Tutoriel de Android AsyncTask
- Le Tutoriel de Android AsyncTaskLoader
- Tutoriel Android pour débutant - Exemples de base
- Comment connaître le numéro de téléphone d'Android Emulator et le changer?
- Le Tutoriel de Android TextInputLayout
- Le Tutoriel de Android CardView
- Le Tutoriel de Android ViewPager2
- Obtenir un numéro de téléphone dans Android à l'aide de TelephonyManager
- Le Tutoriel de Android Phone Call
- Le Tutoriel de Android Wifi Scanning
- Le Tutoriel de programmation de jeux Android 2D pour débutant
- Le Tutoriel de Android DialogFragment
- Le Tutoriel de Android CharacterPickerDialog
- Le Tutoriel Android pour débutant - Hello Android
- Utiliser Android Device File Explorer
- Activer USB Debugging sur un appareil Android
- Le Tutoriel de Android UI Layouts
- Le Tutoriel de Android SMS
- Le Tutoriel de Android et SQLite Database
- Le Tutoriel de Google Maps Android API
- Le Tutoriel de texte pour parler dans Android
- Le Tutoriel de Android Space
- Le Tutoriel de Android Toast
- Créer un Android Toast personnalisé
- Le Tutoriel de Android SnackBar
- Le Tutoriel de Android TextView
- Le Tutoriel de Android TextClock
- Le Tutoriel de Android EditText
- Le Tutoriel de Android TextWatcher
- Formater le numéro de carte de crédit avec Android TextWatcher
- Le Tutoriel de Android Clipboard
- Créer un File Chooser simple dans Android
- Le Tutoriel de Android AutoCompleteTextView et MultiAutoCompleteTextView
- Le Tutoriel de Android ImageView
- Le Tutoriel de Android ImageSwitcher
- Le Tutoriel de Android ScrollView et HorizontalScrollView
- Le Tutoriel de Android WebView
- Le Tutoriel de Android SeekBar
- Le Tutoriel de Android Dialog
- Le Tutoriel de Android AlertDialog
- Tutoriel Android RatingBar
- Le Tutoriel de Android ProgressBar
- Le Tutoriel de Android Spinner
- Le Tutoriel de Android Button
- Le Tutoriel de Android Switch
- Le Tutoriel de Android ImageButton
- Le Tutoriel de Android FloatingActionButton
- Le Tutoriel de Android CheckBox
- Le Tutoriel de Android RadioGroup et RadioButton
- Le Tutoriel de Android Chip et ChipGroup
- Utilisation des Image assets et des Icon assets d'Android Studio
- Configuration de la Carte SD pour Android Emulator
- Exemple ChipGroup et Chip Entry
- Comment ajouter des bibliothèques externes à Android Project dans Android Studio?
- Comment désactiver les autorisations déjà accordées à l'application Android?
- Comment supprimer des applications de Android Emulator?
- Le Tutoriel de Android LinearLayout
- Le Tutoriel de Android TableLayout
- Le Tutoriel de Android FrameLayout
- Le Tutoriel de Android QuickContactBadge
- Le Tutoriel de Android StackView
- Le Tutoriel de Android Camera
- Le Tutoriel de Android MediaPlayer
- Le Tutoriel de Android VideoView
- Jouer des effets sonores dans Android avec SoundPool
- Le Tutoriel de Android Networking
- Analyser JSON dans Android
- Le Tutoriel de Android SharedPreferences
- Le Tutorial de stockage interne Android (Internal Storage)
- Le Tutoriel de Android External Storage
- Le Tutoriel de Android Intents
- Exemple d'une Android Intent explicite, appelant une autre Intent
- Exemple de Android Intent implicite, ouvrez une URL, envoyez un email
- Le Tutoriel de Android Service
- Le Tutoriel Android Notifications
- Le Tutoriel de Android DatePicker
- Le Tutoriel de Android TimePicker
- Le Tutoriel de Android Chronometer
- Le Tutoriel de Android OptionMenu
- Le Tutoriel de Android ContextMenu
- Le Tutoriel de Android PopupMenu
- Le Tutoriel de Android Fragment
- Le Tutoriel de Android ListView
- Android ListView avec Checkbox en utilisant ArrayAdapter
- Le Tutoriel de Android GridView
Show More