Le Tutoriel de Android StackView
1. Qu'est-ce que Android StackView?
L'image ci- dessous est une illustration de StackView:

Vous pouvez voir un exemple de StackView dans ce document:

- TODO - More info
2. Exemple avec Android StackView
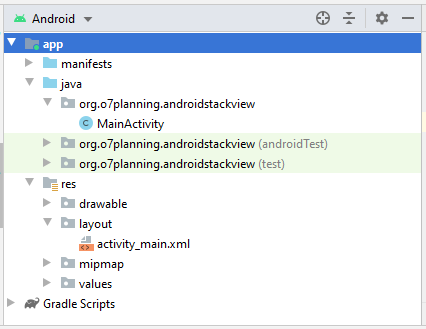
Créez un nouveau projet baptisé AndroidStackView:

- Name: AndroidStackView
- Package name: org.o7planning.androidstackview

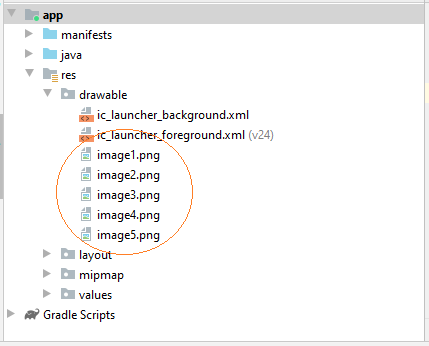
Vous avez besoin de quelques images pour utiliser dans l'exemple:
image1.png |  |
image2.png |  |
image3.png |  |
image4.png |  |
image5.png |  |
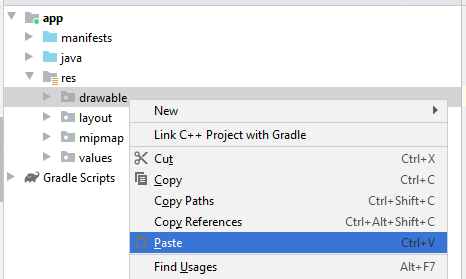
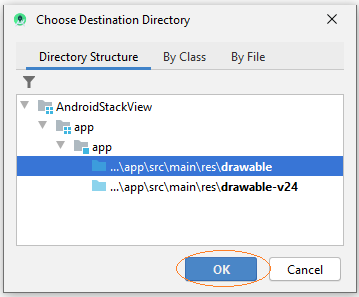
Copiez des images dans le dossier drawable du projet.
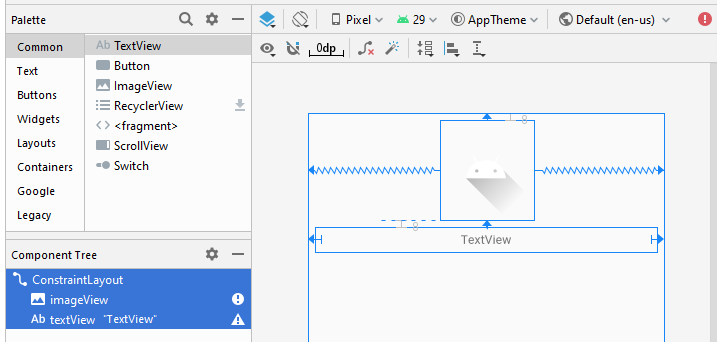
Ajoutez layout our concevoir la mise en page pour StackItem:
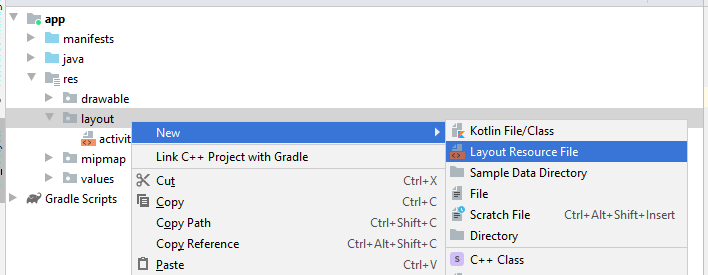
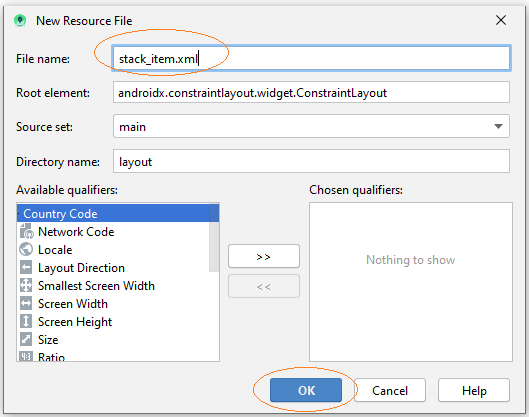
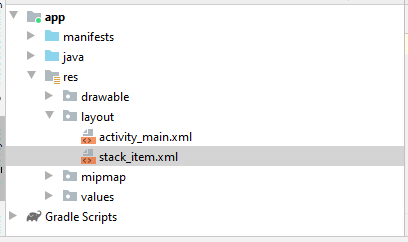
La conception d'interface pour StackItem:
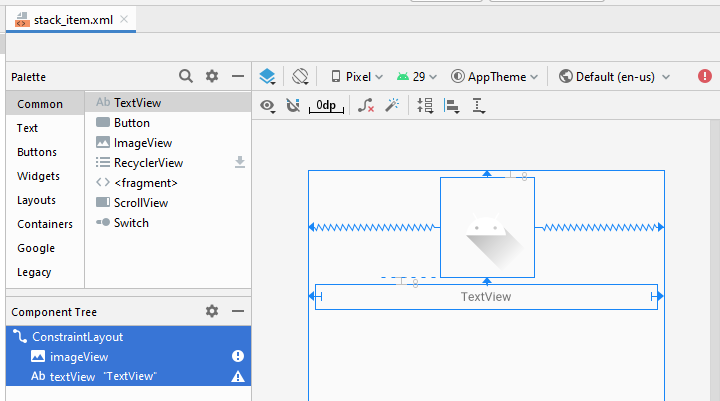
stack_item.xml
<?xml version="1.0" encoding="utf-8"?>
<androidx.constraintlayout.widget.ConstraintLayout
    xmlns:android="http://schemas.android.com/apk/res/android"
    xmlns:app="http://schemas.android.com/apk/res-auto"
    xmlns:tools="http://schemas.android.com/tools"
    android:layout_width="match_parent"
    android:layout_height="match_parent">

    <ImageView
        android:id="@+id/imageView"
        android:layout_width="wrap_content"
        android:layout_height="115sp"
        android:layout_marginTop="8dp"
        app:layout_constraintEnd_toEndOf="parent"
        app:layout_constraintStart_toStartOf="parent"
        app:layout_constraintTop_toTopOf="parent"
        app:srcCompat="@drawable/ic_launcher_foreground"
        tools:ignore="VectorDrawableCompat" />

    <TextView
        android:id="@+id/textView"
        android:layout_width="0dp"
        android:layout_height="29dp"
        android:layout_marginStart="8dp"
        android:layout_marginLeft="8dp"
        android:layout_marginTop="8dp"
        android:layout_marginEnd="8dp"
        android:layout_marginRight="8dp"
        android:gravity="center"
        android:text="TextView"
        app:layout_constraintEnd_toEndOf="parent"
        app:layout_constraintStart_toStartOf="parent"
        app:layout_constraintTop_toBottomOf="@+id/imageView" />
</androidx.constraintlayout.widget.ConstraintLayout>
L'interface de l'application:
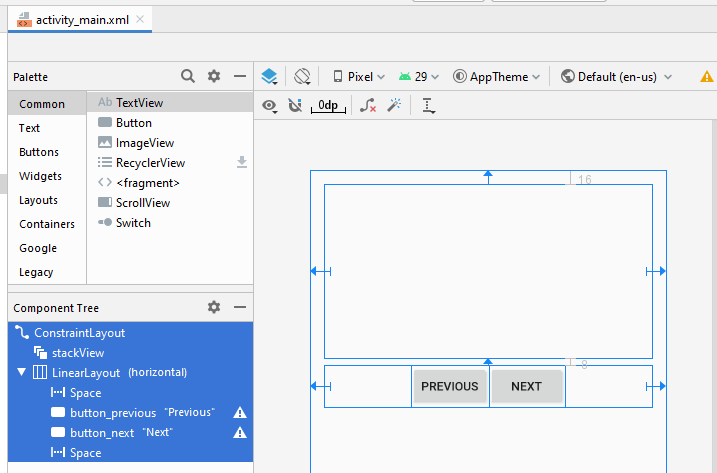
activity_main.xml
<?xml version="1.0" encoding="utf-8"?>
<androidx.constraintlayout.widget.ConstraintLayout
    xmlns:android="http://schemas.android.com/apk/res/android"
    xmlns:app="http://schemas.android.com/apk/res-auto"
    xmlns:tools="http://schemas.android.com/tools"
    android:layout_width="match_parent"
    android:layout_height="match_parent"
    tools:context=".MainActivity">

    <StackView
        android:id="@+id/stackView"
        android:layout_width="0dp"
        android:layout_height="201dp"
        android:layout_marginStart="16dp"
        android:layout_marginLeft="16dp"
        android:layout_marginTop="16dp"
        android:layout_marginEnd="16dp"
        android:layout_marginRight="16dp"
        app:layout_constraintEnd_toEndOf="parent"
        app:layout_constraintStart_toStartOf="parent"
        app:layout_constraintTop_toTopOf="parent" />

    <LinearLayout
        android:layout_width="0dp"
        android:layout_height="wrap_content"
        android:layout_marginStart="16dp"
        android:layout_marginLeft="16dp"
        android:layout_marginTop="8dp"
        android:layout_marginEnd="16dp"
        android:layout_marginRight="16dp"
        android:orientation="horizontal"
        app:layout_constraintEnd_toEndOf="parent"
        app:layout_constraintStart_toStartOf="parent"
        app:layout_constraintTop_toBottomOf="@+id/stackView">

        <Space
            android:layout_width="wrap_content"
            android:layout_height="wrap_content"
            android:layout_weight="1" />

        <Button
            android:id="@+id/button_previous"
            android:layout_width="wrap_content"
            android:layout_height="wrap_content"
            android:layout_weight="0"
            android:text="Previous" />

        <Button
            android:id="@+id/button_next"
            android:layout_width="wrap_content"
            android:layout_height="wrap_content"
            android:layout_weight="0"
            android:text="Next" />

        <Space
            android:layout_width="wrap_content"
            android:layout_height="wrap_content"
            android:layout_weight="1" />
    </LinearLayout>

</androidx.constraintlayout.widget.ConstraintLayout>
StackItem.java
package org.o7planning.androidstackview;

public class StackItem {

    private String itemText;

    // "image1","image2",..
    private String imageName;

    public StackItem(String text, String imageName) {
        this.imageName = imageName;
        this.itemText = text;
    }

    public String getImageName() {
        return imageName;
    }


    public String getItemText() {
        return itemText;
    }

}
StackAdapter.java
package org.o7planning.androidstackview;

import android.content.Context;
import android.graphics.Color;
import android.util.Log;
import android.view.LayoutInflater;
import android.view.View;
import android.view.ViewGroup;
import android.widget.ArrayAdapter;
import android.widget.ImageView;
import android.widget.TextView;

import java.util.List;

public class StackAdapter extends ArrayAdapter<StackItem> {

    private List<StackItem> items;
    private Context context;

    public StackAdapter(Context context, int textViewResourceId,
                        List<StackItem> objects) {
        super(context, textViewResourceId, objects);
        this.items = objects;
        this.context = context;
    }

    public View getView(int position, View convertView, ViewGroup parent) {
        View itemView = convertView;
        if (itemView == null) {
            LayoutInflater layoutInflater = (LayoutInflater) context
                    .getSystemService(Context.LAYOUT_INFLATER_SERVICE);
            itemView = layoutInflater.inflate(R.layout.stack_item, null);
        }
        StackItem stackItem = items.get(position);
        if(stackItem== null)  {
            Log.i("MyLog", "stackItem at " + position + " is null!!!");
            return itemView;
        }
        // TextView defined in the stack_item.xml
        TextView textView = (TextView) itemView.findViewById(R.id.textView);

        // ImageView defined in the stack_item.xml
        ImageView imageView = (ImageView) itemView.findViewById(R.id.imageView);

        textView.setText(stackItem.getItemText());

        // "image1", "image2",..
        String imageName= stackItem.getImageName();

        int resId= this.getDrawableResIdByName(imageName);

        imageView.setImageResource(resId);
        imageView.setBackgroundColor(Color.rgb(211,204,188));

        return itemView;
    }


    // Find Image ID corresponding to the name of the image (in the drawable folder).
    public int getDrawableResIdByName(String resName)  {
        String pkgName = context.getPackageName();
        // Return 0 if not found.
        int resID = context.getResources().getIdentifier(resName, "drawable", pkgName);
        Log.i("MyLog", "Res Name: " + resName + "==> Res ID = " + resID);
        return resID;
    }

}
MainActivity.java
package org.o7planning.androidstackview;

import androidx.appcompat.app.AppCompatActivity;
import android.os.Bundle;
import android.graphics.Color;
import android.view.View;
import android.widget.Button;
import android.widget.StackView;

import java.util.ArrayList;
import java.util.List;

public class MainActivity extends AppCompatActivity {

    private StackView stackView;
    private Button buttonPrevious;
    private Button buttonNext;

    private final String[] IMAGE_NAMES= {"image1","image2", "image3", "image4","image5"};

    @Override
    protected void onCreate(Bundle savedInstanceState) {
        super.onCreate(savedInstanceState);
        setContentView(R.layout.activity_main);

        this.stackView = (StackView) findViewById(R.id.stackView);
        this.buttonNext =(Button) findViewById(R.id.button_next);
        this.buttonPrevious= (Button) findViewById(R.id.button_previous);

        List<StackItem> items = new ArrayList<StackItem>();

        for(String imageName: IMAGE_NAMES) {
            items.add(new StackItem(imageName+".png", imageName));
        }

        StackAdapter adapt = new StackAdapter(this, R.layout.stack_item, items);
        stackView.setAdapter(adapt);
        stackView.setHorizontalScrollBarEnabled(true);
        stackView.setBackgroundColor(Color.rgb(230, 255, 255));

        buttonNext.setOnClickListener(new Button.OnClickListener() {

            @Override
            public void onClick(View v) {
                stackView.showNext();
            }
        });

        buttonPrevious.setOnClickListener(new Button.OnClickListener(){

            @Override
            public void onClick(View v) {
                stackView.showPrevious();
            }
        });
    }


}
L'exécution de l'application:
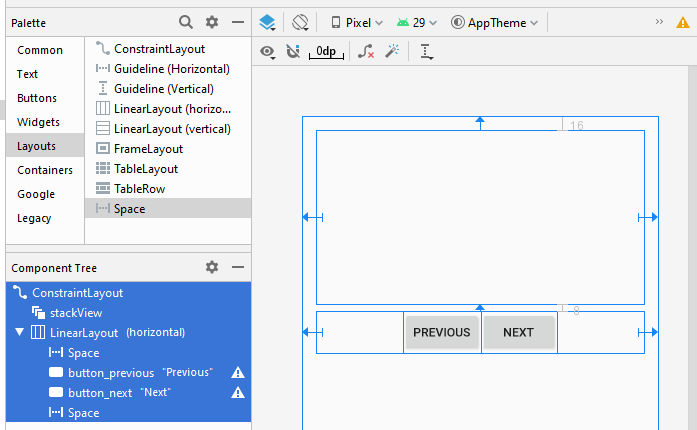
4. Phụ lục: Thiết kế main_activity.xml
I don't know why, but StackView is not available on the Palette of design window (Android Studio 3.6.x), so you may have to add the following XML code to main_activity.xml to get StackView on the interface.
<StackView
        android:layout_width="100dp"
        android:layout_height="100dp"
        tools:layout_editor_absoluteX="16dp"
        tools:layout_editor_absoluteY="16dp" />
Set ID, Text for components on the interface.
Tutoriels de programmation Android
- Configurer Android Emulator en Android Studio
- Le Tutoriel de Android ToggleButton
- Créer un File Finder Dialog simple dans Android
- Le Tutoriel de Android TimePickerDialog
- Le Tutoriel de Android DatePickerDialog
- De quoi avez-vous besoin pour démarrer avec Android?
- Installer Android Studio sur Windows
- Installer Intel® HAXM pour Android Studio
- Le Tutoriel de Android AsyncTask
- Le Tutoriel de Android AsyncTaskLoader
- Tutoriel Android pour débutant - Exemples de base
- Comment connaître le numéro de téléphone d'Android Emulator et le changer?
- Le Tutoriel de Android TextInputLayout
- Le Tutoriel de Android CardView
- Le Tutoriel de Android ViewPager2
- Obtenir un numéro de téléphone dans Android à l'aide de TelephonyManager
- Le Tutoriel de Android Phone Call
- Le Tutoriel de Android Wifi Scanning
- Le Tutoriel de programmation de jeux Android 2D pour débutant
- Le Tutoriel de Android DialogFragment
- Le Tutoriel de Android CharacterPickerDialog
- Le Tutoriel Android pour débutant - Hello Android
- Utiliser Android Device File Explorer
- Activer USB Debugging sur un appareil Android
- Le Tutoriel de Android UI Layouts
- Le Tutoriel de Android SMS
- Le Tutoriel de Android et SQLite Database
- Le Tutoriel de Google Maps Android API
- Le Tutoriel de texte pour parler dans Android
- Le Tutoriel de Android Space
- Le Tutoriel de Android Toast
- Créer un Android Toast personnalisé
- Le Tutoriel de Android SnackBar
- Le Tutoriel de Android TextView
- Le Tutoriel de Android TextClock
- Le Tutoriel de Android EditText
- Le Tutoriel de Android TextWatcher
- Formater le numéro de carte de crédit avec Android TextWatcher
- Le Tutoriel de Android Clipboard
- Créer un File Chooser simple dans Android
- Le Tutoriel de Android AutoCompleteTextView et MultiAutoCompleteTextView
- Le Tutoriel de Android ImageView
- Le Tutoriel de Android ImageSwitcher
- Le Tutoriel de Android ScrollView et HorizontalScrollView
- Le Tutoriel de Android WebView
- Le Tutoriel de Android SeekBar
- Le Tutoriel de Android Dialog
- Le Tutoriel de Android AlertDialog
- Tutoriel Android RatingBar
- Le Tutoriel de Android ProgressBar
- Le Tutoriel de Android Spinner
- Le Tutoriel de Android Button
- Le Tutoriel de Android Switch
- Le Tutoriel de Android ImageButton
- Le Tutoriel de Android FloatingActionButton
- Le Tutoriel de Android CheckBox
- Le Tutoriel de Android RadioGroup et RadioButton
- Le Tutoriel de Android Chip et ChipGroup
- Utilisation des Image assets et des Icon assets d'Android Studio
- Configuration de la Carte SD pour Android Emulator
- Exemple ChipGroup et Chip Entry
- Comment ajouter des bibliothèques externes à Android Project dans Android Studio?
- Comment désactiver les autorisations déjà accordées à l'application Android?
- Comment supprimer des applications de Android Emulator?
- Le Tutoriel de Android LinearLayout
- Le Tutoriel de Android TableLayout
- Le Tutoriel de Android FrameLayout
- Le Tutoriel de Android QuickContactBadge
- Le Tutoriel de Android StackView
- Le Tutoriel de Android Camera
- Le Tutoriel de Android MediaPlayer
- Le Tutoriel de Android VideoView
- Jouer des effets sonores dans Android avec SoundPool
- Le Tutoriel de Android Networking
- Analyser JSON dans Android
- Le Tutoriel de Android SharedPreferences
- Le Tutorial de stockage interne Android (Internal Storage)
- Le Tutoriel de Android External Storage
- Le Tutoriel de Android Intents
- Exemple d'une Android Intent explicite, appelant une autre Intent
- Exemple de Android Intent implicite, ouvrez une URL, envoyez un email
- Le Tutoriel de Android Service
- Le Tutoriel Android Notifications
- Le Tutoriel de Android DatePicker
- Le Tutoriel de Android TimePicker
- Le Tutoriel de Android Chronometer
- Le Tutoriel de Android OptionMenu
- Le Tutoriel de Android ContextMenu
- Le Tutoriel de Android PopupMenu
- Le Tutoriel de Android Fragment
- Le Tutoriel de Android ListView
- Android ListView avec Checkbox en utilisant ArrayAdapter
- Le Tutoriel de Android GridView
Show More