Analyser JSON dans Android
1. Qu'est-ce que JSON?
JSON (JavaScript Object Notation) est un format d'échange des données (data exchange format). Il stocke des données par des paires de clés- valeurs. JSON est plus simple et plus lisible que XML.
Observez un simple exemple de JSON:
{
"name" : "Tran",
"address" : "Hai Duong, Vietnam",
"phones" : [0121111111, 012222222]
}
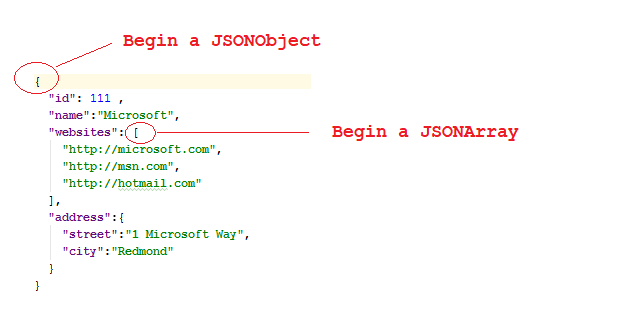
Des paires clé- valeur peuvent s'insérer:
{
  "id": 111 ,
  "name":"Microsoft",
  "websites": [
     "http://microsoft.com",
     "http://msn.com",
     "http://hotmail.com"
  ],
  "address":{
     "street":"1 Microsoft Way",
     "city":"Redmond"
  }
}
En Java, il y a plusieurs bibliothèques de source ouverte qui vous aide de manipulier avec des fichiers JSON, par exemple:
- JSONP
- json.org
- Jackson
- Google GSON
- json-lib
- javax json
- json-simple
- json-smart
- flexjson
- fastjson
Android soutient la bibliothèque pour qu'elle travaille avec JSON, vous ne devez pas déclarer de bibliothèque quelconque. Dans ce document je vais vous apprendre de manipuler avec JSON en utilisant JSON API qui est disponible dans le système d'exploitation Android.
3. Créer rapidement un Projet pour travailler avec JSON
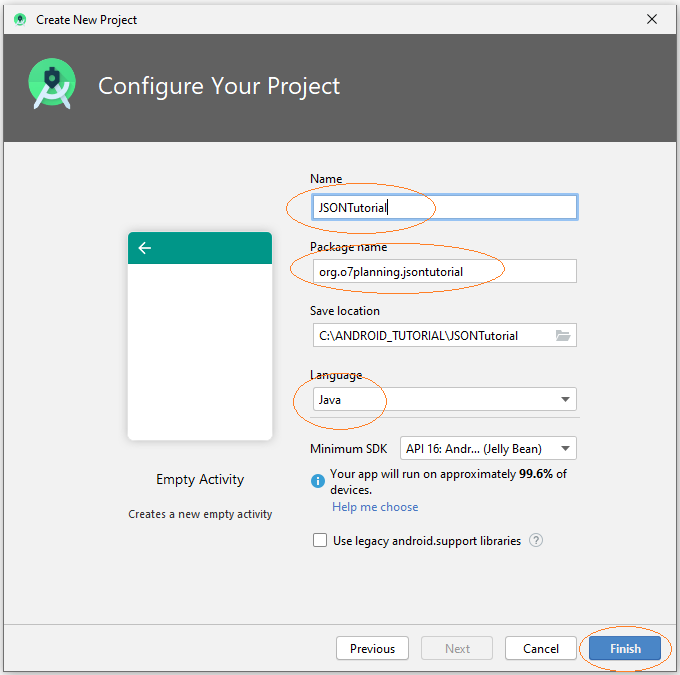
Je crée rapidement un projet baptisé JSONTutorial afin de travailler avec JSON à travers des exemples.
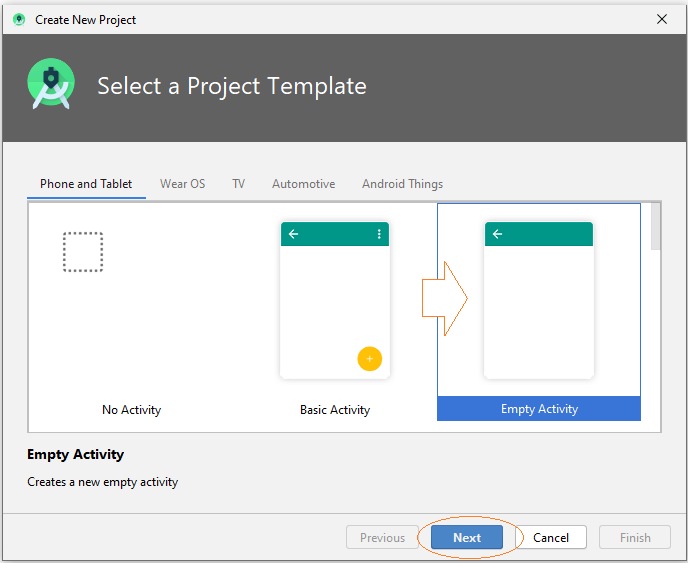
- Name: JSONTutorial
- Package name: org.o7planning.jsontutorial
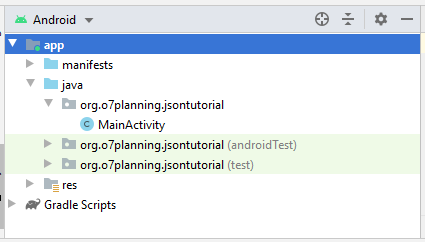
Créez le fichier raw:
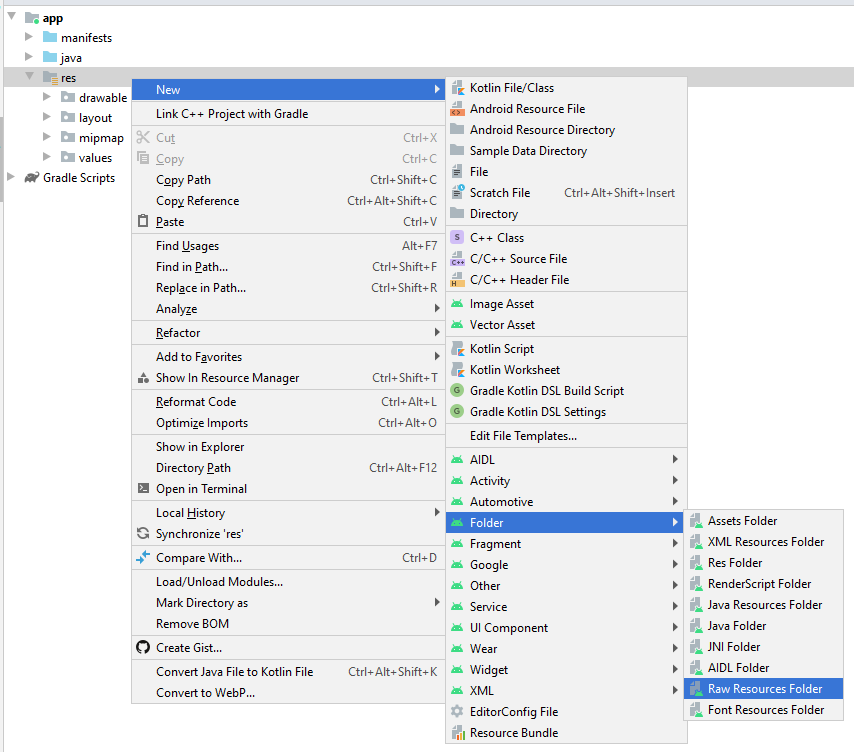
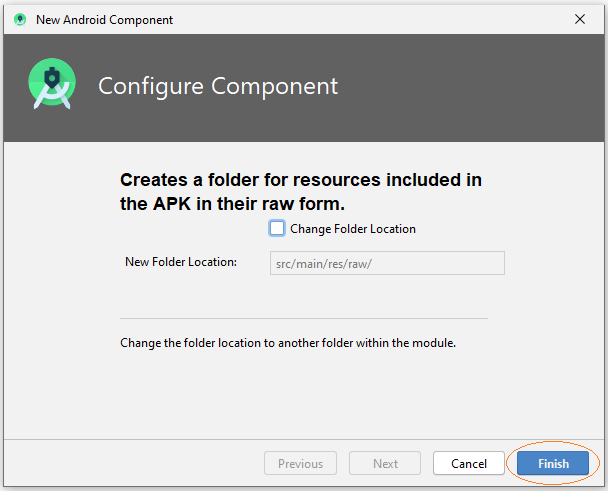
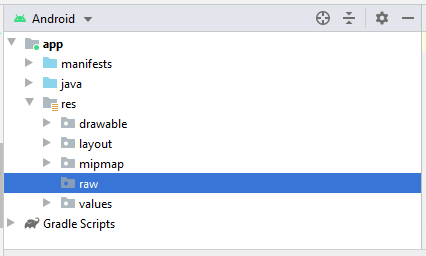
Je crée un autre fichier json dans le dossier 'raw', ces fichiers seront utilisés dans l'un des exemples dans ce document.
Des fournisseurs des données JSON sont compris dans des fichiers ou URL,... Vous pouvez voir des exemples qui récupent des données JSON de URL, analysent et présentent sur une application Android à la fin de ce document.
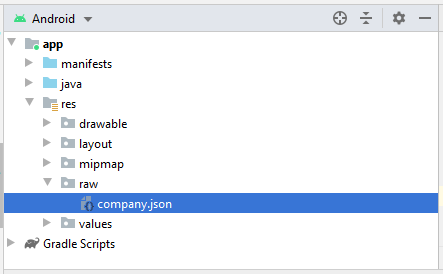
company.json
{
  "id": 111 ,
  "name":"Microsoft",
  "websites": [
     "http://microsoft.com",
     "http://msn.com",
     "http://hotmail.com"
  ],
  "address":{
     "street":"1 Microsoft Way",
     "city":"Redmond"
  }
}
Concevez activity_main.xml:
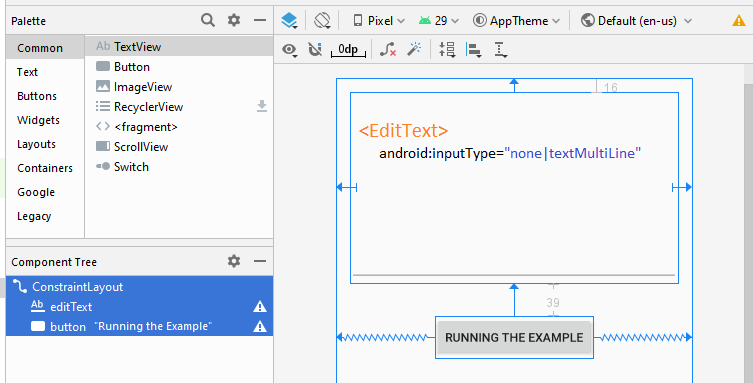
activity_main.xml
<?xml version="1.0" encoding="utf-8"?>
<androidx.constraintlayout.widget.ConstraintLayout
    xmlns:android="http://schemas.android.com/apk/res/android"
    xmlns:app="http://schemas.android.com/apk/res-auto"
    xmlns:tools="http://schemas.android.com/tools"
    android:layout_width="match_parent"
    android:layout_height="match_parent"
    tools:context=".MainActivity">

    <EditText
        android:id="@+id/editText"
        android:layout_width="0dp"
        android:layout_height="220dp"
        android:layout_marginStart="16dp"
        android:layout_marginLeft="16dp"
        android:layout_marginTop="16dp"
        android:layout_marginEnd="16dp"
        android:layout_marginRight="16dp"
        android:ems="10"
        android:inputType="none|textMultiLine"
        app:layout_constraintEnd_toEndOf="parent"
        app:layout_constraintStart_toStartOf="parent"
        app:layout_constraintTop_toTopOf="parent" />

    <Button
        android:id="@+id/button"
        android:layout_width="wrap_content"
        android:layout_height="wrap_content"
        android:layout_marginTop="39dp"
        android:text="Running the Example"
        app:layout_constraintEnd_toEndOf="parent"
        app:layout_constraintStart_toStartOf="parent"
        app:layout_constraintTop_toBottomOf="@+id/editText" />
</androidx.constraintlayout.widget.ConstraintLayout>
4. Java Beans classes
Quelques classes sont utilisées dans des exemples:
Address.java
package org.o7planning.jsontutorial.beans;


public class Address {

    private String street;
    private String city;

    public Address() {

    }

    public Address(String street, String city) {
        this.street = street;
        this.city = city;
    }

    public String getStreet() {
        return street;
    }

    public void setStreet(String street) {
        this.street = street;
    }

    public String getCity() {
        return city;
    }

    public void setCity(String city) {
        this.city = city;
    }

    @Override
    public String toString() {
        return street + ", " + city;
    }

}
Company.java
package org.o7planning.jsontutorial.beans;

public class Company {

    private int id;
    private String name;
    private String[] websites;
    private Address address;

    public int getId() {
        return id;
    }

    public void setId(int id) {
        this.id = id;
    }

    public String getName() {
        return name;
    }

    public void setName(String name) {
        this.name = name;
    }

    public String[] getWebsites() {
        return websites;
    }

    public void setWebsites(String[] websites) {
        this.websites = websites;
    }

    public Address getAddress() {
        return address;
    }

    public void setAddress(Address address) {
        this.address = address;
    }

    @Override
    public String toString() {
        StringBuilder sb = new StringBuilder();

        sb.append("\n id:" + this.id);
        sb.append("\n name:" + this.name);
        if (this.websites != null) {
            sb.append("\n website: ");
            for (String website : this.websites) {
                sb.append(website + ", ");
            }
        }
        if (this.address != null) {
            sb.append("\n address:" + this.address.toString());
        }
        return sb.toString();
    }

}
5. Par exemple, lisez les données JSON converties en objets Java
Dans ce document, nous allons lire le fichier des données JSON et le transformer en objet Java.
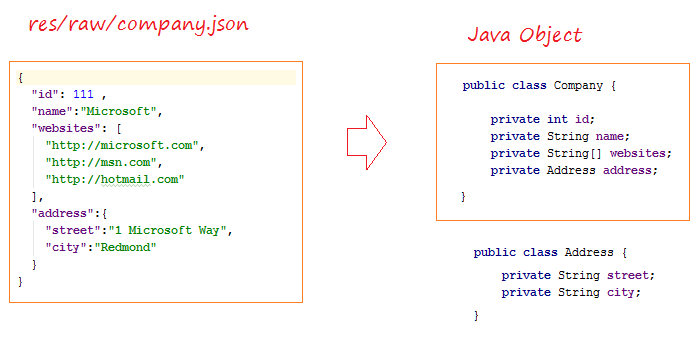
ReadJSONExample.java
package org.o7planning.jsontutorial.json;

import android.content.Context;

import org.json.JSONArray;
import org.json.JSONException;
import org.json.JSONObject;
import org.o7planning.jsontutorial.R;
import org.o7planning.jsontutorial.beans.Address;
import org.o7planning.jsontutorial.beans.Company;

import java.io.BufferedReader;
import java.io.IOException;
import java.io.InputStream;
import java.io.InputStreamReader;


public class ReadJSONExample {

    // Read the company.json file and convert it to a java object.
    public static Company readCompanyJSONFile(Context context) throws IOException,JSONException {

        // Read content of company.json
        String jsonText = readText(context, R.raw.company);


        JSONObject jsonRoot = new JSONObject(jsonText);


        int id= jsonRoot.getInt("id");
        String name = jsonRoot.getString("name");

        JSONArray jsonArray = jsonRoot.getJSONArray("websites");
        String[] websites = new String[jsonArray.length()];

        for(int i=0;i < jsonArray.length();i++) {
            websites[i] = jsonArray.getString(i);
        }

        JSONObject jsonAddress = jsonRoot.getJSONObject("address");
        String street = jsonAddress.getString("street");
        String city = jsonAddress.getString("city");
        Address address= new Address(street, city);

        Company company = new Company();
        company.setId(id);
        company.setName(name);
        company.setAddress(address);
        company.setWebsites(websites);
        return company;
    }


    private static String readText(Context context, int resId) throws IOException {
        InputStream is = context.getResources().openRawResource(resId);
        BufferedReader br= new BufferedReader(new InputStreamReader(is));
        StringBuilder sb= new StringBuilder();
        String s= null;
        while((  s = br.readLine())!=null) {
            sb.append(s);
            sb.append("\n");
        }
        return sb.toString();
    }

}
MainActivity.java
package org.o7planning.jsontutorial;

import androidx.appcompat.app.AppCompatActivity;

import android.os.Bundle;
import android.view.View;
import android.widget.Button;
import android.widget.EditText;
import org.o7planning.jsontutorial.beans.Company;
import org.o7planning.jsontutorial.json.ReadJSONExample;

public class MainActivity extends AppCompatActivity {

    private EditText outputText;
    private Button button;

    @Override
    protected void onCreate(Bundle savedInstanceState) {
        super.onCreate(savedInstanceState);
        setContentView(R.layout.activity_main);

        this.outputText = (EditText)this.findViewById(R.id.editText);
        this.button = (Button) this.findViewById(R.id.button);

        this.button.setOnClickListener(new View.OnClickListener() {
            @Override
            public void onClick(View view) {
                runExample(view);
            }
        });
    }


    public void runExample(View view)  {
        try {

            Company company = ReadJSONExample.readCompanyJSONFile(this);

            outputText.setText(company.toString());
        } catch(Exception e)  {
            outputText.setText(e.getMessage());
            e.printStackTrace();
        }
    }

}
Exécutez l'exemple:
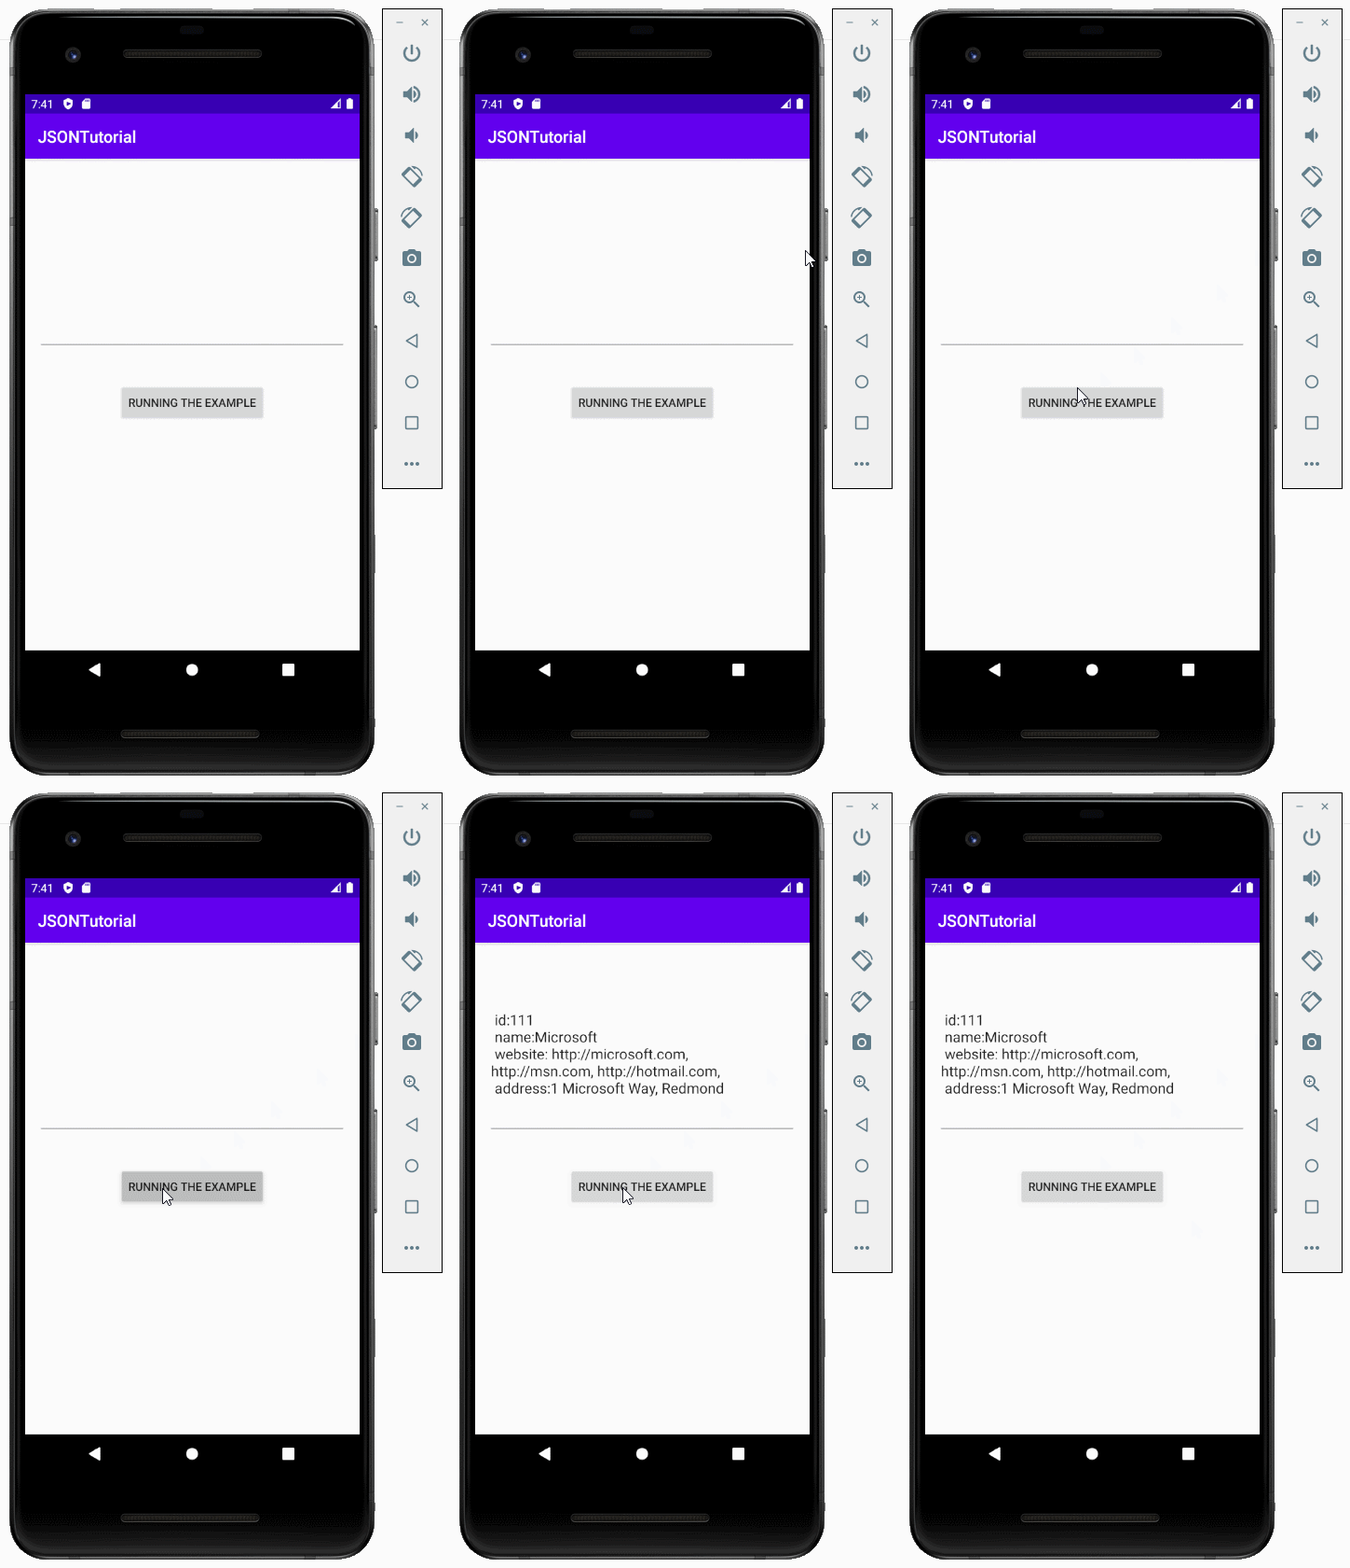
6. Exemple de convertissement l'objet Java en des données JSON
L'exemple de la transformation d'un objet Java en des données JSON.
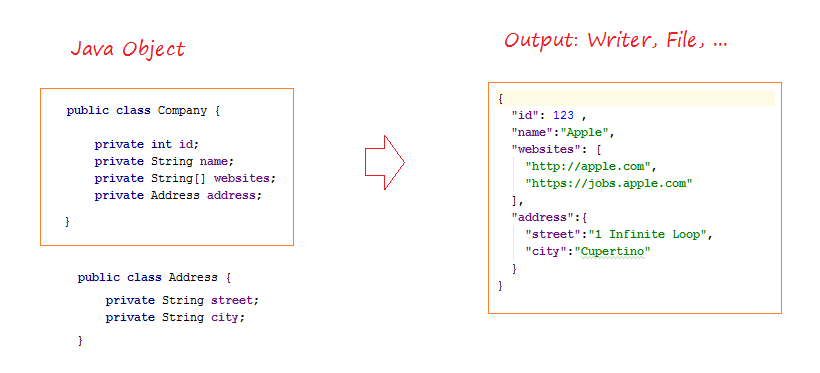
JsonWriterExample.java
package org.o7planning.jsontutorial.json;

import android.util.JsonWriter;

import org.o7planning.jsontutorial.beans.Address;
import org.o7planning.jsontutorial.beans.Company;
import java.io.IOException;
import java.io.Writer;

public class JsonWriterExample {


    public static void writeJsonStream(Writer output, Company company ) throws IOException {
        JsonWriter jsonWriter = new JsonWriter(output);

        jsonWriter.beginObject();// begin root

        jsonWriter.name("id").value(company.getId());
        jsonWriter.name("name").value(company.getName());

        String[] websites= company.getWebsites();

        // "websites": [ ....]
        jsonWriter.name("websites").beginArray(); // begin websites
        for(String website: websites) {
            jsonWriter.value(website);
        }
        jsonWriter.endArray();// end websites

        // "address": { ... }
        jsonWriter.name("address").beginObject(); // begin address
        jsonWriter.name("street").value(company.getAddress().getStreet());
        jsonWriter.name("city").value(company.getAddress().getCity());
        jsonWriter.endObject();// end address

        // end root
        jsonWriter.endObject();
    }


    public static Company createCompany() {

        Company company = new Company();
        company.setId(123);
        company.setName("Apple");

        String[] websites = { "http://apple.com", "https://jobs.apple.com" };
        company.setWebsites(websites);

        Address address = new Address();
        address.setCity("Cupertino");
        address.setStreet("1 Infinite Loop");

        company.setAddress(address);

        return company;
    }

}
MainActivity.java (2)
package org.o7planning.jsontutorial;

import androidx.appcompat.app.AppCompatActivity;

import android.os.Bundle;
import android.view.View;
import android.widget.Button;
import android.widget.EditText;
import org.o7planning.jsontutorial.beans.Company;
import org.o7planning.jsontutorial.json.JsonWriterExample;
import java.io.StringWriter;

public class MainActivity extends AppCompatActivity {

    private EditText outputText;
    private Button button;

    @Override
    protected void onCreate(Bundle savedInstanceState) {
        super.onCreate(savedInstanceState);
        setContentView(R.layout.activity_main);

        this.outputText = (EditText)this.findViewById(R.id.editText);
        this.button = (Button) this.findViewById(R.id.button);

        this.button.setOnClickListener(new View.OnClickListener() {
            @Override
            public void onClick(View view) {
                runExample(view);
            }
        });
    }

    public void runExample(View view)  {
        try {
            StringWriter output = new StringWriter();

            Company company = JsonWriterExample.createCompany();


            JsonWriterExample.writeJsonStream(output, company);

            String jsonText = output.toString();

            outputText.setText(jsonText);
        } catch(Exception e)  {
            outputText.setText(e.getMessage());
            e.printStackTrace();
        }
    }
}
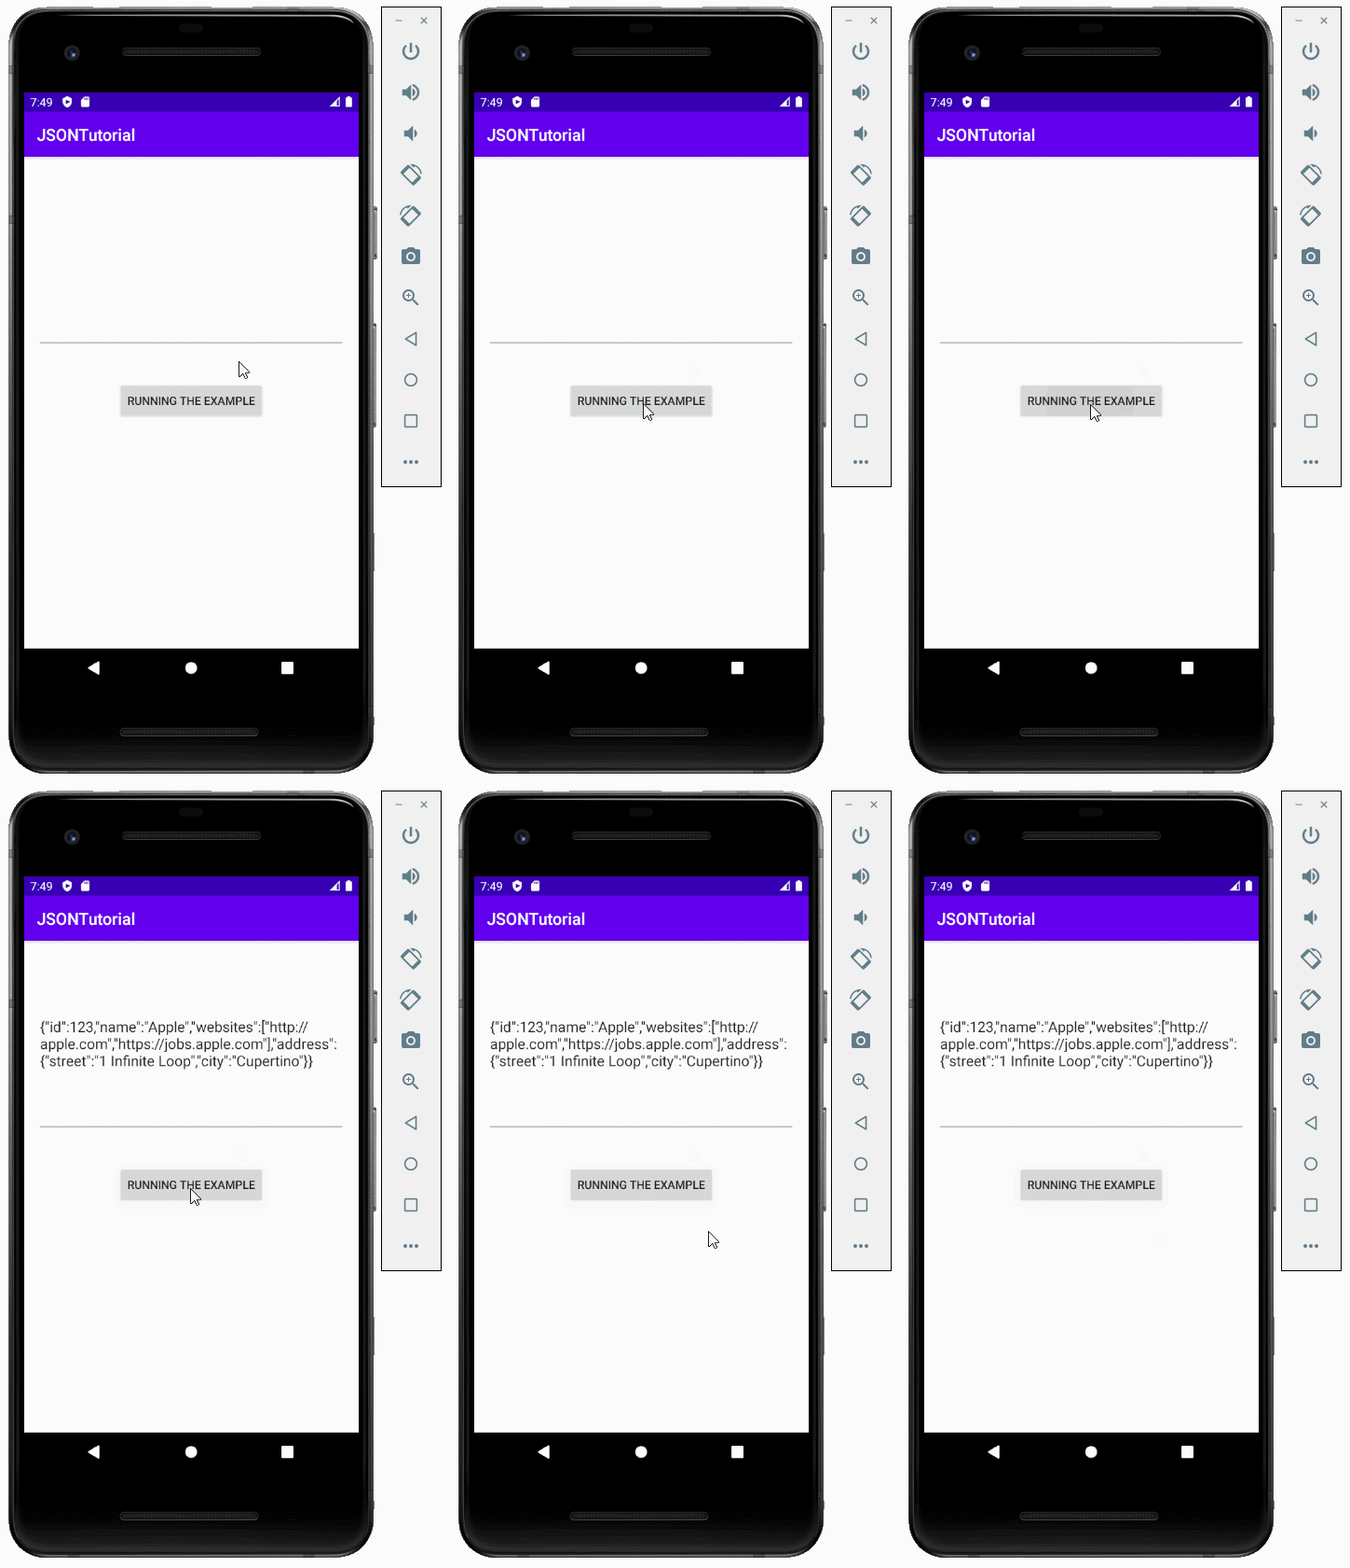
L'exécution de l'application:
Tutoriels de programmation Android
- Configurer Android Emulator en Android Studio
- Le Tutoriel de Android ToggleButton
- Créer un File Finder Dialog simple dans Android
- Le Tutoriel de Android TimePickerDialog
- Le Tutoriel de Android DatePickerDialog
- De quoi avez-vous besoin pour démarrer avec Android?
- Installer Android Studio sur Windows
- Installer Intel® HAXM pour Android Studio
- Le Tutoriel de Android AsyncTask
- Le Tutoriel de Android AsyncTaskLoader
- Tutoriel Android pour débutant - Exemples de base
- Comment connaître le numéro de téléphone d'Android Emulator et le changer?
- Le Tutoriel de Android TextInputLayout
- Le Tutoriel de Android CardView
- Le Tutoriel de Android ViewPager2
- Obtenir un numéro de téléphone dans Android à l'aide de TelephonyManager
- Le Tutoriel de Android Phone Call
- Le Tutoriel de Android Wifi Scanning
- Le Tutoriel de programmation de jeux Android 2D pour débutant
- Le Tutoriel de Android DialogFragment
- Le Tutoriel de Android CharacterPickerDialog
- Le Tutoriel Android pour débutant - Hello Android
- Utiliser Android Device File Explorer
- Activer USB Debugging sur un appareil Android
- Le Tutoriel de Android UI Layouts
- Le Tutoriel de Android SMS
- Le Tutoriel de Android et SQLite Database
- Le Tutoriel de Google Maps Android API
- Le Tutoriel de texte pour parler dans Android
- Le Tutoriel de Android Space
- Le Tutoriel de Android Toast
- Créer un Android Toast personnalisé
- Le Tutoriel de Android SnackBar
- Le Tutoriel de Android TextView
- Le Tutoriel de Android TextClock
- Le Tutoriel de Android EditText
- Le Tutoriel de Android TextWatcher
- Formater le numéro de carte de crédit avec Android TextWatcher
- Le Tutoriel de Android Clipboard
- Créer un File Chooser simple dans Android
- Le Tutoriel de Android AutoCompleteTextView et MultiAutoCompleteTextView
- Le Tutoriel de Android ImageView
- Le Tutoriel de Android ImageSwitcher
- Le Tutoriel de Android ScrollView et HorizontalScrollView
- Le Tutoriel de Android WebView
- Le Tutoriel de Android SeekBar
- Le Tutoriel de Android Dialog
- Le Tutoriel de Android AlertDialog
- Tutoriel Android RatingBar
- Le Tutoriel de Android ProgressBar
- Le Tutoriel de Android Spinner
- Le Tutoriel de Android Button
- Le Tutoriel de Android Switch
- Le Tutoriel de Android ImageButton
- Le Tutoriel de Android FloatingActionButton
- Le Tutoriel de Android CheckBox
- Le Tutoriel de Android RadioGroup et RadioButton
- Le Tutoriel de Android Chip et ChipGroup
- Utilisation des Image assets et des Icon assets d'Android Studio
- Configuration de la Carte SD pour Android Emulator
- Exemple ChipGroup et Chip Entry
- Comment ajouter des bibliothèques externes à Android Project dans Android Studio?
- Comment désactiver les autorisations déjà accordées à l'application Android?
- Comment supprimer des applications de Android Emulator?
- Le Tutoriel de Android LinearLayout
- Le Tutoriel de Android TableLayout
- Le Tutoriel de Android FrameLayout
- Le Tutoriel de Android QuickContactBadge
- Le Tutoriel de Android StackView
- Le Tutoriel de Android Camera
- Le Tutoriel de Android MediaPlayer
- Le Tutoriel de Android VideoView
- Jouer des effets sonores dans Android avec SoundPool
- Le Tutoriel de Android Networking
- Analyser JSON dans Android
- Le Tutoriel de Android SharedPreferences
- Le Tutorial de stockage interne Android (Internal Storage)
- Le Tutoriel de Android External Storage
- Le Tutoriel de Android Intents
- Exemple d'une Android Intent explicite, appelant une autre Intent
- Exemple de Android Intent implicite, ouvrez une URL, envoyez un email
- Le Tutoriel de Android Service
- Le Tutoriel Android Notifications
- Le Tutoriel de Android DatePicker
- Le Tutoriel de Android TimePicker
- Le Tutoriel de Android Chronometer
- Le Tutoriel de Android OptionMenu
- Le Tutoriel de Android ContextMenu
- Le Tutoriel de Android PopupMenu
- Le Tutoriel de Android Fragment
- Le Tutoriel de Android ListView
- Android ListView avec Checkbox en utilisant ArrayAdapter
- Le Tutoriel de Android GridView
Show More
