Le Tutoriel de Android Camera
1. Android Camera
Camera est un périphérique qui vous permet de prendre des photos ou d'enregistrer une vidéo. Dans Android, il existe 2 façons de travailler avec la Camera.
Méthode 1:
Sur le système d'exploitation Android, l'application pour fonctionner avec la Camera est disponible, votre application peut appeler l'application par une implicit Intent pour exiger une certaine action avec la camera, telles que demander à la camera d'ouvrir et de prendre des photos ou demandezr à la camera d'enregistrer une vidéo, et puis les résultats sont retournés.
Méthode 2:
Android vous fournit l'API pour fonctionner directement avec la camera.
Avec Android Level <21, vous pouvez travailler directement avec la camera à travers la classe android.hardware.Camera, mais cette classe est obsolète (Deprected) et n'est plus utilisée dans Android Level >= 21, je vous recommande l'utilisation de l'API camera2.
Avec Android Level <21, vous pouvez travailler directement avec la camera à travers la classe android.hardware.Camera, mais cette classe est obsolète (Deprected) et n'est plus utilisée dans Android Level >= 21, je vous recommande l'utilisation de l'API camera2.
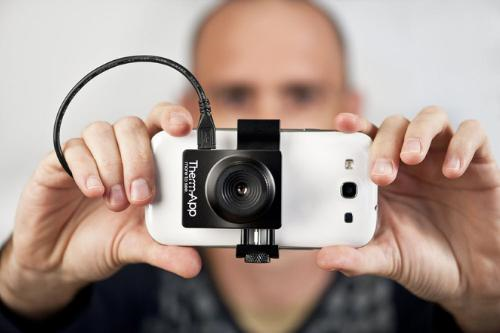
Dans ce document, je vais vous guider comment l'intention implicite appelle dans l'application Camera qui est disponible dans le système afin d'ouvrir la caméra pour prendre une photo ou enregistrer une vidéo.
Vous pouvez voir les instruction de Camera2 API à:
- Android Camera API2
2. Vue d'ensemble
Sur le système d'exploitation Android, il est disponible sur l'application pour fonctionner avec la Camera, sur votre application, vous pouvez créer une Intent implicite (implicit intent) pour appeler cette application, demander à la camera de prendre une photo ou d'enregistrer une vidéo.
// Create an implicit intent, for image capture.
Intent intent = new Intent(MediaStore.ACTION_IMAGE_CAPTURE);

int REQUEST_ID_IMAGE_CAPTURE = 100;

// Start camera and wait for the results.
this.startActivityForResult(intent, REQUEST_ID_IMAGE_CAPTURE);
Des types de Intent pour Camera:
Des types d'Intent | Description |
ACTION_IMAGE_CAPTURE_SECURE | Il renvoie l'Image capturée à partir de la Camera, lorsque l'appareil photo est sécurisé |
ACTION_VIDEO_CAPTURE | Il appelle l'application vidéo existante dans Android pour capturer une vidéo à partir de la Camera. |
EXTRA_SCREEN_ORIENTATION | Il sert à régler l'orientation de l'écran en "vertical" ou en "landscape" (paysage) |
EXTRA_FULL_SCREEN | Il sert à contrôler l'interface utilisateur du ViewImage |
INTENT_ACTION_VIDEO_CAMERA | Cette intention permet de lancer la Camera en mode vidéo |
EXTRA_SIZE_LIMIT | Il est utilisé pour spécifier la limite de taille de la taille de capture vidéo ou image. |
Dans le cas où vous souhaitez enregistrer des photos ou des vidéos enregistrées sur l'appareil, vous devez configurer les autorisations pour lire et écrire des données sur le périphérique. Configurez sur AndroidManifest.xml.
<uses-permission android:name="android.permission.WRITE_EXTERNAL_STORAGE" />
<uses-permission android:name="android.permission.READ_EXTERNAL_STORAGE" />
Avec Android Level >= 23, vous devez utiliser le code pour demander à l'utilisateur l'autorisation de lire et d'écrire des données sur le périphérique.
// With Android Level >= 23, you have to ask the user
// for permission to read/write data on the device.
if (android.os.Build.VERSION.SDK_INT >= 23) {

    // Check if we have read/write permission
    // Kiểm tra quyền đọc/ghi dữ liệu vào thiết bị lưu trữ ngoài.
    int readPermission = ActivityCompat.checkSelfPermission(this,
                                   Manifest.permission.READ_EXTERNAL_STORAGE);
    int writePermission = ActivityCompat.checkSelfPermission(this,
                                   Manifest.permission.WRITE_EXTERNAL_STORAGE);

   if (writePermission != PackageManager.PERMISSION_GRANTED ||
           readPermission != PackageManager.PERMISSION_GRANTED) {
       // If don't have permission so prompt the user.
       this.requestPermissions(
               new String[]{Manifest.permission.WRITE_EXTERNAL_STORAGE,
                       Manifest.permission.READ_EXTERNAL_STORAGE},
               REQUEST_ID_READ_WRITE_PERMISSION
       );
   }
}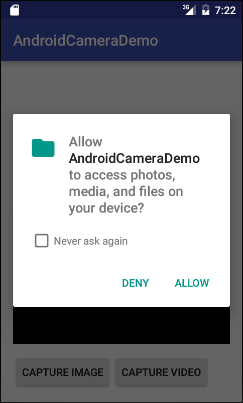
La manipulation lorsque les utilisateurs répondent à la demande.
// When you have the request results
@Override
public void onRequestPermissionsResult(int requestCode,
                                   String permissions[], int[] grantResults) {

    super.onRequestPermissionsResult(requestCode, permissions, grantResults);
    //
    switch (requestCode) {
        case REQUEST_ID_READ_WRITE_PERMISSION: {

            // Note: If request is cancelled, the result arrays are empty.
            // Permissions granted (read/write).
            if (grantResults.length > 1
                    && grantResults[0] == PackageManager.PERMISSION_GRANTED
                    && grantResults[1] == PackageManager.PERMISSION_GRANTED) {

                Toast.makeText(this, "Permission granted!", Toast.LENGTH_LONG).show();

                this.captureVideo();

            }
            // Cancelled or denied.
            else {
                Toast.makeText(this, "Permission denied!", Toast.LENGTH_LONG).show();
            }
            break;
        }
    }
}
3. Exemple
Créez un nouveau projet baptisé AndroidCameraDemo:
- File > New > New Project > Empty Activity
- Name: AndroidCameraDemo
- Package name: org.o7planning.androidcamerademo
- Language: Java
Ajoutez une configuration qui permet de lire et d'écrire des données sur le périphérique.
<uses-permission android:name="android.permission.WRITE_EXTERNAL_STORAGE" />
<uses-permission android:name="android.permission.READ_EXTERNAL_STORAGE" />
AndroidManifest.xml
<?xml version="1.0" encoding="utf-8"?>
<manifest xmlns:android="http://schemas.android.com/apk/res/android"
    package="org.o7planning.androidcamerademo">

    <uses-permission android:name="android.permission.WRITE_EXTERNAL_STORAGE" />
    <uses-permission android:name="android.permission.READ_EXTERNAL_STORAGE" />

    <application
        android:allowBackup="true"
        android:icon="@mipmap/ic_launcher"
        android:label="@string/app_name"
        android:roundIcon="@mipmap/ic_launcher_round"
        android:supportsRtl="true"
        android:theme="@style/AppTheme">
        <activity android:name=".MainActivity">
            <intent-filter>
                <action android:name="android.intent.action.MAIN" />

                <category android:name="android.intent.category.LAUNCHER" />
            </intent-filter>
        </activity>
    </application>

</manifest>
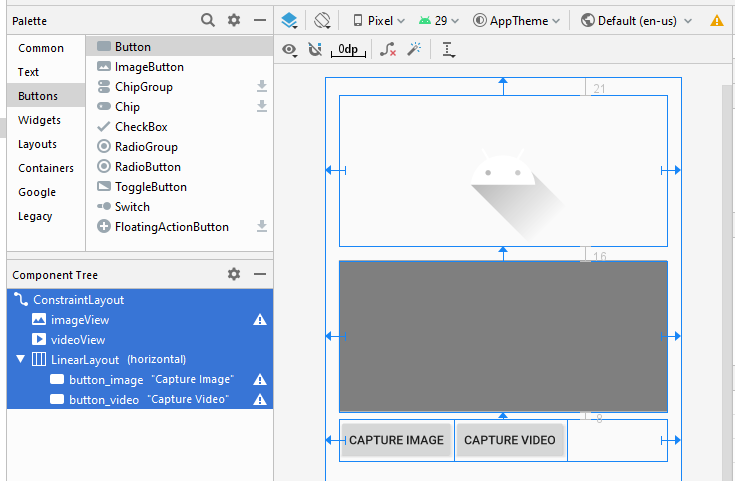
L'exemple de la conception de l'interface:
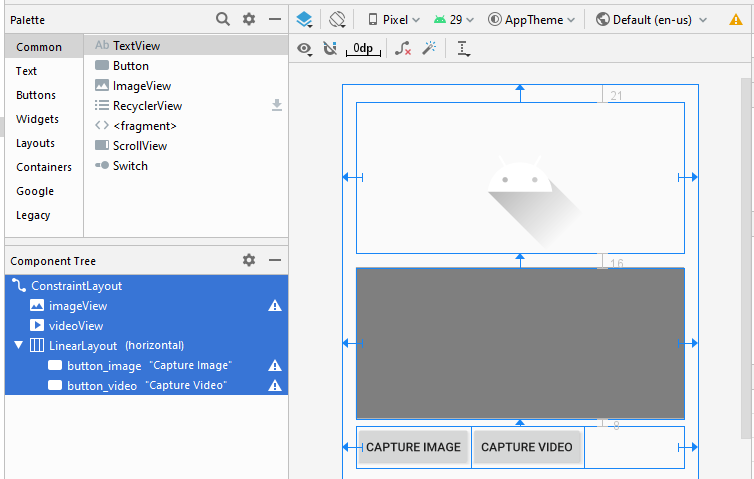
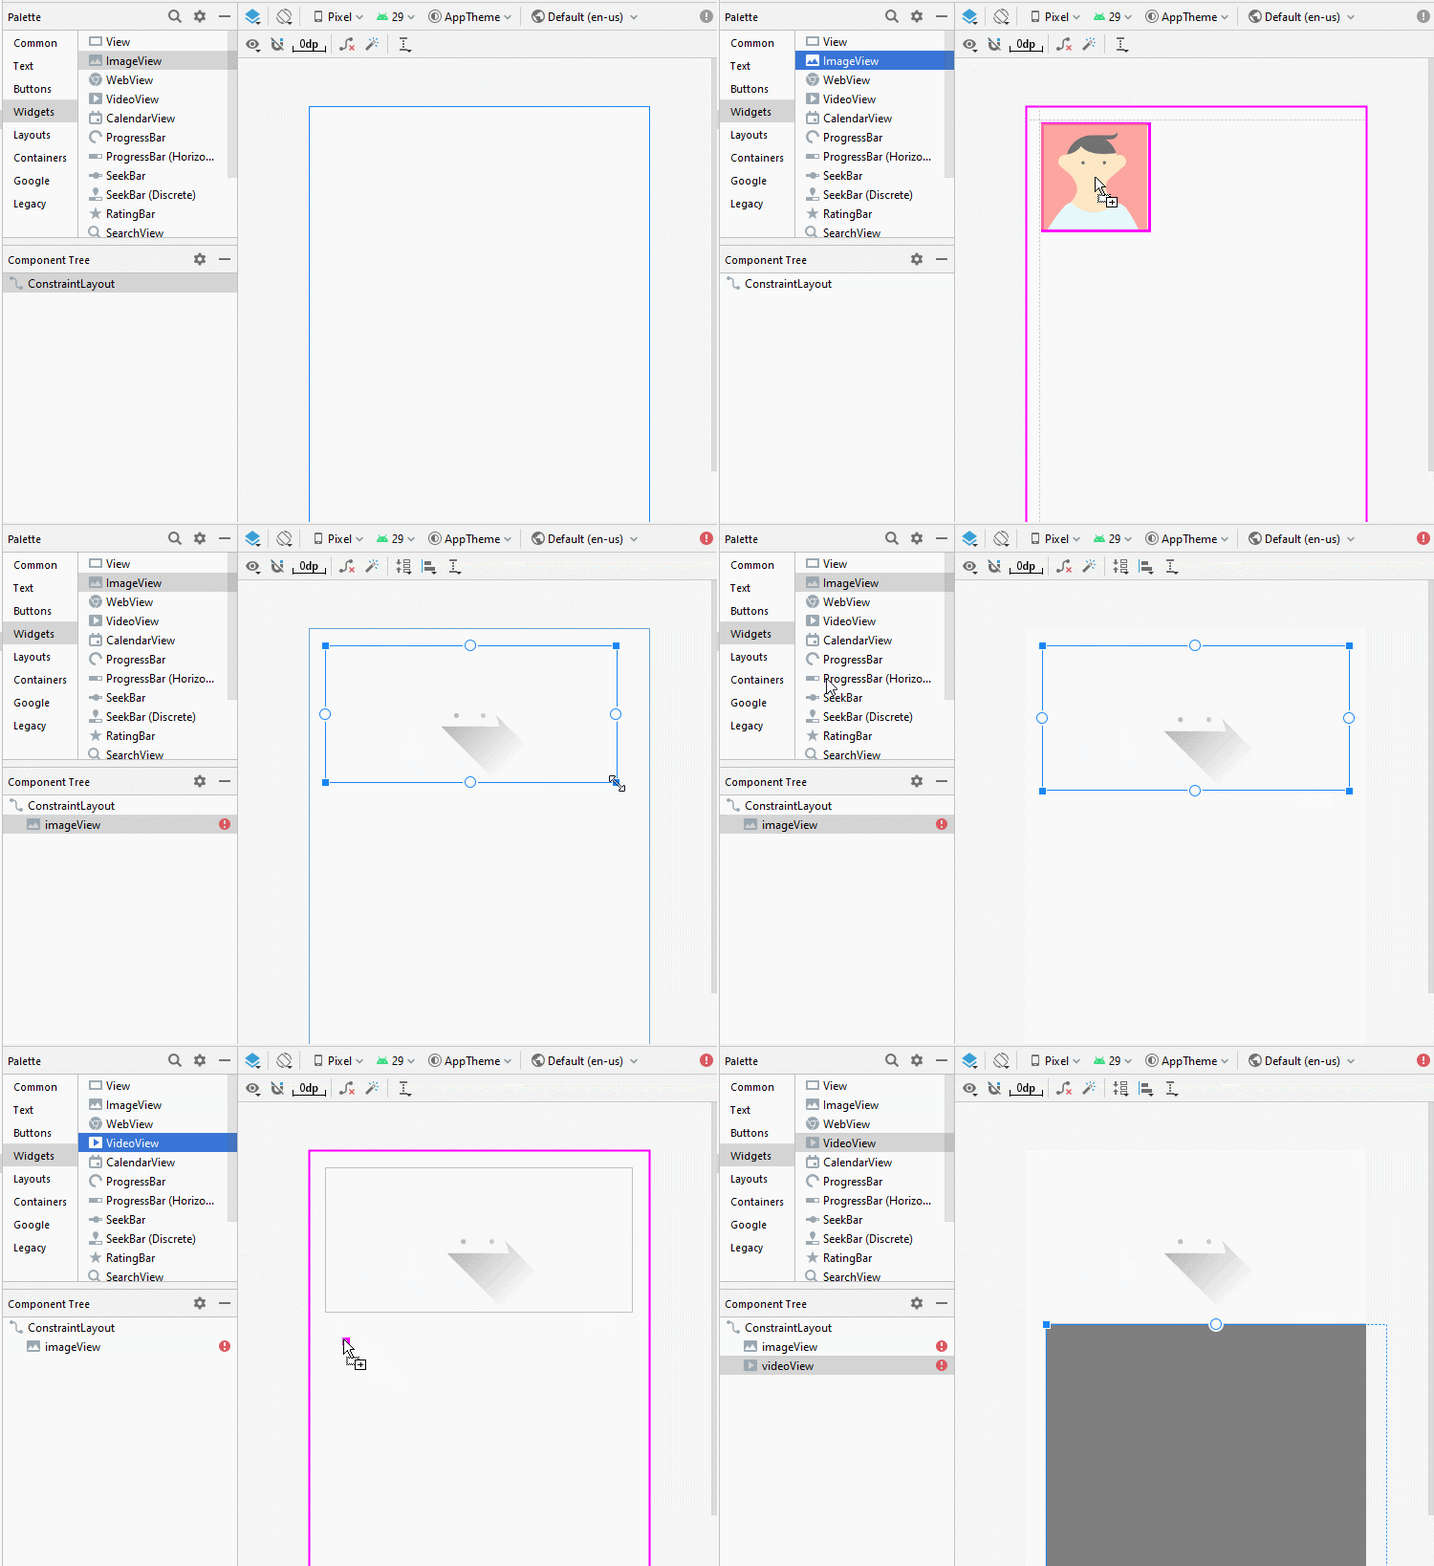
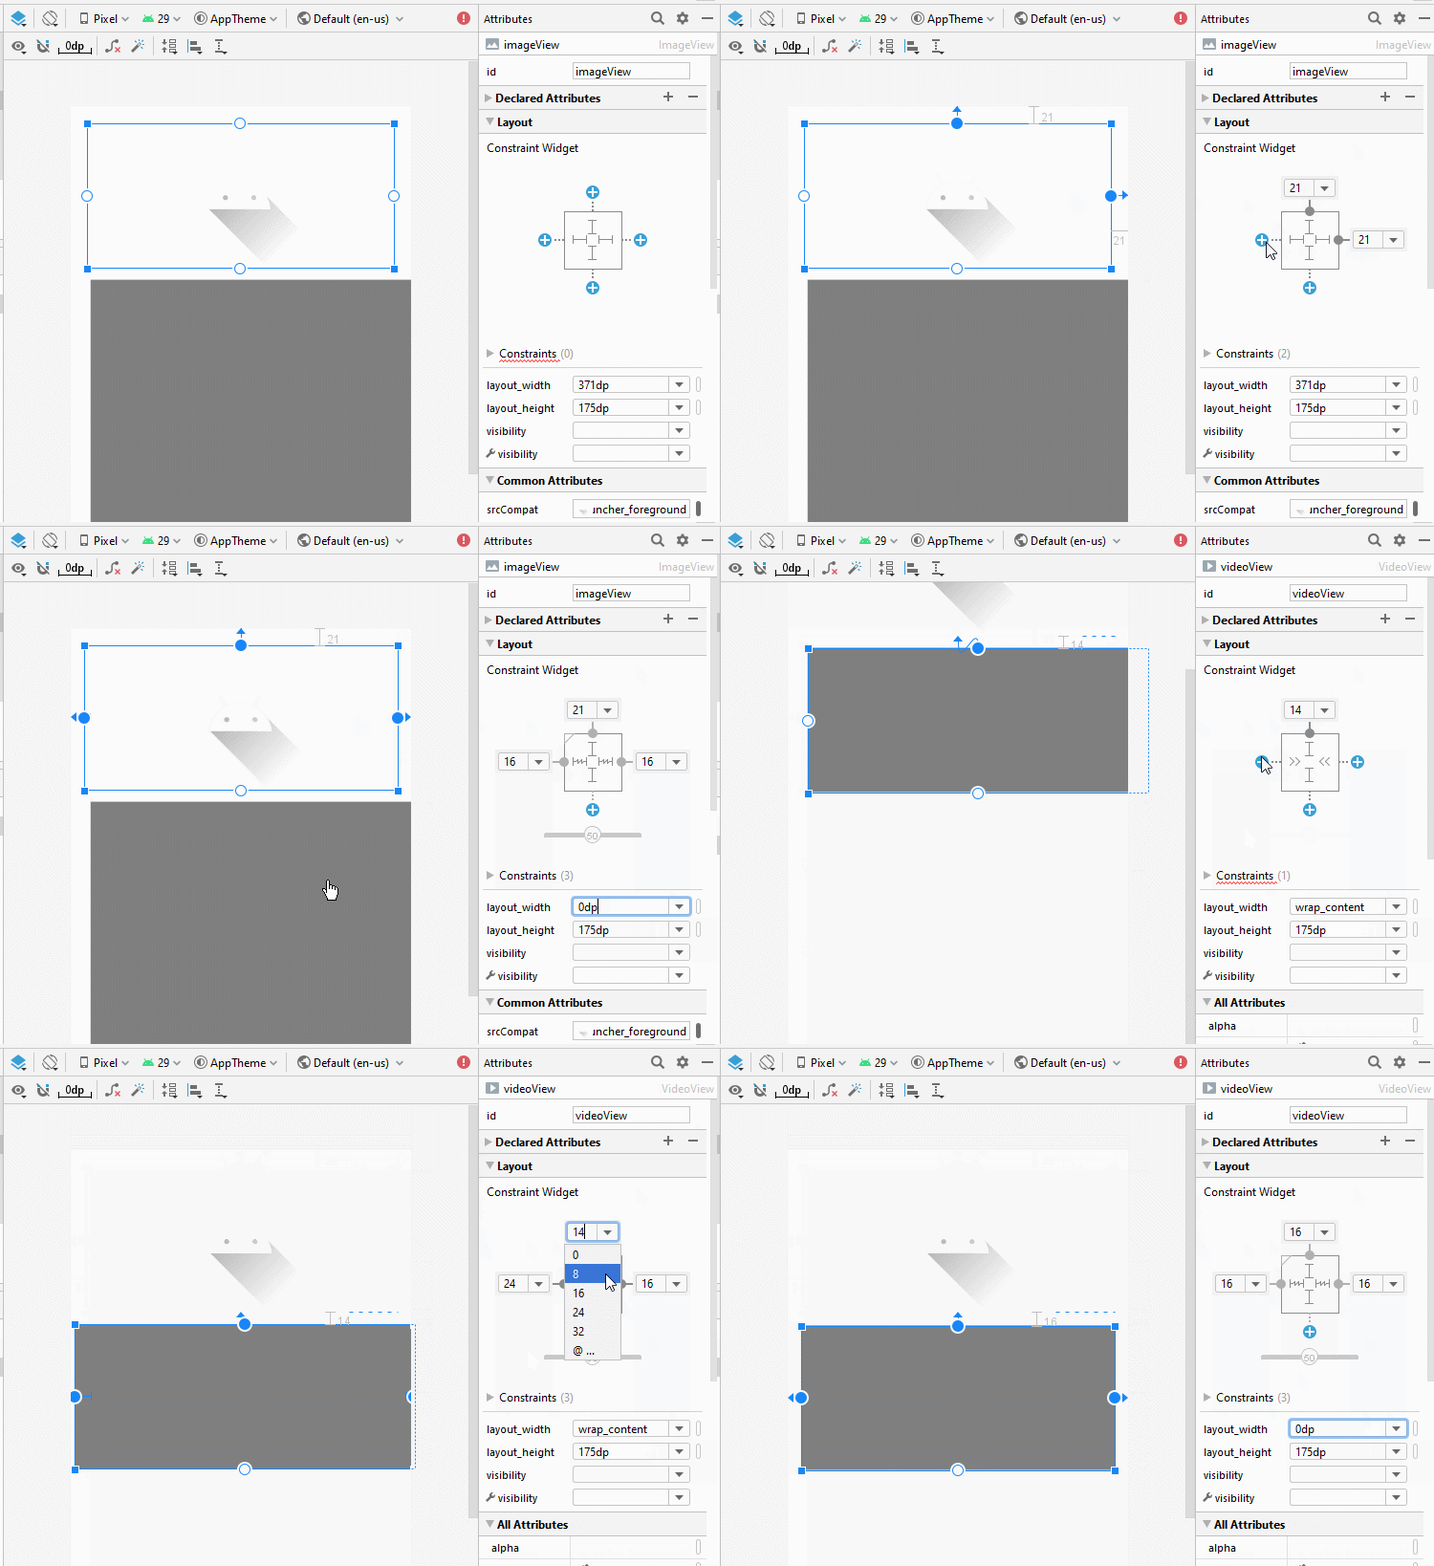
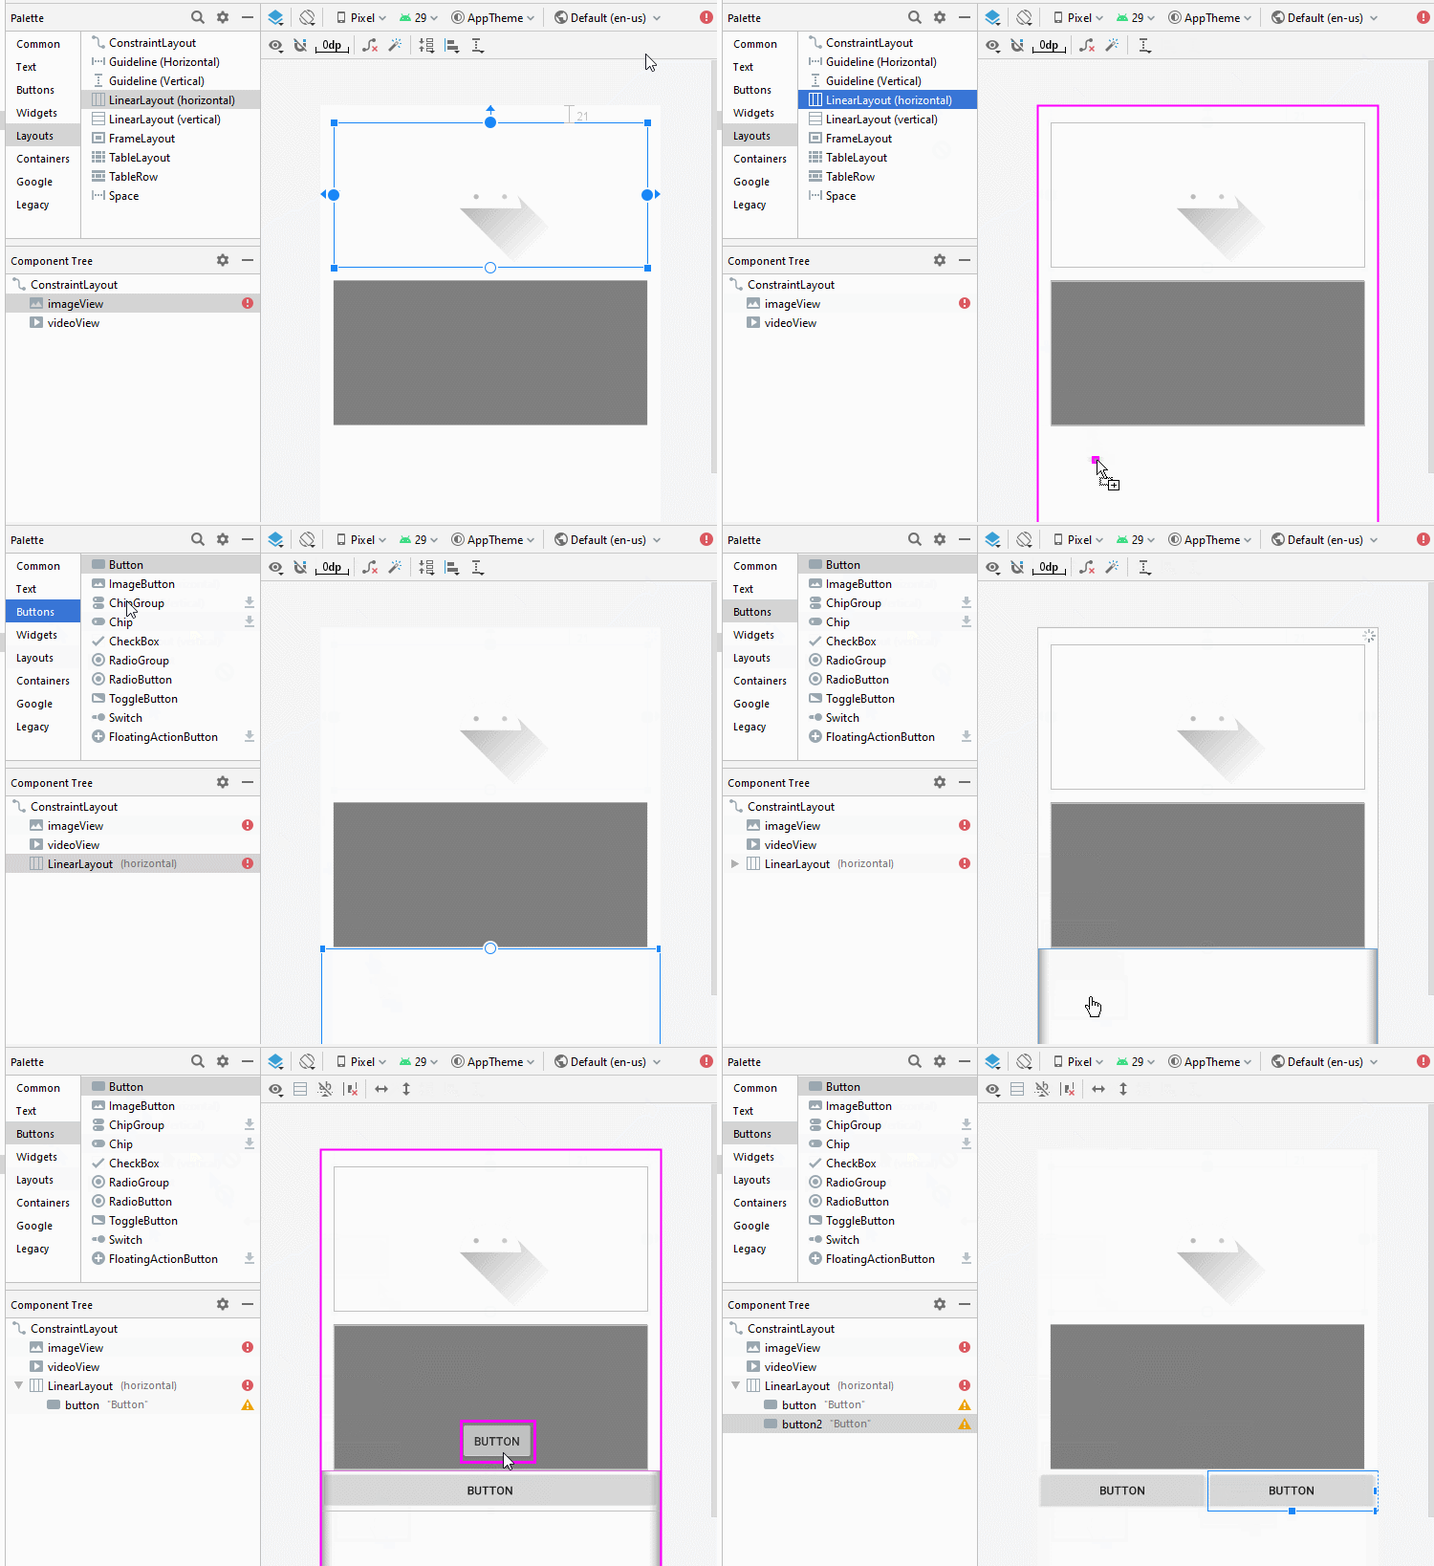
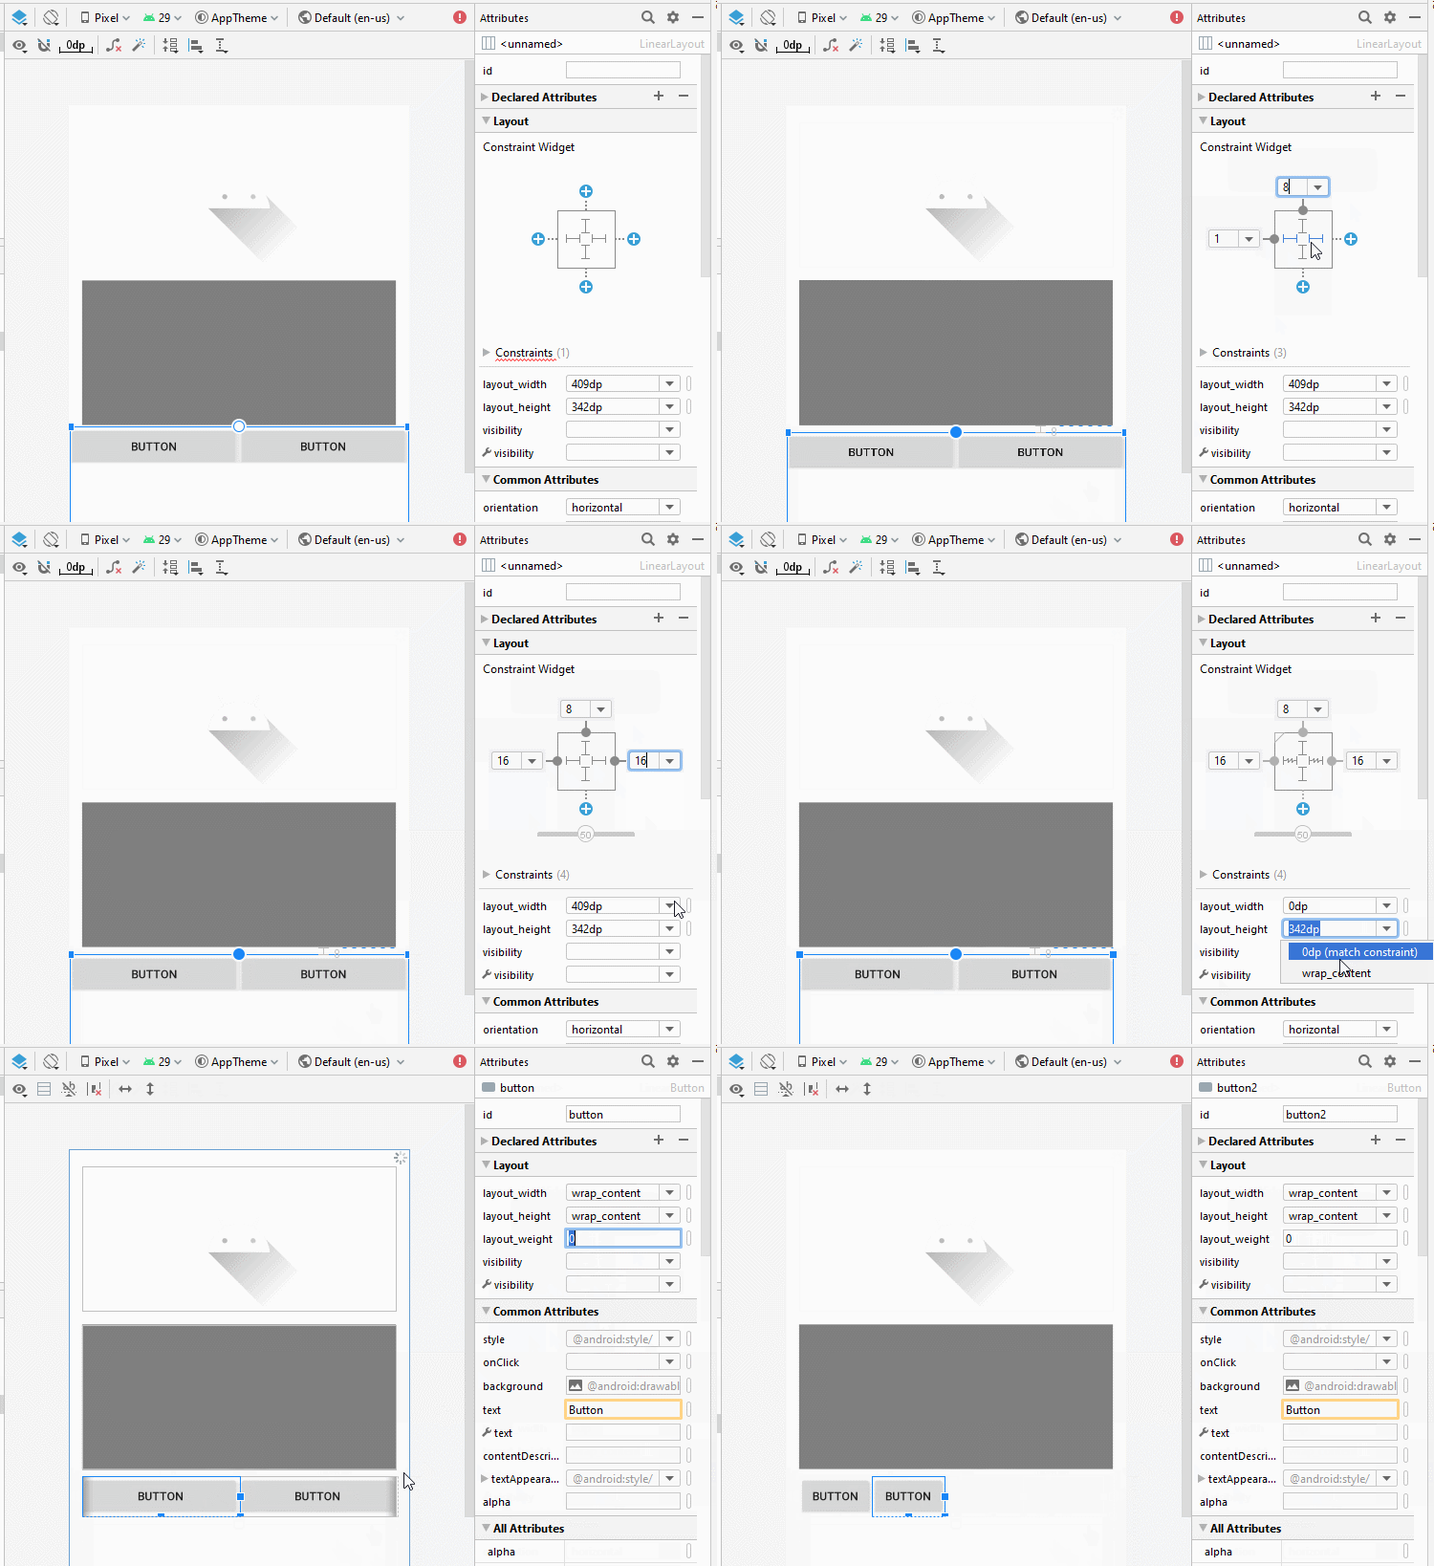
If you are interested in the steps to design this application interface, see the appendix at the end of the article.
activity_main.xml
<?xml version="1.0" encoding="utf-8"?>
<androidx.constraintlayout.widget.ConstraintLayout
    xmlns:android="http://schemas.android.com/apk/res/android"
    xmlns:app="http://schemas.android.com/apk/res-auto"
    xmlns:tools="http://schemas.android.com/tools"
    android:layout_width="match_parent"
    android:layout_height="match_parent"
    tools:context=".MainActivity">

    <ImageView
        android:id="@+id/imageView"
        android:layout_width="0dp"
        android:layout_height="175dp"
        android:layout_marginStart="16dp"
        android:layout_marginLeft="16dp"
        android:layout_marginTop="21dp"
        android:layout_marginEnd="16dp"
        android:layout_marginRight="16dp"
        app:layout_constraintEnd_toEndOf="parent"
        app:layout_constraintStart_toStartOf="parent"
        app:layout_constraintTop_toTopOf="parent"
        app:srcCompat="@drawable/ic_launcher_foreground"
        tools:ignore="VectorDrawableCompat" />

    <VideoView
        android:id="@+id/videoView"
        android:layout_width="0dp"
        android:layout_height="175dp"
        android:layout_marginStart="16dp"
        android:layout_marginLeft="16dp"
        android:layout_marginTop="16dp"
        android:layout_marginEnd="16dp"
        android:layout_marginRight="16dp"
        app:layout_constraintEnd_toEndOf="parent"
        app:layout_constraintStart_toStartOf="parent"
        app:layout_constraintTop_toBottomOf="@+id/imageView" />

    <LinearLayout
        android:layout_width="0dp"
        android:layout_height="wrap_content"
        android:layout_marginStart="16dp"
        android:layout_marginLeft="16dp"
        android:layout_marginTop="8dp"
        android:layout_marginEnd="16dp"
        android:layout_marginRight="16dp"
        android:orientation="horizontal"
        app:layout_constraintEnd_toEndOf="parent"
        app:layout_constraintStart_toStartOf="parent"
        app:layout_constraintTop_toBottomOf="@+id/videoView">

        <Button
            android:id="@+id/button_image"
            android:layout_width="wrap_content"
            android:layout_height="wrap_content"
            android:layout_weight="0"
            android:text="Capture Image" />

        <Button
            android:id="@+id/button_video"
            android:layout_width="wrap_content"
            android:layout_height="wrap_content"
            android:layout_weight="0"
            android:text="Capture Video" />
    </LinearLayout>
</androidx.constraintlayout.widget.ConstraintLayout>
MainActivity.java
package org.o7planning.androidcamerademo;

import androidx.appcompat.app.AppCompatActivity;
import androidx.core.app.ActivityCompat;

import android.os.Bundle;
import android.Manifest;
import android.content.Intent;
import android.content.pm.PackageManager;
import android.graphics.Bitmap;
import android.net.Uri;
import android.os.Environment;
import android.os.StrictMode;
import android.provider.MediaStore;
import android.util.Log;
import android.view.View;
import android.widget.Button;
import android.widget.ImageView;
import android.widget.Toast;
import android.widget.VideoView;
import java.io.File;

public class MainActivity extends AppCompatActivity {

    private Button buttonImage;
    private Button buttonVideo;

    private VideoView videoView;
    private ImageView imageView;

    private static final int REQUEST_ID_READ_WRITE_PERMISSION = 99;
    private static final int REQUEST_ID_IMAGE_CAPTURE = 100;
    private static final int REQUEST_ID_VIDEO_CAPTURE = 101;

    @Override
    protected void onCreate(Bundle savedInstanceState) {
        super.onCreate(savedInstanceState);
        setContentView(R.layout.activity_main);

        this.buttonImage = (Button) this.findViewById(R.id.button_image);
        this.buttonVideo = (Button) this.findViewById(R.id.button_video);
        this.videoView = (VideoView) this.findViewById(R.id.videoView);
        this.imageView = (ImageView) this.findViewById(R.id.imageView);

        this.buttonImage.setOnClickListener(new Button.OnClickListener() {
            @Override
            public void onClick(View v) {
                captureImage();
            }
        });

        this.buttonVideo.setOnClickListener(new Button.OnClickListener() {
            @Override
            public void onClick(View v) {
                askPermissionAndCaptureVideo();
            }
        });
    }

    private void captureImage() {
        // Create an implicit intent, for image capture.
        Intent intent = new Intent(MediaStore.ACTION_IMAGE_CAPTURE);

        // Start camera and wait for the results.
        this.startActivityForResult(intent, REQUEST_ID_IMAGE_CAPTURE);
    }

    private void askPermissionAndCaptureVideo() {

        // With Android Level >= 23, you have to ask the user
        // for permission to read/write data on the device.
        if (android.os.Build.VERSION.SDK_INT >= 23) {

            // Check if we have read/write permission
            int readPermission = ActivityCompat.checkSelfPermission(this,
                    Manifest.permission.READ_EXTERNAL_STORAGE);
            int writePermission = ActivityCompat.checkSelfPermission(this,
                    Manifest.permission.WRITE_EXTERNAL_STORAGE);

            if (writePermission != PackageManager.PERMISSION_GRANTED ||
                    readPermission != PackageManager.PERMISSION_GRANTED) {
                // If don't have permission so prompt the user.
                this.requestPermissions(
                        new String[]{Manifest.permission.WRITE_EXTERNAL_STORAGE,
                                Manifest.permission.READ_EXTERNAL_STORAGE},
                        REQUEST_ID_READ_WRITE_PERMISSION
                );
                return;
            }
        }
        this.captureVideo();
    }

    private void captureVideo() {
        try {
            // Create an implicit intent, for video capture.
            Intent intent = new Intent(MediaStore.ACTION_VIDEO_CAPTURE);

            // The external storage directory.
            File dir = Environment.getExternalStorageDirectory();
            if (!dir.exists()) {
                dir.mkdirs();
            }
            // file:///storage/emulated/0/myvideo.mp4
            String savePath = dir.getAbsolutePath() + "/myvideo.mp4";
            File videoFile = new File(savePath);
            Uri videoUri = Uri.fromFile(videoFile);

            // Specify where to save video files.
            intent.putExtra(MediaStore.EXTRA_OUTPUT, videoUri);
            intent.addFlags(Intent.FLAG_GRANT_READ_URI_PERMISSION);

            // ================================================================================================
            // To Fix Error (**)
            // ================================================================================================

            StrictMode.VmPolicy.Builder builder = new StrictMode.VmPolicy.Builder();
            StrictMode.setVmPolicy(builder.build());

            // ================================================================================================
            // You may get an Error (**) If your app targets API 24+
            // "android.os.FileUriExposedException: file:///storage/emulated/0/xxx exposed beyond app through.."
            //  Explanation: https://stackoverflow.com/questions/38200282
            // ================================================================================================

            // Start camera and wait for the results.
            this.startActivityForResult(intent, REQUEST_ID_VIDEO_CAPTURE); // (**)

        } catch(Exception e)  {
            Toast.makeText(this, "Error capture video: " +e.getMessage(), Toast.LENGTH_LONG).show();
            e.printStackTrace();
        }
    }


    // When you have the request results
    @Override
    public void onRequestPermissionsResult(int requestCode,
                                           String permissions[], int[] grantResults) {

        super.onRequestPermissionsResult(requestCode, permissions, grantResults);
        //
        switch (requestCode) {
            case REQUEST_ID_READ_WRITE_PERMISSION: {

                // Note: If request is cancelled, the result arrays are empty.
                // Permissions granted (read/write).
                if (grantResults.length > 1
                        && grantResults[0] == PackageManager.PERMISSION_GRANTED
                        && grantResults[1] == PackageManager.PERMISSION_GRANTED) {

                    Toast.makeText(this, "Permission granted!", Toast.LENGTH_LONG).show();

                    this.captureVideo();

                }
                // Cancelled or denied.
                else {
                    Toast.makeText(this, "Permission denied!", Toast.LENGTH_LONG).show();
                }
                break;
            }
        }
    }

    // When results returned
    @Override
    protected void onActivityResult(int requestCode, int resultCode, Intent data) {
        super.onActivityResult(requestCode, resultCode, data);

        if (requestCode == REQUEST_ID_IMAGE_CAPTURE) {
            if (resultCode == RESULT_OK) {
                Bitmap bp = (Bitmap) data.getExtras().get("data");
                this.imageView.setImageBitmap(bp);
            } else if (resultCode == RESULT_CANCELED) {
                Toast.makeText(this, "Action canceled", Toast.LENGTH_LONG).show();
            } else {
                Toast.makeText(this, "Action Failed", Toast.LENGTH_LONG).show();
            }
        } else if (requestCode == REQUEST_ID_VIDEO_CAPTURE) {
            if (resultCode == RESULT_OK) {
                Uri videoUri = data.getData();
                Log.i("MyLog", "Video saved to: " + videoUri);
                Toast.makeText(this, "Video saved to:\n" +
                        videoUri, Toast.LENGTH_LONG).show();
                this.videoView.setVideoURI(videoUri);
                this.videoView.start();
            } else if (resultCode == RESULT_CANCELED) {
                Toast.makeText(this, "Action Cancelled.",
                        Toast.LENGTH_LONG).show();
            } else {
                Toast.makeText(this, "Action Failed",
                        Toast.LENGTH_LONG).show();
            }
        }
    }

}
The app will save video to SD Card of the Emulator, so make sure you have SD Card set up.
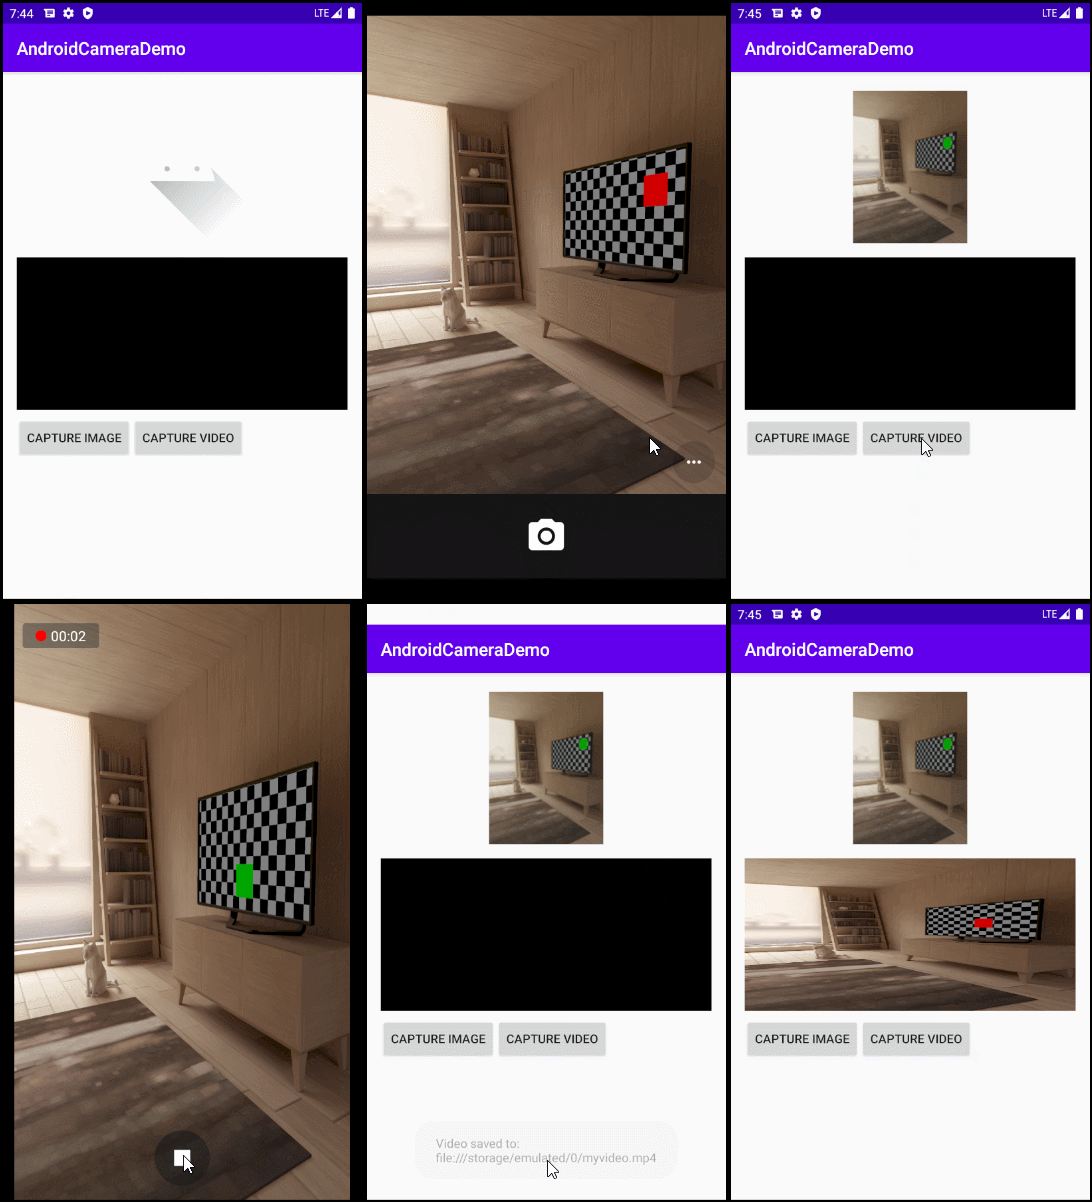
OK, maintenant vous pouvez exécuter l'exemple. Ici je lance l'application sur un appareil de simultation avec la camera simultateur.
Tutoriels de programmation Android
- Configurer Android Emulator en Android Studio
- Le Tutoriel de Android ToggleButton
- Créer un File Finder Dialog simple dans Android
- Le Tutoriel de Android TimePickerDialog
- Le Tutoriel de Android DatePickerDialog
- De quoi avez-vous besoin pour démarrer avec Android?
- Installer Android Studio sur Windows
- Installer Intel® HAXM pour Android Studio
- Le Tutoriel de Android AsyncTask
- Le Tutoriel de Android AsyncTaskLoader
- Tutoriel Android pour débutant - Exemples de base
- Comment connaître le numéro de téléphone d'Android Emulator et le changer?
- Le Tutoriel de Android TextInputLayout
- Le Tutoriel de Android CardView
- Le Tutoriel de Android ViewPager2
- Obtenir un numéro de téléphone dans Android à l'aide de TelephonyManager
- Le Tutoriel de Android Phone Call
- Le Tutoriel de Android Wifi Scanning
- Le Tutoriel de programmation de jeux Android 2D pour débutant
- Le Tutoriel de Android DialogFragment
- Le Tutoriel de Android CharacterPickerDialog
- Le Tutoriel Android pour débutant - Hello Android
- Utiliser Android Device File Explorer
- Activer USB Debugging sur un appareil Android
- Le Tutoriel de Android UI Layouts
- Le Tutoriel de Android SMS
- Le Tutoriel de Android et SQLite Database
- Le Tutoriel de Google Maps Android API
- Le Tutoriel de texte pour parler dans Android
- Le Tutoriel de Android Space
- Le Tutoriel de Android Toast
- Créer un Android Toast personnalisé
- Le Tutoriel de Android SnackBar
- Le Tutoriel de Android TextView
- Le Tutoriel de Android TextClock
- Le Tutoriel de Android EditText
- Le Tutoriel de Android TextWatcher
- Formater le numéro de carte de crédit avec Android TextWatcher
- Le Tutoriel de Android Clipboard
- Créer un File Chooser simple dans Android
- Le Tutoriel de Android AutoCompleteTextView et MultiAutoCompleteTextView
- Le Tutoriel de Android ImageView
- Le Tutoriel de Android ImageSwitcher
- Le Tutoriel de Android ScrollView et HorizontalScrollView
- Le Tutoriel de Android WebView
- Le Tutoriel de Android SeekBar
- Le Tutoriel de Android Dialog
- Le Tutoriel de Android AlertDialog
- Tutoriel Android RatingBar
- Le Tutoriel de Android ProgressBar
- Le Tutoriel de Android Spinner
- Le Tutoriel de Android Button
- Le Tutoriel de Android Switch
- Le Tutoriel de Android ImageButton
- Le Tutoriel de Android FloatingActionButton
- Le Tutoriel de Android CheckBox
- Le Tutoriel de Android RadioGroup et RadioButton
- Le Tutoriel de Android Chip et ChipGroup
- Utilisation des Image assets et des Icon assets d'Android Studio
- Configuration de la Carte SD pour Android Emulator
- Exemple ChipGroup et Chip Entry
- Comment ajouter des bibliothèques externes à Android Project dans Android Studio?
- Comment désactiver les autorisations déjà accordées à l'application Android?
- Comment supprimer des applications de Android Emulator?
- Le Tutoriel de Android LinearLayout
- Le Tutoriel de Android TableLayout
- Le Tutoriel de Android FrameLayout
- Le Tutoriel de Android QuickContactBadge
- Le Tutoriel de Android StackView
- Le Tutoriel de Android Camera
- Le Tutoriel de Android MediaPlayer
- Le Tutoriel de Android VideoView
- Jouer des effets sonores dans Android avec SoundPool
- Le Tutoriel de Android Networking
- Analyser JSON dans Android
- Le Tutoriel de Android SharedPreferences
- Le Tutorial de stockage interne Android (Internal Storage)
- Le Tutoriel de Android External Storage
- Le Tutoriel de Android Intents
- Exemple d'une Android Intent explicite, appelant une autre Intent
- Exemple de Android Intent implicite, ouvrez une URL, envoyez un email
- Le Tutoriel de Android Service
- Le Tutoriel Android Notifications
- Le Tutoriel de Android DatePicker
- Le Tutoriel de Android TimePicker
- Le Tutoriel de Android Chronometer
- Le Tutoriel de Android OptionMenu
- Le Tutoriel de Android ContextMenu
- Le Tutoriel de Android PopupMenu
- Le Tutoriel de Android Fragment
- Le Tutoriel de Android ListView
- Android ListView avec Checkbox en utilisant ArrayAdapter
- Le Tutoriel de Android GridView
Show More
