Le Tutoriel de Flutter SizedBox
1. SizedBox
A l'inverse de Container, SizedBox est une boîte transparente dont vous ne pouvez pas définir le style (par exemple, la couleur d'arrière-plan, la marge, le remplissage, etc.). Si vous précisez une taille particulière pour la SizedBox, cette taille s'appliquera également à son widget enfant. Sinon, si la largeur de SizedBox n'est pas précisée ou null, son widget enfant disposera d'une largeur correspondant à son paramètre ou égale à 0 (s'il n'est pas défini). Pour sa part, la hauteur a un comportement similaire.
Tous les paramètres impliqués dans la création d'une SizedBox tels que width, height, size, child sont facultatifs.
Les constructeurs de SizedBox:
SizedBox constructor
const SizedBox(
    {Key key,
    double width,
    double height,
    Widget child}
)
SizedBox.fromSize constructor
SizedBox.fromSize(
    {Key key,
    Widget child,
    Size size}
)
SizedBox.expand constructor
const SizedBox.expand(
    {Key key,
    Widget child}
)
SizedBox.shrink constructor
const SizedBox.shrink(
    {Key key,
    Widget child}
)
Si vous précisez une taille spécifique à la SizedBox par les paramètres de width, height ou size, cette taille s'appliquera également à son widget enfant.
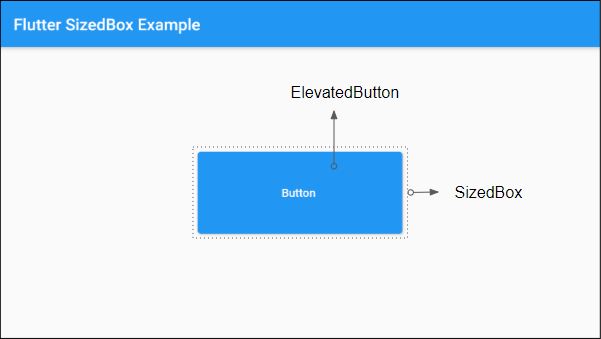
Par exemple: Placer un ElevatedButton dans une SizedBox de taille 250x100. Cette taille s'appliquera également à ElevatedButton:
(ex1)
SizedBox(
    width: 250,
    height: 100,
    child: ElevatedButton(
      child: Text("Button "),
      onPressed: (){},
    )
)
Vous pouvez également créer l'objet SizedBox via le constructeur SizedBox.fromSize:
SizedBox.fromSize (
    size: Size(250, 100),
    child: ElevatedButton(
      child: Text("Button"),
      onPressed: (){},
    )
)
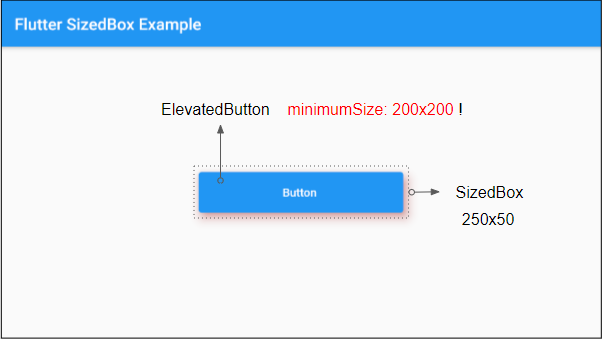
Par exemple: Un ElevatedButton est défini sur une taille minimale de 200x200, mais lorsqu'il est placé dans une SizedBox ayant la taille précisée (par exemple 250x50), il obéira à la taille de la SizedBox.
(ex3)
SizedBox (
    width:250,
    height: 50,
    child: ElevatedButton(
      child: Text("Button "),
      onPressed: (){},
      style: ElevatedButton.styleFrom(
          shadowColor : Colors.redAccent,
          elevation: 10,
          minimumSize: Size(200,  200 )
      )
    )
)
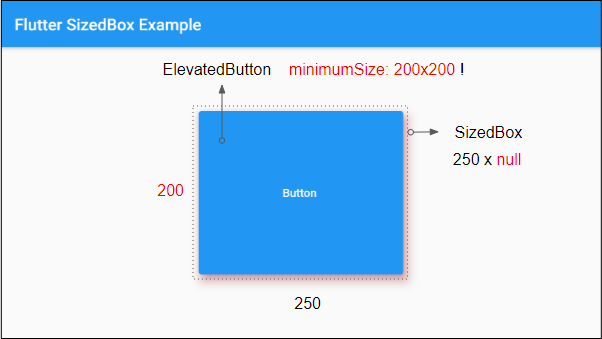
Un autre exemple: Si la hauteur de SizedBox n'est pas précisée (ou null), donc la hauteur du widget enfant sera déterminée en fonction de ses paramètres ou égale à 0 (s'il n'y a pas ses propres paramètres).
(ex4)
SizedBox (
    width:250,
    child: ElevatedButton(
      child: Text("Button "),
      onPressed: (){},
      style: ElevatedButton.styleFrom(
          shadowColor : Colors.redAccent,
          elevation: 10,
          minimumSize: Size(200,  200 )
      )
    )
)
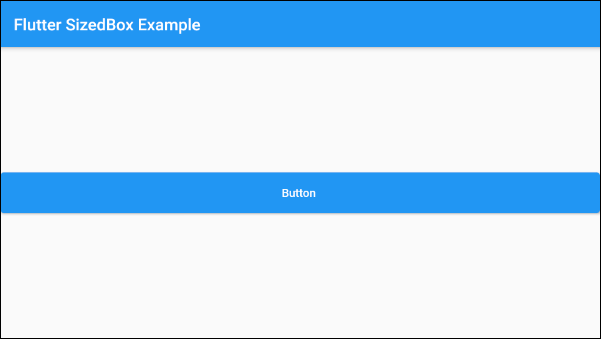
Par exemple: Définir la valeur double.infinity pour la largeur de SizedBox, sa largeur sera aussi grande que possible dans l'autorisation de widget parent.
(ex5)
SizedBox (
    width: double.infinity,
    height: 50,
    child: ElevatedButton(
        child: Text("Button "),
        onPressed: (){}
    )
)
2. SizedBox.fromSize
Le constructeur SizedBox.fromSize est utilisé pour créer une SizedBox avec la taille précisée via un paramètre facultatif - size.
SizedBox.fromSize Constructor
SizedBox.fromSize(
    {Key key,
    Widget child,
    Size size}
)
Par exemple:
SizedBox.fromSize (
    size: Size(250, 100),
    child: ElevatedButton(
      child: Text("Button "),
      onPressed: (){},
    )
)
3. SizedBox.expand
Le constructeur SizedBox.expand est utilisé pour créer une SizedBox avec la largeur et la hauteur de double.infinity. C'est-à-dire, la taille de SizedBox sera aussi grande que possible dans l'autorisation de widget parent.
SizedBox.expand constructor
const SizedBox.expand(
    {Key key,
    Widget child}
)
4. SizedBox.shrink
Le constructeur SizedBox.shrink est utilisé pour créer une SizedBox avec la plus petite taille selon les suggestions de son widget parent.
SizedBox.shrink Constructor
const SizedBox.shrink(
    {Key key,
    Widget child}
)
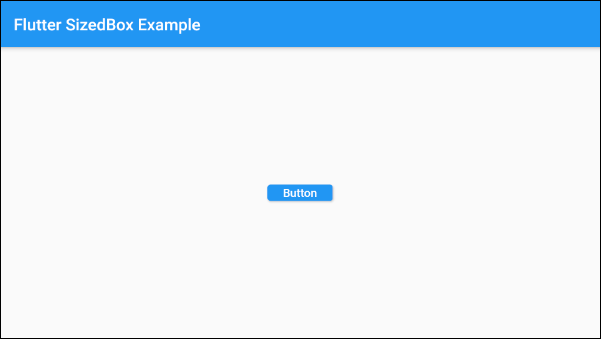
Dans cet exemple, on a une SizedBox créée par le constructeur SizedBox.shrink, et son widget parent, une ConstrainedBox, est définie avec la taille minimale de 80x20. La SizedBox réduira sa taille pour mieux s'adapter à la taille minimale du widget parent.
(ex6)
ConstrainedBox(
    constraints: new BoxConstraints( // Min: 80x20
        minWidth: 80.0,
        minHeight: 20.0
    ),
    child: SizedBox.shrink(
      child: ElevatedButton(
        child: Text('Button'),
        onPressed: () {},
      ),
    )
)
- Le Tutoriel de Flutter ConstrainedBox
Tutoriels de programmation Flutter
- Le Tutoriel de Flutter Column
- Le Tutoriel de Flutter Stack
- Le Tutoriel de Flutter IndexedStack
- Le Tutoriel de Flutter Spacer
- Le Tutoriel de Flutter Expanded
- Le Tutoriel de Flutter SizedBox
- Le Tutoriel de Flutter Tween
- Installer Flutter SDK sur Windows
- Installer Flutter Plugin pour Android Studio
- Créez votre première application Flutter - Hello Flutter
- Le Tutoriel de Flutter Scaffold
- Le Tutoriel de Flutter AppBar
- Le Tutoriel de Flutter BottomAppBar
- Le Tutoriel de Flutter TextButton
- Le Tutoriel de Flutter ElevatedButton
- Le Tutoriel de Flutter EdgeInsetsGeometry
- Le Tutoriel de Flutter EdgeInsets
- Le Tutoriel de CircularProgressIndicator
- Le Tutoriel de Flutter LinearProgressIndicator
- Le Tutoriel de Flutter Center
- Le Tutoriel de Flutter Align
- Le Tutoriel de Flutter Row
- Le Tutoriel de Flutter SplashScreen
- Le Tutoriel de Flutter Alignment
- Le Tutoriel de Flutter Positioned
- Le Tutoriel de Flutter SimpleDialog
- Le Tutoriel de Flutter AlertDialog
- Navigation et Routing dans Flutter
- Le Tutoriel de Flutter TabBar
- Le Tutoriel de Flutter Banner
- Le Tutoriel de Flutter BottomNavigationBar
- Le Tutoriel de Flutter FancyBottomNavigation
- Le Tutoriel de Flutter Card
- Le Tutoriel de Flutter Border
- Le Tutoriel de Flutter ContinuousRectangleBorder
- Le Tutoriel de Flutter RoundedRectangleBorder
- Le Tutoriel de Flutter CircleBorder
- Le Tutoriel de Flutter StadiumBorder
- Le Tutoriel de Flutter Container
- Le Tutoriel de Flutter RotatedBox
- Le Tutoriel de Flutter CircleAvatar
- Le Tutoriel de Flutter IconButton
- Le Tutoriel de Flutter FlatButton
- Le Tutoriel de Flutter SnackBar
Show More