Le Tutoriel de Spring Boot et Thymeleaf
1. Qu'est-ce que Thymeleaf ?
Thymeleaf est un Java XML/XHTML/HTML5 Template Engine qui peut travailler à la fois dans des environnements Web (Servlet) et celui de non Web. Il est mieux adapté pour diffuser XHTML/HTML5 sur View (View Layer) des applications Web basées sur MVC. Mais il peut traiter n'importe quel fichier XML même dans des environnements hors ligne (offline). Il fournit une intégration complète de Spring Framework.
Le fichier modèle (Template file) de Thymeleaf est en substance un fichier de document ordinaire au format XML/XHTML/HTML5. Thymeleaf Engine (le moteur Thymeleaf) va lire un fichier modèle et le combiner avec des objets Java pour générer (generate) un autre document.
Thymeleaf peut être utilisé pour remplacer JSP sur la couche View (View Layer) de l'application Web MVC. Thymeleaf est un logiciel à code source ouvert (open source) sous licence Apache 2.0.
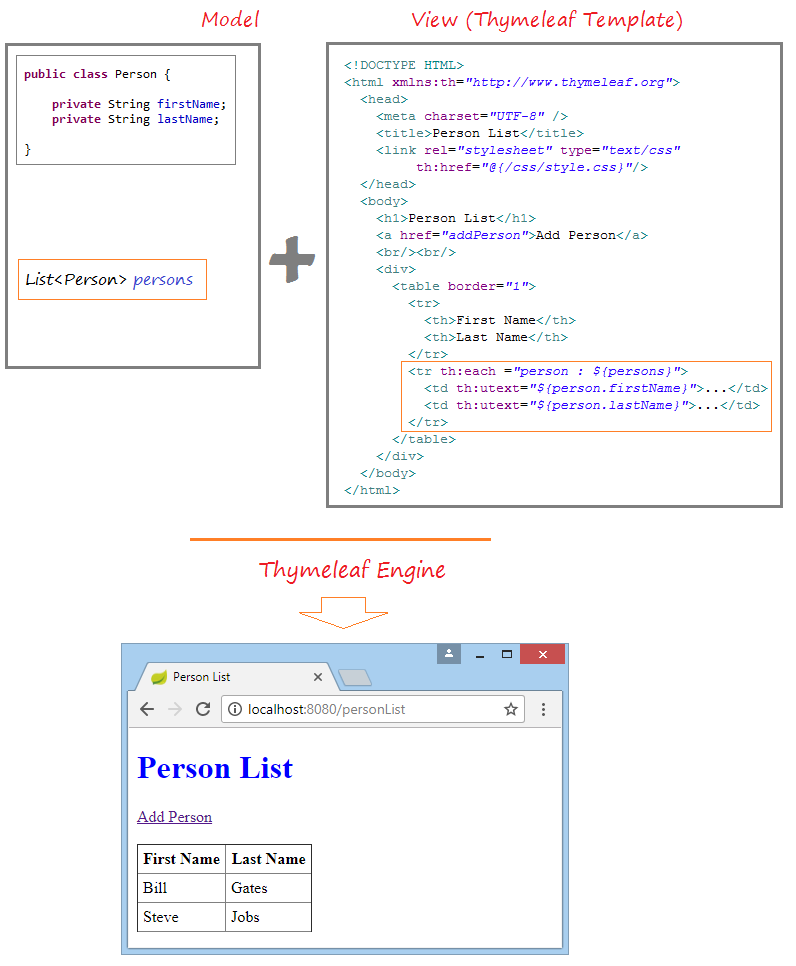
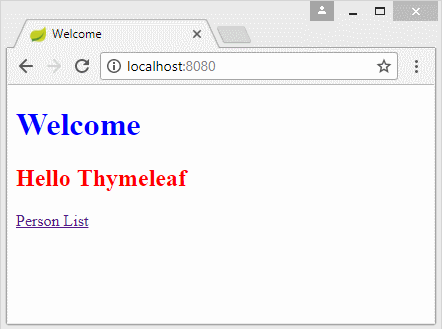
Voici est l'image de l'application que nous allons effectuer dans cette leçon :

See Also:
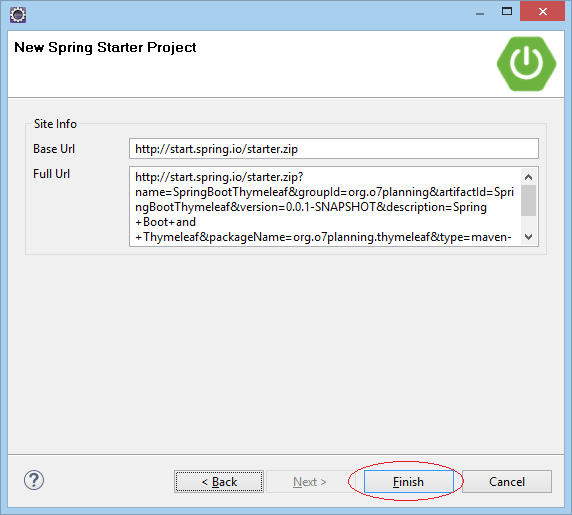
2. Créer l'application
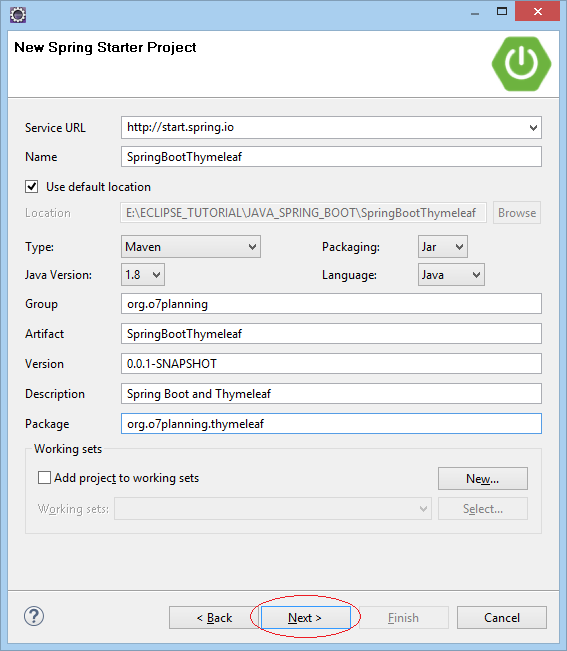
Sur Eclipse sélectionnez :
- File/New/Other...

Saisissez :
- Name: SpringBootThymeleaf
- Group: org.o7planning
- Artifact: SpringBootThymeleaf
- Description: Spring Boot and Thymeleaf
- Package: org.o7planning.thymeleaf
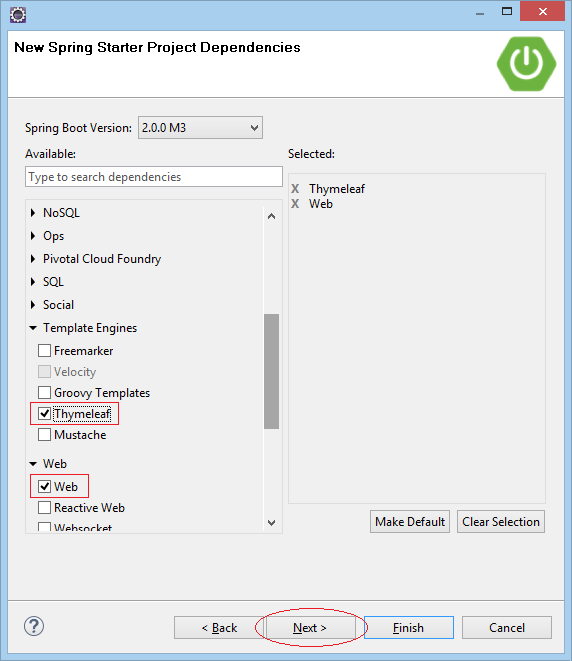
Sélectionnez 2 technologies Web et Thymeleaf.
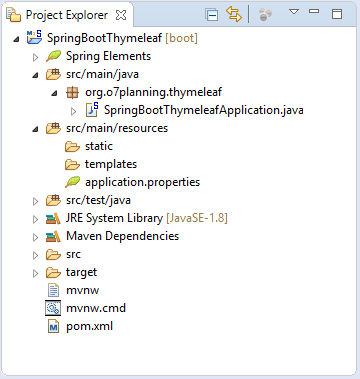
Votre projet a été créé :
pom.xml
<?xml version="1.0" encoding="UTF-8"?>
<project xmlns="http://maven.apache.org/POM/4.0.0"
    xmlns:xsi="http://www.w3.org/2001/XMLSchema-instance"
    xsi:schemaLocation="http://maven.apache.org/POM/4.0.0
         http://maven.apache.org/xsd/maven-4.0.0.xsd">
    <modelVersion>4.0.0</modelVersion>

    <groupId>org.o7planning</groupId>
    <artifactId>SpringBootThymeleaf</artifactId>
    <version>0.0.1-SNAPSHOT</version>
    <packaging>jar</packaging>

    <name>SpringBootThymeleaf</name>
    <description>Spring Boot and Thymeleaf</description>

    <parent>
        <groupId>org.springframework.boot</groupId>
        <artifactId>spring-boot-starter-parent</artifactId>
        <version>2.0.0.RELEASE</version>
        <relativePath/> <!-- lookup parent from repository -->
    </parent>

    <properties>
        <project.build.sourceEncoding>UTF-8</project.build.sourceEncoding>
        <project.reporting.outputEncoding>UTF-8</project.reporting.outputEncoding>
        <java.version>1.8</java.version>
    </properties>

    <dependencies>
        <dependency>
            <groupId>org.springframework.boot</groupId>
            <artifactId>spring-boot-starter-thymeleaf</artifactId>
        </dependency>
        <dependency>
            <groupId>org.springframework.boot</groupId>
            <artifactId>spring-boot-starter-web</artifactId>
        </dependency>

        <dependency>
            <groupId>org.springframework.boot</groupId>
            <artifactId>spring-boot-starter-test</artifactId>
            <scope>test</scope>
        </dependency>
    </dependencies>

    <build>
        <plugins>
            <plugin>
                <groupId>org.springframework.boot</groupId>
                <artifactId>spring-boot-maven-plugin</artifactId>
            </plugin>
        </plugins>
    </build>

</project>
3. Thymeleaf Template
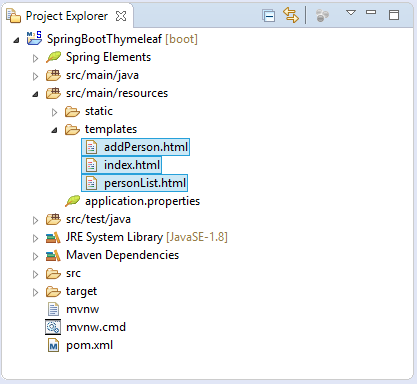
Thymeleaf Template est un fichier modèle. Son contenu est au format XML/XHTML/HTML5. Nous allons créer 3 fichiers et les placer dans le répertoire src/main/resources/templates :
index.html
<!DOCTYPE HTML>
<html xmlns:th="http://www.thymeleaf.org">
   <head>
      <meta charset="UTF-8" />
      <title>Welcome</title>
      <link rel="stylesheet" type="text/css" th:href="@{/css/style.css}"/>
   </head>
   <body>
      <h1>Welcome</h1>
      <h2 th:utext="${message}">..!..</h2>

      <!--

         In Thymeleaf the equivalent of
         JSP's ${pageContext.request.contextPath}/edit.html
         would be @{/edit.html}

         -->

      <a th:href="@{/personList}">Person List</a>

   </body>

</html>
personList.html
<!DOCTYPE HTML>
<html xmlns:th="http://www.thymeleaf.org">
<head>
<meta charset="UTF-8" />
<title>Person List</title>
<link rel="stylesheet" type="text/css" th:href="@{/css/style.css}"/>
</head>
<body>
<h1>Person List</h1>
<a href="addPerson">Add Person</a>
<br/><br/>
<div>
<table border="1">
<tr>
<th>First Name</th>
<th>Last Name</th>
</tr>
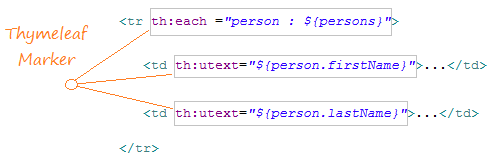
<tr th:each ="person : ${persons}">
<td th:utext="${person.firstName}">...</td>
<td th:utext="${person.lastName}">...</td>
</tr>
</table>
</div>
</body>
</html>addPerson.html
<!DOCTYPE HTML>
<html xmlns:th="http://www.thymeleaf.org">
   <head>
      <meta charset="UTF-8" />
      <title>Add Person</title>
      <link rel="stylesheet" type="text/css" th:href="@{/css/style.css}"/>
   </head>
   <body>
      <h1>Create a Person:</h1>

      <!--
         In Thymeleaf the equivalent of
         JSP's ${pageContext.request.contextPath}/edit.html
         would be @{/edit.html}
         -->

      <form th:action="@{/addPerson}"
         th:object="${personForm}" method="POST">
         First Name:
         <input type="text" th:field="*{firstName}" />
         <br/>
         Last Name:
         <input type="text" th:field="*{lastName}" />
         <br/>
         <input type="submit" value="Create" />
      </form>

      <br/>

      <!-- Check if errorMessage is not null and not empty -->

      <div th:if="${errorMessage}" th:utext="${errorMessage}"
         style="color:red;font-style:italic;">
         ...
      </div>

   </body>
</html>
J'ai créé 3 fichiers HTML. Les fichiers HTML ci-dessus doivent être adaptés aux normes de XML, toutes les étiquettes (tag) doivent être ouvertes et fermées. Par exemple :
<div>A div tag</div>

<br />

<meta charset="UTF-8" />
Tous les fichiers HTML doivent déclarer l'utilisation de Thymeleaf Namespace:
<!-- Thymeleaf Namespace -->

<html xmlns:th="http://www.thymeleaf.org">
Dans les fichiers modèles (Template file), il y a des Thymeleaf Marker (des marqueurs de Thymeleaf) qui sont des instructions aidant les données de processus de Thymeleaf Engine.
Thymeleaf Engine analyse les fichiers modèles (Template file) et les combine avec les données Java pour générer (generate) un nouveau document.
Thymeleaf Engine analyse les fichiers modèles (Template file) et les combine avec les données Java pour générer (generate) un nouveau document.
Ci-dessus sont des exemples qui tilisent Context-Path dans Thymeleaf:<!-- Example 1: --> <a th:href="@{/mypath/abc.html}">A Link</a> Output: ==> <a href="/my-context-path/mypath/abc.html">A Link</a> <!-- Example 2: --> <form th:action="@{/mypath/abc.html}" th:object="${personForm}" method="POST"> Output: ==> <form action="/my-context-path/mypath/abc.html" method="POST">
4. Static Resource & Properties File
Pour les ressources statiques (Static Resource), par exemple: des fichiers css, javascript, image,... vous devez les placer dans le dossier src/main/resources/static ou dans ses sous-dossiers.
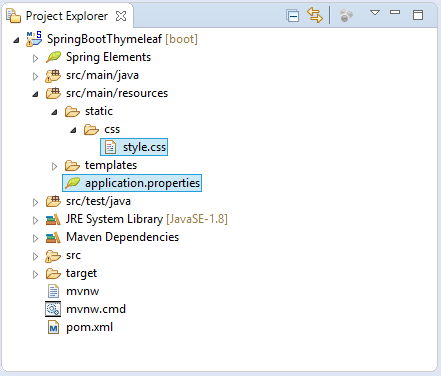
style.css
h1 {
    color:#0000FF;
}

h2 {
    color:#FF0000;
}

table {
    border-collapse: collapse;
}

table th, table td {
    padding: 5px;
}
application.properties
spring.thymeleaf.cache=false
welcome.message=Hello Thymeleaf
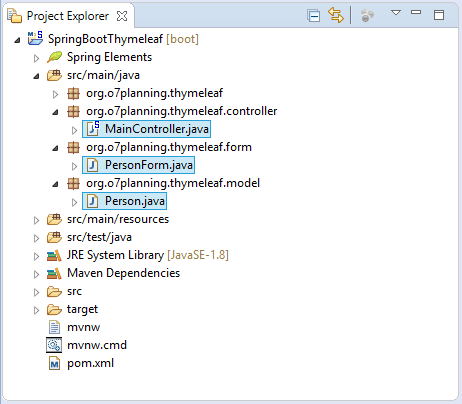
error.message=First Name & Last Name is required!5. Model, Form, Controller classes
Person.java
package org.o7planning.thymeleaf.model;

public class Person {

    private String firstName;
    private String lastName;

    public Person() {

    }

    public Person(String firstName, String lastName) {
        this.firstName = firstName;
        this.lastName = lastName;
    }

    public String getFirstName() {
        return firstName;
    }

    public void setFirstName(String firstName) {
        this.firstName = firstName;
    }

    public String getLastName() {
        return lastName;
    }

    public void setLastName(String lastName) {
        this.lastName = lastName;
    }

}
La classe PersonForm représentent des données de FORM lorsque vous créez une nouvelle Person sur la page addPerson.
PersonForm.java
package org.o7planning.thymeleaf.form;


public class PersonForm {

    private String firstName;
    private String lastName;

    public String getFirstName() {
        return firstName;
    }

    public void setFirstName(String firstName) {
        this.firstName = firstName;
    }

    public String getLastName() {
        return lastName;
    }

    public void setLastName(String lastName) {
        this.lastName = lastName;
    }

}
MainController est une classe Controller. Il traite les demandes d'un utilisateur et contrôle le flux (flow) de l'application.
MainController.java
package org.o7planning.thymeleaf.controller;

import java.util.ArrayList;
import java.util.List;

import org.o7planning.thymeleaf.form.PersonForm;
import org.o7planning.thymeleaf.model.Person;
import org.springframework.beans.factory.annotation.Value;
import org.springframework.stereotype.Controller;
import org.springframework.ui.Model;
import org.springframework.web.bind.annotation.ModelAttribute;
import org.springframework.web.bind.annotation.RequestMapping;
import org.springframework.web.bind.annotation.RequestMethod;

@Controller
public class MainController {

	private static List<Person> persons = new ArrayList<Person>();

	static {
		persons.add(new Person("Bill", "Gates"));
		persons.add(new Person("Steve", "Jobs"));
	}

	// Injectez (inject) via application.properties.
	@Value("${welcome.message}")
	private String message;

	@Value("${error.message}")
	private String errorMessage;

	@RequestMapping(value = { "/", "/index" }, method = RequestMethod.GET)
	public String index(Model model) {

		model.addAttribute("message", message);

		return "index";
	}

	@RequestMapping(value = { "/personList" }, method = RequestMethod.GET)
	public String personList(Model model) {

		model.addAttribute("persons", persons);

		return "personList";
	}

	@RequestMapping(value = { "/addPerson" }, method = RequestMethod.GET)
	public String showAddPersonPage(Model model) {

		PersonForm personForm = new PersonForm();
		model.addAttribute("personForm", personForm);

		return "addPerson";
	}

	@RequestMapping(value = { "/addPerson" }, method = RequestMethod.POST)
	public String savePerson(Model model, //
			@ModelAttribute("personForm") PersonForm personForm) {

		String firstName = personForm.getFirstName();
		String lastName = personForm.getLastName();

		if (firstName != null && firstName.length() > 0 //
				&& lastName != null && lastName.length() > 0) {
			Person newPerson = new Person(firstName, lastName);
			persons.add(newPerson);

			return "redirect:/personList";
		}

		model.addAttribute("errorMessage", errorMessage);
		return "addPerson";
	}

}
Tutoriels Spring Boot
- Installer Spring Tool Suite pour Eclipse
- Le Tutoriel de Spring pour débutant
- Le Tutoriel de Spring Boot pour débutant
- Propriétés communes de Spring Boot
- Le Tutoriel de Spring Boot et Thymeleaf
- Le Tutoriel de Spring Boot et FreeMarker
- Le Tutoriel de Spring Boot et Groovy
- Le Tutoriel de Spring Boot et Mustache
- Le Tutoriel de Spring Boot et JSP
- Le Tutoriel de Spring Boot, Apache Tiles, JSP
- Utiliser Logging dans Spring Boot
- Surveillance des applications avec Spring Boot Actuator
- Créer une application Web multilingue avec Spring Boot
- Utiliser plusieurs ViewResolvers dans Spring Boot
- Utiliser Twitter Bootstrap dans Spring Boot
- Le Tutoriel de Spring Boot Interceptor
- Le Tutoriel de Spring Boot, Spring JDBC et Spring Transaction
- Le Tutoriel de Spring JDBC
- Le Tutoriel de Spring Boot, JPA et Spring Transaction
- Le Tutoriel de Spring Boot et Spring Data JPA
- Le Tutoriel de Spring Boot, Hibernate et Spring Transaction
- Intégration de Spring Spring, JPA et H2 Database
- Le Tutoriel de Spring Boot et MongoDB
- Utiliser plusieurs DataSources avec Spring Boot et JPA
- Utiliser plusieurs DataSources avec Spring Boot et RoutingDataSource
- Créer une application de connexion avec Spring Boot, Spring Security, Spring JDBC
- Créer une application de connexion avec Spring Boot, Spring Security, JPA
- Créer une application d'enregistrement d'utilisateur avec Spring Boot, Spring Form Validation
- Exemple de OAuth2 Social Login dans Spring Boot
- Exécuter des tâches planifiées en arrière-plan dans Spring
- Exemple CRUD Restful WebService avec Spring Boot
- Exemple Spring Boot Restful Client avec RestTemplate
- Exemple CRUD avec Spring Boot, REST et AngularJS
- Sécurité Spring RESTful Service utilisant Basic Authentication
- Sécuriser Spring Boot RESTful Service en utilisant Auth0 JWT
- Exemple Upload file avec Spring Boot
- Le exemple de Download file avec Spring Boot
- Le exemple de Upload file avec Spring Boot et jQuery Ajax
- Le exemple de Upload file avec Spring Boot et AngularJS
- Créer une application Web Panier avec Spring Boot, Hibernate
- Le Tutoriel de Spring Email
- Créer une application Chat simple avec Spring Boot et Websocket
- Déployer le application Spring Boot sur Tomcat Server
- Déployer le application Spring Boot sur Oracle WebLogic Server
- Installer un certificat SSL gratuit Let's Encrypt pour Spring Boot
- Configurer Spring Boot pour rediriger HTTP vers HTTPS
Show More