Tutoriel de programmation Java multithreading
2. L'exemple entame avec Thread
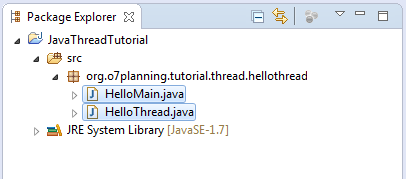
On a besoin de 2 classes participant à cet exemple.
- HelloMain est une classe ordinaire avec la méthode principale,il est flux principal (main thread).
- HelloThread est la classe qui étend la classe Thread. Elle a été créée et est activitée en cours d'exécution du flux principal et elle sera parallèlement exécutée avec le flux principal.
package org.o7planning.tutorial.thread.hellothread;

public class HelloMain {

   public static void main(String[] args) throws InterruptedException {

       int idx = 1;

       for (int i = 0; i < 2; i++) {

           System.out.println("Main thread running " + idx++);
           // Sleep 2101 miliseconds.
           Thread.sleep(2101);
       }

       HelloThread helloThread = new HelloThread();

       // Run thread
       helloThread.start();

       for (int i = 0; i < 3; i++) {
           System.out.println("Main thread running " + idx++);

           // Sleep 2101 miliseconds.
           Thread.sleep(2101);
       }

       System.out.println("==> Main thread stopped");
   }
}
HelloThread.java
package org.o7planning.tutorial.thread.hellothread;
public class HelloThread extends Thread {
// Code of method run() will be executed when
// thread call start()
@Override
public void run() {
int index = 1;
for (int i = 0; i < 10; i++) {
System.out.println(" - HelloThread running " + index++);
try {
// Sleep 1030 miliseconds.
Thread.sleep(1030);
} catch (InterruptedException e) {
}
}
System.out.println(" - ==> HelloThread stopped");
}
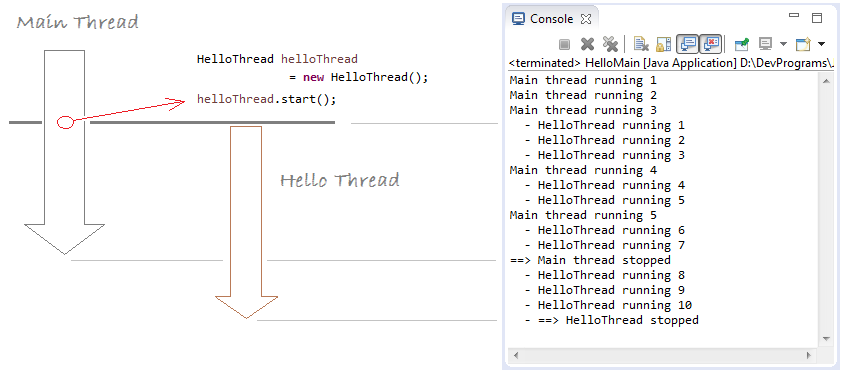
}Les résultats de l'exécution de la classe HelloMain :
3. Runnable Interface
Vous pouvez également créer un Thread à l'aide de la classe de l'interface Runnable. Voyez l'exemple d'illustration ci-dessous :
RunnableDemo.java
package org.o7planning.tutorial.thread.runnable;

public class RunnableDemo implements Runnable {

   @Override
   public void run() {
       int idx = 1;
       for (int i = 0; i < 5; i++) {
           System.out.println("Hello from RunnableDemo " + idx++);

           // Sleep 2 second.
           try {
               Thread.sleep(2000);
           } catch (InterruptedException e) {
           }
       }
   }

}
RunnableTest.java
package org.o7planning.tutorial.thread.runnable;

public class RunnableTest {

   public static void main(String[] args) throws InterruptedException {

       System.out.println("Main thread running..");

       // Create a thread from Runnable.
       Thread thread = new Thread(new RunnableDemo());

       thread.start();

       // Sleep 5 seconds.
       Thread.sleep(5000);
       System.out.println("Main thread stopped");
   }
}
Exécutez la classe RunnableTest:
Main thread running..
Hello from RunnableDemo 1
Hello from RunnableDemo 2
Hello from RunnableDemo 3
Main thread stopped
Hello from RunnableDemo 4
Hello from RunnableDemo 5
4. Flux de Deamon (Deamon Thread)
Java divise Thread en 2 types : thread normal et Deamon Thread. La différence entre eux est la facon de termination. Dans un programme, les thread normaux et Deamon sont parallèls l'un et l'autre. Lorsque tous les flux normaux se terminent, tous les Deamon se également terminent.
Remarque :
Utilisez setDeamon(boolean) pour configurer le flux qui peut être Deamon ou pas. Il est remarquable que vous ne pouvez qu'appeler setDeamon(boolean) lorsque thread ne fonctionne pas Cela signifie que thread a été couru ,vous pouvez pas changer de non-deamon à deamon et vice versa.
Lorsqu'un nouveau flux est créé, il hérite des caractéristiques deamon de son père. Ainsi ,lorsque vous créez un flux dans la méthode principale d'une classe, ce flux est naturellement un flux non-deamon, donc thread crée par défaut est également non-deamon. Alors si vous créez un nouveau flux dans un flux Deamon, par défaut il est également Deamon.
Thread thread = new MyThread();

// marks this thread as a daemon thread
// This method is only called when the thread is not a start.
// In the case of start, it will be throws an exception.
thread.setDeamon(true);


// marks this thread as a none-daemon thread
// This method is only called when the thread is not a start.
// In the case of start, it will be throws an exception.
thread.setDeamon(false);
Pour faciliter la compréhension, on voit l'exemple ci-dessous, on a besoin de trois classes participées dans cet exemple :
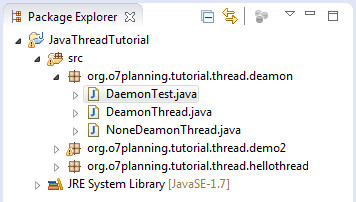
NoneDeamonThread.java
package org.o7planning.tutorial.thread.deamon;

public class NoneDeamonThread extends Thread {

   @Override
   public void run() {
       int i = 0;

       // Loop 10 times. This thread will end.
       while (i < 10) {
           System.out.println("  - Hello from None Deamon Thread " + i++);
           try {

               // Sleep 1 second
               Thread.sleep(1000);
           } catch (InterruptedException e) {
           }
       }

       // None deamon thread ending.
       System.out.println("\n==> None Deamon Thread ending\n");
   }
}
DeamonThread.java
package org.o7planning.tutorial.thread.deamon;

class DeamonThread extends Thread {

   @Override
   public void run() {
       int count = 0;

       // Infinite loop
       while (true) {
           System.out.println("+ Hello from Deamon Thread " + count++);
           try {
               // Sleep 2 second
               sleep(2000);
           } catch (InterruptedException e) {
           }
       }
   }
}
DaemonTest.java
package org.o7planning.tutorial.thread.deamon;

public class DaemonTest {

   public static void main(String[] args) {
       System.out.println("==> Main Thread running..\n");

       // Create thread
       Thread deamonThread = new DeamonThread();

       // Set deamon true
       deamonThread.setDaemon(true);
       deamonThread.start();

       // Create other thread
       new NoneDeamonThread().start();

       try {
           // Sleep 5 second
           Thread.sleep(5000);
       } catch (InterruptedException e) {
       }

       // Main Thread ending
       System.out.println("\n==> Main Thread ending\n");
   }

}
Les résultats de l'exécution de la class DeamonTest :

L'illustration ci-dessus montre que le flux Deamon a été arrêté lorsque tous les flux normaux ont été arrêtés bien que son code soit infini.
A quoi Deamon thread sert?
Un des flux Deamon importants de Java est le flux de la collecte des déchets (Garbage Collection Thread ), cela signifie que le ramassage des ressources ne sont plus utilisés pour libérer la mémoire. Lorsque tout le flux de l'utilisateur thread ne fonctionne plus, le flux de collecte des déchets s'arrête également.
5. Utilisation de join() & join(long)
Thread.join() est une méthode qui annonce que "Merci d'attendre jusqu'à quand ce thread soit terminé, puis le thread père continuera à s'exécuter".
// Parent thread must wait until the end of this thread, before being continued.
// (This is equivalent to calling join(0))
public final void join() throws InterruptedException;

// Parent thread must wait 'millis' milliseconds to continue running.
// After call join(long).
// If the parameter millis = 0 means to wait until the end of this thread.
public final synchronized void join(long millis) throws InterruptedException;


// Parent thread must wait 'millis' milliseconds and 'nanos' nanoseconds to continue running.
// After call join(long,int).
// 1 second = 1000000 nanoseconds.
public final synchronized void join(long millis, int nanos) throws InterruptedException;
Voyez un exemple de l'illustration:

JoinThread.java
package org.o7planning.tutorial.thread.join;

public class JoinThread extends Thread {
  private String threadName;
  private int count;

  public JoinThread(String threadName, int count) {
      this.threadName = threadName;
      this.count = count;
  }

  @Override
  public void run() {

      for (int i = 1; i < count + 1; i++) {
          System.out.println("Hello from " + this.threadName + " " + i);
          try {
              Thread.sleep(2000);
          } catch (InterruptedException e) {
          }
      }
      System.out.println("\n==> Thread " + threadName + " end!\n");
  }
}
JoinTest.java
package org.o7planning.tutorial.thread.join;

public class JoinTest {

   public static void main(String[] args) throws InterruptedException {

       System.out.println("\n==> Main thread starting..\n");

       Thread joinThreadA = new JoinThread("A*", 2);
       Thread joinThreadB = new JoinThread("B*", 3);


       // None join Thread.
       Thread noJoinThreadC = new JoinThread("C", 5);

       joinThreadA.start();
       joinThreadB.start();
       noJoinThreadC.start();

       // Using join()
       joinThreadA.join();
       joinThreadB.join();


       // The following code will have to wait until 2
       // JoinThread A, B completed.
       System.out.println("Hello from main thread...");

       System.out.println("Thread A isLive? " + joinThreadA.isAlive());
       System.out.println("Thread B isLive? " + joinThreadB.isAlive());
       System.out.println("Thread C isLive? " + noJoinThreadC.isAlive());

       System.out.println("\n==> Main Thread end!\n");
   }
}
Le résultat de l'exécution de la classe JoinTest:
==> Main thread starting..

Hello from A* 1
Hello from C 1
Hello from B* 1
Hello from A* 2
Hello from C 2
Hello from B* 2

==> Thread A* end!

Hello from B* 3
Hello from C 3

==> Thread B* end!

Hello from C 4
Hello from main thread...
Thread A isLive? false
Thread B isLive? false
Thread C isLive? true

==> Main Thread end!

Hello from C 5

==> Thread C end!
L'exemple de l'utilisation de join(long millis):
JoinTest2.java
package org.o7planning.tutorial.thread.join;

public class JoinTest2 {

   public static void main(String[] args) throws InterruptedException {

       System.out.println("\n==> Main thread starting..\n");

       Thread joinThreadA = new JoinThread("A*", 5);

       joinThreadA.start();

       // Main thread must wait to 5000 miliseconds,
       // and then continue running. (Not necessarily joinThreadA finish)
       joinThreadA.join(5000);

       System.out.println("Main thread after 5000 milli second");
       System.out.println("Hello from main thread...");

       System.out.println("Thread A isLive? " + joinThreadA.isAlive());

       System.out.println("\n==> Main Thread end!\n");
   }

}
Le résultat de l'exécution de l'exemple :
==> Main thread starting..

Hello from A* 1
Hello from A* 2
Hello from A* 3
Main thread after 5000 milli second
Hello from main thread...
Thread A isLive? true

==> Main Thread end!

Hello from A* 4
Hello from A* 5

==> Thread A* end!
6. Traitement des exceptions pour thread
La méthode Thread.setDefaultUncaughtExceptionHandler() établit les paramèttres de gestion par défaut lorsqu'un thread se termine brusquement à cause d'une exception non intercaptée, alors qu'il n'y aucun autre traitement défini pour ce flux.
ThreadExceptionDemo.java
package org.o7planning.tutorial.thread.exception;

import java.util.Random;

public class ThreadExceptionDemo {

   public static class RunnableTest implements Runnable {

       @Override
       public void run() {
           System.out.println("Thread running ..");

           while (true) {
               Random r = new Random();

               // A random number from 0-99
               int i = r.nextInt(100);
               System.out.println("Next value " + i);

               try {
                   Thread.sleep(2000);
               } catch (InterruptedException e) {
               }

               if (i > 70) {
                    // Simulate an exception was not handled in the thread.
                   throw new RuntimeException("Have a problem...");
               }
           }
       }

   }

   public static void main(String[] args) {
       System.out.println("==> Main thread running...");

       Thread thread = new Thread(new RunnableTest());
       Thread.setDefaultUncaughtExceptionHandler(new Thread.UncaughtExceptionHandler() {

           @Override
           public void uncaughtException(Thread t, Throwable e) {
               System.out.println("#Thread: " + t);
               System.out.println("#Thread exception message: " + e.getMessage());
           }
       });

       thread.start();
       System.out.println("==> Main thread end...");
   }

}
Le résultat de l'exécution de l'exemple:
==> Main thread running...
==> Main thread end...
Thread running ..
Next value 21
Next value 42
Next value 67
Next value 18
Next value 34
Next value 40
Next value 11
Next value 1
Next value 92
#Thread: Thread[Thread-0,5,main]
#Thread exception message: Have a problem...
7. L'utilisation de yield()
Théoriquement, "yield" signifie donner, abandonner , se rendre. Un flux yield indique à la machine virtuelle qu'il est prêt pour d'autres thread qui sont prévus à sa place. Cela signifie qu'il ne fait pas de grand-chose importante. Notez qu'il est une seule suggestion, cependant, et elle ne garantit pas du tout de causer la moindre effets.
yield() a été défini comme ci-dessous dans Thread.java
yield() a été défini comme ci-dessous dans Thread.java
public static native void yield();so, yield() method is used when you see that thread is free, it's not doing anything important, it suggests operating system give priority temporarily to the other thread.
The example below, there are two threads, each thread print out a text 100K times (the numbers are large enough to see the difference). One thread is the highest priority, and other thread is lowest priority. See completion time of 2 threads.
YieldThreadExample.java
package org.o7planning.tutorial.thread.yield;

import java.util.Date;

public class YieldThreadExample {

	private static Date importantEndTime;
	private static Date unImportantEndTime;

	public static void main(String[] args) {
		importantEndTime = new Date();
		unImportantEndTime = new Date();

		System.out.println("Create thread 1");

		Thread importantThread = new ImportantThread();

		// Set the highest priority for this thread.
		importantThread.setPriority(Thread.MAX_PRIORITY);

		System.out.println("Create thread 2");

		Thread unImportantThread = new UnImportantThread();

		// Set the lowest priority for this thread.
		unImportantThread.setPriority(Thread.MIN_PRIORITY);

		// Start threads.
		unImportantThread.start();
		importantThread.start();

	}

	// A important job which requires high priority.
	static class ImportantThread extends Thread {

		@Override
		public void run() {
			for (int i = 0; i < 100000; i++) {
				System.out.println("\n Important work " + i);

				// Notifying the operating system,
				// this thread gives priority to other threads.
				Thread.yield();
			}

			// The end time of this thread.
			importantEndTime = new Date();
			printTime();
		}

	}

	static class UnImportantThread extends Thread {
		@Override
		public void run() {
			for (int i = 0; i < 100000; i++) {
				System.out.println("\n  -- UnImportant work " + i);
			}
			// The end time of this thread.
			unImportantEndTime = new Date();
			printTime();
		}
	}

	private static void printTime() {
		// Interval (Milliseconds)
		long interval = unImportantEndTime.getTime() - importantEndTime.getTime();

		System.out.println("UnImportant Thread - Important Thread = " //
				+ interval + " milliseconds");
	}

}
The result: the lower priority thread has completed the task 51 milliseconds faster than the thread with higher priority.
...

 Important work 99995

 Important work 99996

 Important work 99997

 Important work 99998

 Important work 99999
UnImportant Thread - Important Thread = -269 millisecondsJava Basic
- Personnaliser le compilateur Java pour traiter votre annotation (Annotation Processing Tool)
- Programmation Java pour l'équipe utilisant Eclipse et SVN
- Le Tutoriel de Java WeakReference
- Le Tutoriel de Java PhantomReference
- Tutoriel sur la compression et la décompression Java
- Configuration d'Eclipse pour utiliser le JDK au lieu de JRE
- Méthodes Java String.format() et printf()
- Syntaxe et nouvelles fonctionnalités de Java 8
- Expression régulière en Java
- Tutoriel de programmation Java multithreading
- Bibliothèques de pilotes JDBC pour différents types de bases de données en Java
- Tutoriel Java JDBC
- Obtenir des valeurs de colonne automatiquement incrémentées lors de l'insertion d'un enregistrement à l'aide de JDBC
- Le Tutoriel de Java Stream
- Le Tutoriel de Java Functional Interface
- Introduction à Raspberry Pi
- Le Tutoriel de Java Predicate
- Classe abstraite et interface en Java
- Modificateurs d'accès en Java
- Le Tutoriel de Java Enum
- Le Tutoriel de Java Annotation
- Comparer et trier en Java
- Le Tutoriel de Java String, StringBuffer et StringBuilder
- Tutoriel de gestion des exceptions Java
- Le Tutoriel de Java Generics
- Manipulation de fichiers et de répertoires en Java
- Le Tutoriel de Java BiPredicate
- Le Tutoriel de Java Consumer
- Le Tutoriel de Java BiConsumer
- Qu'est-ce qui est nécessaire pour commencer avec Java?
- L'histoire de Java et la différence entre Oracle JDK et OpenJDK
- Installer Java sur Windows
- Installer Java sur Ubuntu
- Installer OpenJDK sur Ubuntu
- Installer Eclipse
- Installer Eclipse sur Ubuntu
- Le Tutoriel Java pour débutant
- Histoire des bits et des bytes en informatique
- Types de données dans Java
- Opérations sur les bits
- Le Tutoriel de instruction Java If else
- Le Tutoriel de instruction Java Switch
- Les Boucles en Java
- Les Tableaux (Array) en Java
- JDK Javadoc au format CHM
- Héritage et polymorphisme en Java
- Le Tutoriel de Java Function
- Le Tutoriel de Java BiFunction
- Exemple de Java encoding et decoding utilisant Apache Base64
- Le Tutoriel de Java Reflection
- Invocation de méthode à distance en Java
- Le Tutoriel de Java Socket
- Quelle plate-forme devez-vous choisir pour développer des applications de bureau Java?
- Le Tutoriel de Java Commons IO
- Le Tutoriel de Java Commons Email
- Le Tutoriel de Java Commons Logging
- Comprendre Java System.identityHashCode, Object.hashCode et Object.equals
- Le Tutoriel de Java SoftReference
- Le Tutoriel de Java Supplier
- Programmation orientée aspect Java avec AspectJ (AOP)
Show More
- Tutoriels de programmation Java Servlet/JSP
- Tutoriels de Java Collections Framework
- Tutoriels Java API pour HTML & XML
- Tutoriels Java IO
- Tutoriels Java Date Time
- Tutoriels Spring Boot
- Tutoriels Maven
- Tutoriels Gradle
- Tutoriels Java Web Service
- Tutoriels de programmation Java SWT
- Tutoriels de JavaFX
- Tutoriels Java Oracle ADF
- Tutoriels Struts2
- Tutoriels Spring Cloud