Le Tutoriel de Java SWT Button
1. SWT Button
JavaFX Button permet aux développeurs de traiter une action lorsqu'un utilisateur clique sur un bouton. La classe Button est étendue de la classe Control. Elle peut afficher un texte, une image et tous les deux.

2. Exemple de Button
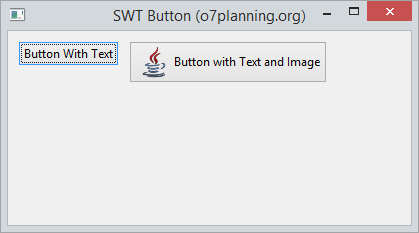
Créez un Button avec Texte, ou Image ou bien tous les deux.

// Button 1
final Button button1 = new Button(shell, SWT.NONE);
button1.setText("Button With Text");

// Button 2
final Button button2 = new Button(shell, SWT.NONE);
button2.setText("Button with Text and Image");

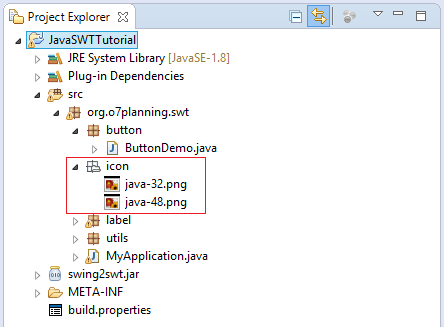
InputStream input = ButtonDemo.class.getResourceAsStream("/org/o7planning/swt/icon/java-32.png");
Image image = new Image(null, input);
button2.setImage(image);
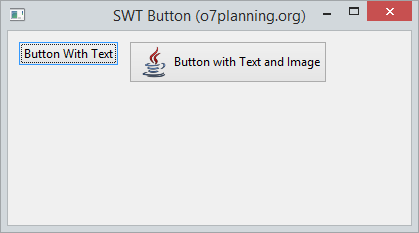
Voyez l'exemple complet:

ButtonDemo.java
package org.o7planning.swt.button;

import java.io.InputStream;

import org.eclipse.swt.SWT;
import org.eclipse.swt.graphics.Image;
import org.eclipse.swt.layout.RowLayout;
import org.eclipse.swt.widgets.Button;
import org.eclipse.swt.widgets.Display;
import org.eclipse.swt.widgets.Shell;

public class ButtonDemo {
   public static void main(String[] args) {
       Display display = new Display();
       Shell shell = new Shell(display);
       shell.setText("SWT Button (o7planning.org)");
       shell.setSize(400, 250);

       RowLayout rowLayout = new RowLayout();
       rowLayout.spacing = 10;
       rowLayout.marginLeft = 10;
       rowLayout.marginTop = 10;
       shell.setLayout(rowLayout);

       // Button 1
       final Button button1 = new Button(shell, SWT.NONE);
       button1.setText("Button With Text");
       // Button 2
       final Button button2 = new Button(shell, SWT.NONE);
       button2.setText("Button with Text and Image");

       InputStream input
          = ButtonDemo.class.getResourceAsStream("/org/o7planning/swt/icon/java-32.png");
       Image image = new Image(null, input);
       button2.setImage(image);
       shell.open();
       while (!shell.isDisposed()) {
           if (!display.readAndDispatch())
               display.sleep();
       }
       display.dispose();
   }
}
3. Button et des événements
La fonction principale de chaque bouton est de produire une action lorsqu'il est cliqué. Utilisez la méthode addSelectionListener de la classe Button pour définir ce qui se passera quand un utilisateur clique sur ce bouton.
// Handling when users click the button.
button.addSelectionListener(new SelectionAdapter() {
   @Override
   public void widgetSelected(SelectionEvent arg0) {
       Date now = new Date();
       label.setText(now.toString());
       // Causes the receiver to be resized to its preferred size.
       label.pack();
   }
});
// OR
// Handling when users click the button.
button.addSelectionListener(new SelectionListener() {
   @Override
   public void widgetSelected(SelectionEvent arg0) {
       Date now = new Date();
       label.setText(now.toString());
       label.pack();
   }
   @Override
   public void widgetDefaultSelected(SelectionEvent arg0) {
       System.out.println("Ignore this method!");
   }
});
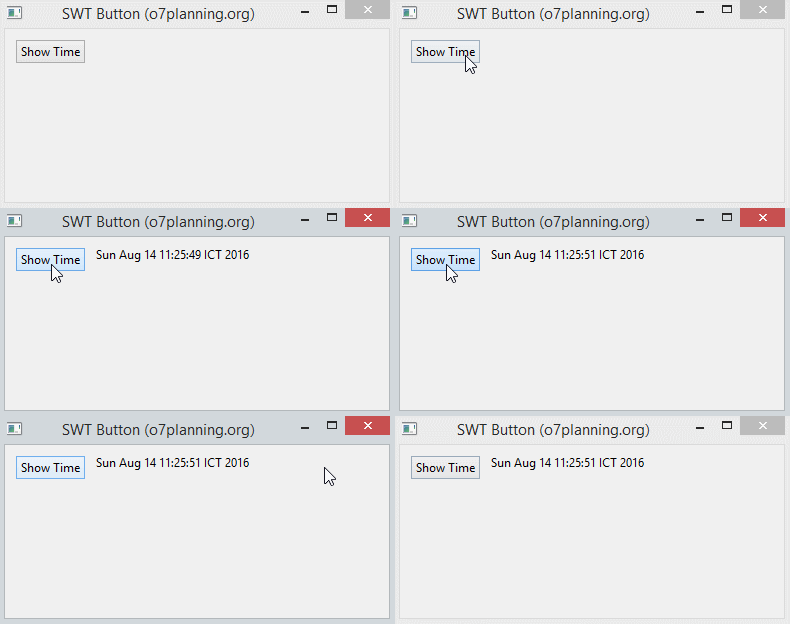
Par exemple, une gestion d'action se produit avec Button.
ButtonEventDemo.java
package org.o7planning.swt.button;

import java.util.Date;
import org.eclipse.swt.SWT;
import org.eclipse.swt.events.SelectionAdapter;
import org.eclipse.swt.events.SelectionEvent;
import org.eclipse.swt.layout.RowLayout;
import org.eclipse.swt.widgets.Button;
import org.eclipse.swt.widgets.Display;
import org.eclipse.swt.widgets.Label;
import org.eclipse.swt.widgets.Shell;

public class ButtonEventDemo {
    public static void main(String[] args) {
        Display display = new Display();
        Shell shell = new Shell(display);
        shell.setText("SWT Button (o7planning.org)");
        shell.setSize(400, 250);

        RowLayout rowLayout = new RowLayout();
        rowLayout.spacing = 10;
        rowLayout.marginLeft = 10;
        rowLayout.marginTop = 10;
        shell.setLayout(rowLayout);

        // Button
        final Button button = new Button(shell, SWT.NONE);
        button.setText("Show Time");
        // Label
        final Label label = new Label(shell, SWT.NONE);
        label.setText("");
        // Handling when users click the button.
        button.addSelectionListener(new SelectionAdapter() {
            @Override
            public void widgetSelected(SelectionEvent arg0) {
                Date now = new Date();
                label.setText(now.toString());
                // Causes the receiver to be resized to its preferred size.
                label.pack();
            }
        });
        shell.open();
        while (!shell.isDisposed()) {
            if (!display.readAndDispatch())
                display.sleep();
        }
        display.dispose();
    }
}
Exécution de l'exemple:

4. Button Style
Lors de la création un Button vous pouvez spécifier son style (Style):
Sample
// Style for Button
int style = SWT.PUSH | SWT.LEFT;
int sytle = SWT.ARROW | SWT.LEFT;

// Create a Button with style.
Button button = new Button(parent, style);
Voici est le style qui peut être appliqué au Button:
- Utilisez une des constantes: SWT.LEFT, SWT.CENTER, hoặc SWT.RIGHT
- Utilisez une des constantes: SWT.ARROW, SWT.CHECK, SWT.PUSH, SWT.RADIO, hoặc SWT.TOGGLE..
- Si vous utilisez de SWT.ARROW vous pouvez combiner avec une des constantes SWT.UP, SWT.DOWN, SWT.LEFT, ou SWT.RIGHT afin de déterminer la direction de la flèche.
Style | Description |
SWT.CHECK
| Crée un CheckBox |
SWT.PUSH
| Crée un bouton poussoir (Push Button) |
SWT.RADIO
| Crée un boutton radio |
SWT.TOGGLE
| Crée un bouton-poussoir qui préserve son état poussé ou non poussé. |
SWT.FLAT
| Crée un bouton-poussoir qui apparaît à plat (Flat) |
SWT.ARROW
| Crée un bouton-poussoir qui affiche une flèche. |
SWT.UP | Lorsqu'il est combiné avec SWT.ARROW, il affiche une flèche pointant vers le haut. |
SWT.DOWN | Lorsqu'il est combiné avec SWT.ARROW, il affiche une flèche pointant vers le bas. |
SWT.CENTER | Centre le texte associé. |
SWT.LEFT | Aligne le texte associé à gauche. Lorsqu'il est combiné avec SWT.ARROW, il affiche une flèche vers la gauche. |
SWT.RIGHT | Aligne le texte associé à droite. Lorsqu'il est combiné avec SWT.ARROW, il affiche une flèche pointant vers la droite |
Tutoriels de programmation Java SWT
- Le Tutoriel de Java SWT FillLayout
- Le Tutoriel de Java SWT RowLayout
- Le Tutorial de Java SWT SashForm
- Le Tutoriel de Java SWT Label
- Le Tutoriel de Java SWT Button
- Le Tutoriel de Java SWT Toggle Button
- Le Tutoriel de Java SWT Radio Button
- Le Tutoriel de Java SWT Text
- Le Tutoriel de Java SWT Password Field
- Le Tutoriel de Java SWT Link
- Programmation de l'application Java Desktop à l'aide de SWT
- Le Tutoriel de Java SWT Combo
- Le Tutoriel de Java SWT Spinner
- Le Tutoriel de Java SWT Slider
- Le Tutoriel de Java SWT Scale
- Le Tutoriel de Java SWT ProgressBar
- Le Tutoriel de Java SWT TabFolder et CTabFolder
- Le Tutoriel de Java SWT List
Show More