Utiliser Template dans Spring MVC avec ApacheTiles

1. Introduction
Ce guide a été rédigé en fonction de:
- Eclipse 4.6 NEON(ok for Eclipse 4.5 MARS)
- Spring MVC 4.x
- Apache Tiles 3.x
2. Qu'est ce qu'Apache Tiles?

Apache Titles s'est inspiré en arrangeant les carreaux ensemble pour faire le toit.
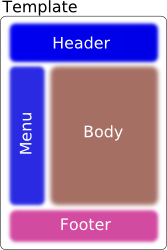
Votre page web est également considérée comme un toit, elle est assemblée à partir des carreaux, un carreau ici est un fichier jsp (jsp fragment). Apache Titles vous aident à définir un modèle (Template) pour assortir les composants (jsp fragments) pour former un Web.
Votre page web est également considérée comme un toit, elle est assemblée à partir des carreaux, un carreau ici est un fichier jsp (jsp fragment). Apache Titles vous aident à définir un modèle (Template) pour assortir les composants (jsp fragments) pour former un Web.
Voir l'illustration du modèle:
classic.jsp
<%@ taglib uri="http://tiles.apache.org/tags-tiles" prefix="tiles"%>
<html>
<head>
<title><tiles:getAsString name="title" /></title>
</head>

<body>
    <table width="100%">
        <tr>
            <td colspan="2">
                <tiles:insertAttribute name="header" />
            </td>
        </tr>
        <tr>
            <td width="20%" nowrap="nowrap">
                 <tiles:insertAttribute name="menu" />
             </td>
            <td width="80%">
                 <tiles:insertAttribute name="body" />
             </td>
        </tr>
        <tr>
            <td colspan="2">
                 <tiles:insertAttribute name="footer" />
            </td>
        </tr>
    </table>
</body>
</html>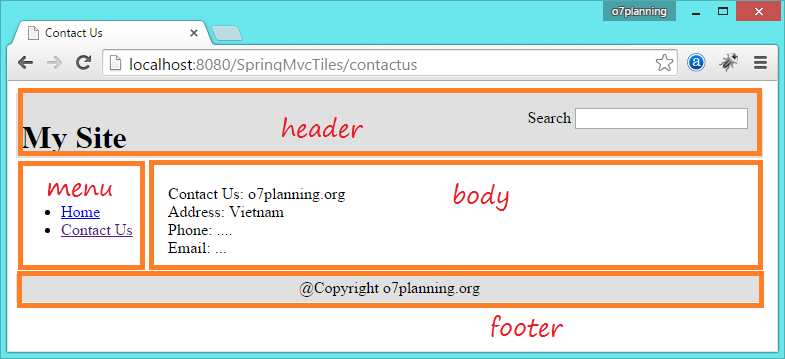
4. Créer le projet Maven
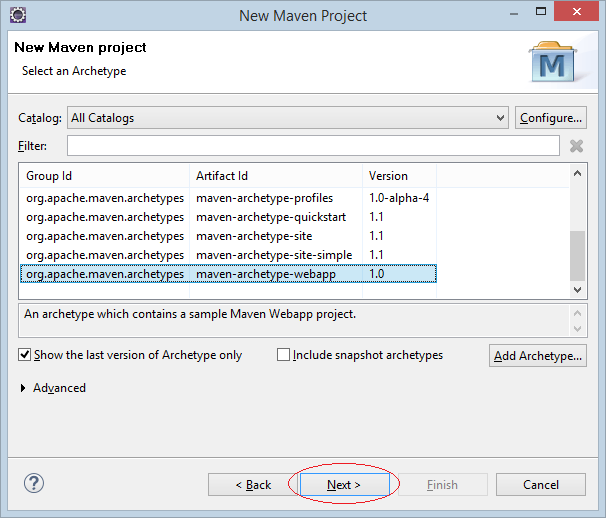
Dans Eclipse sélectionnez
- File/New/Other...
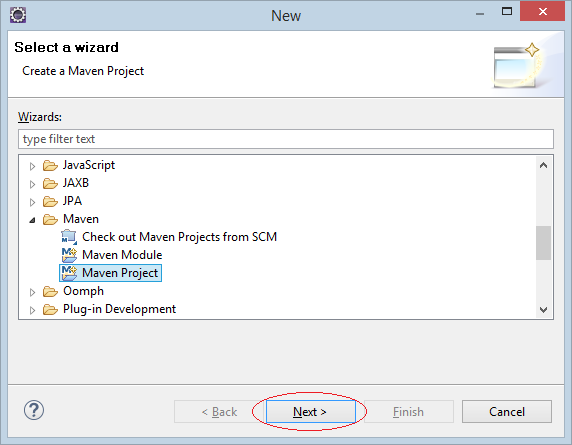
Sélectionnez l'archétype (archetype) "maven-archetype-webapp".
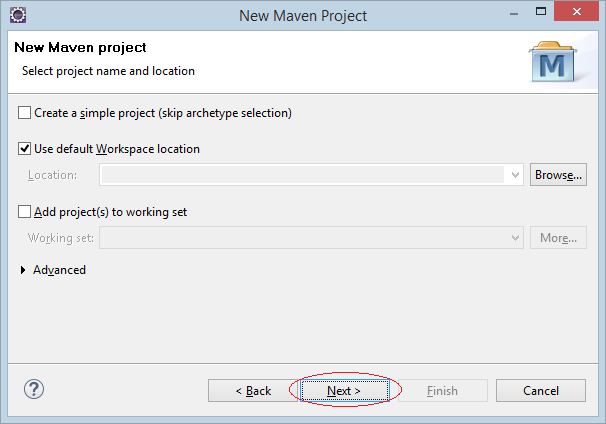
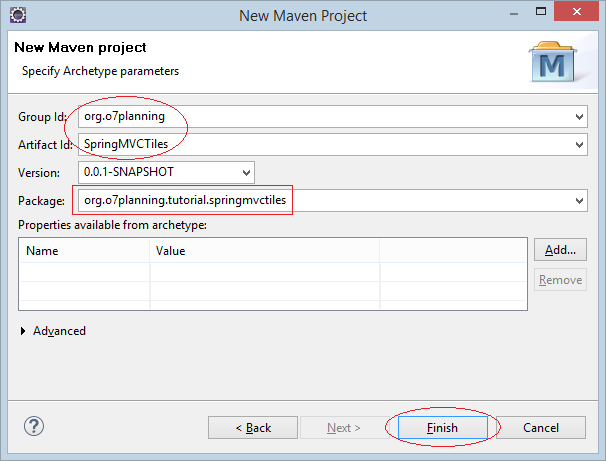
Saisissez:
- Group Id: org.o7planning
- Artifact Id: SpringMVCTiles
- Package: org.o7planning.tutorial.springmvctiles
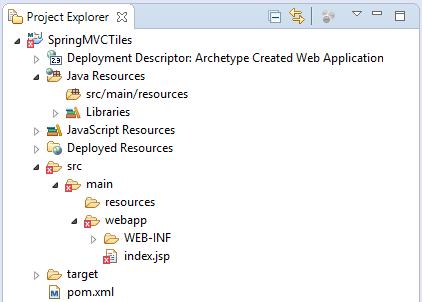
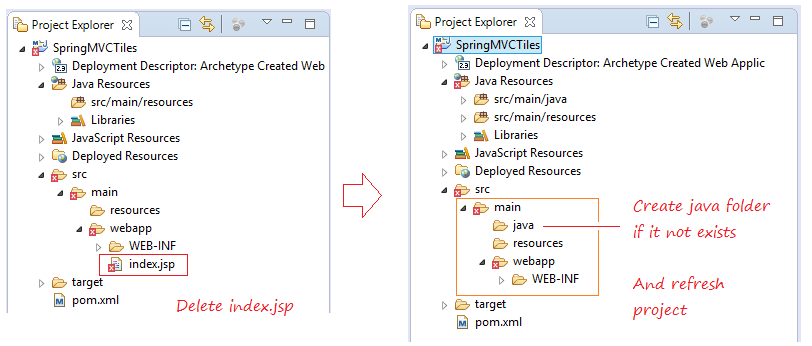
C'est la structure du projet qui est créé:
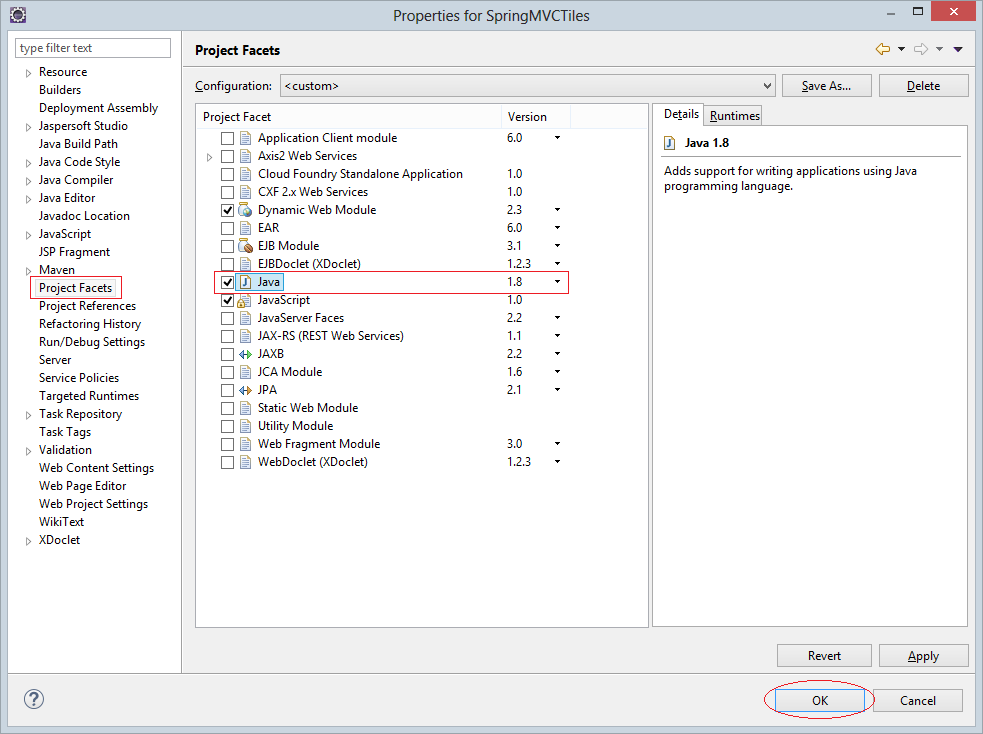
Assurez- vous que vous utilisez Java >= 6.
Project properties:
Ne vous inquiétez pas du message d'erreur lorsque le projet a été créé. La raison en est que vous ne déclarez pas la bibliothèque Servlet.
Eclipse crée la structure du projet Maven peut être fausse. Vous devez le réparer.
5. Déclarer maven & web.xml
Assurez- vous que vous utilisez Servlet API >= 3
web.xml
<?xml version="1.0" encoding="UTF-8"?>
<web-app xmlns:xsi="http://www.w3.org/2001/XMLSchema-instance"
   xmlns="http://java.sun.com/xml/ns/javaee"
   xsi:schemaLocation="http://java.sun.com/xml/ns/javaee
    http://java.sun.com/xml/ns/javaee/web-app_3_0.xsd"
   id="WebApp_ID" version="3.0">

   <display-name>SpringMVCTiles</display-name>

</web-app>
pom.xml
<project xmlns="http://maven.apache.org/POM/4.0.0"
    xmlns:xsi="http://www.w3.org/2001/XMLSchema-instance"
    xsi:schemaLocation="http://maven.apache.org/POM/4.0.0
             http://maven.apache.org/maven-v4_0_0.xsd">

    <modelVersion>4.0.0</modelVersion>
    <groupId>org.o7planning</groupId>
    <artifactId>SpringMVCTiles</artifactId>
    <packaging>war</packaging>
    <version>0.0.1-SNAPSHOT</version>
    <name>SpringMVCTiles Maven Webapp</name>
    <url>http://maven.apache.org</url>


    <dependencies>

        <dependency>
            <groupId>junit</groupId>
            <artifactId>junit</artifactId>
            <version>3.8.1</version>
            <scope>test</scope>
        </dependency>

        <!-- Servlet Library -->
        <!-- http://mvnrepository.com/artifact/javax.servlet/javax.servlet-api -->
        <dependency>
            <groupId>javax.servlet</groupId>
            <artifactId>javax.servlet-api</artifactId>
            <version>3.1.0</version>
            <scope>provided</scope>
        </dependency>

        <!-- JSP API -->
        <!-- http://mvnrepository.com/artifact/javax.servlet.jsp/jsp-api -->
        <dependency>
            <groupId>javax.servlet.jsp</groupId>
            <artifactId>jsp-api</artifactId>
            <version>2.2</version>
            <scope>provided</scope>
        </dependency>


        <!-- Servlet JSP JSTL API -->
        <!-- http://mvnrepository.com/artifact/javax.servlet.jsp.jstl/javax.servlet.jsp.jstl-api -->

        <dependency>
            <groupId>javax.servlet.jsp.jstl</groupId>
            <artifactId>javax.servlet.jsp.jstl-api</artifactId>
            <version>1.2.1</version>
        </dependency>


        <!-- Spring dependencies -->
        <!-- http://mvnrepository.com/artifact/org.springframework/spring-core -->
        <dependency>
            <groupId>org.springframework</groupId>
            <artifactId>spring-core</artifactId>
            <version>4.3.3.RELEASE</version>
        </dependency>

        <!-- http://mvnrepository.com/artifact/org.springframework/spring-web -->
        <dependency>
            <groupId>org.springframework</groupId>
            <artifactId>spring-web</artifactId>
            <version>4.3.3.RELEASE</version>
        </dependency>

        <!-- http://mvnrepository.com/artifact/org.springframework/spring-webmvc -->
        <dependency>
            <groupId>org.springframework</groupId>
            <artifactId>spring-webmvc</artifactId>
            <version>4.3.3.RELEASE</version>
        </dependency>

        <!-- Tiles API -->
        <!-- http://mvnrepository.com/artifact/org.apache.tiles/tiles-api -->
        <dependency>
            <groupId>org.apache.tiles</groupId>
            <artifactId>tiles-api</artifactId>
            <version>3.0.7</version>
        </dependency>


        <!-- Tiles Core -->
        <!-- http://mvnrepository.com/artifact/org.apache.tiles/tiles-core -->
        <dependency>
            <groupId>org.apache.tiles</groupId>
            <artifactId>tiles-core</artifactId>
            <version>3.0.7</version>
        </dependency>

        <!-- Tiles Servlet -->
        <!-- http://mvnrepository.com/artifact/org.apache.tiles/tiles-servlet -->
        <dependency>
            <groupId>org.apache.tiles</groupId>
            <artifactId>tiles-servlet</artifactId>
            <version>3.0.7</version>
        </dependency>

        <!-- Tiles JSP -->
        <!-- http://mvnrepository.com/artifact/org.apache.tiles/tiles-jsp -->
        <dependency>
            <groupId>org.apache.tiles</groupId>
            <artifactId>tiles-jsp</artifactId>
            <version>3.0.7</version>
        </dependency>

    </dependencies>


    <build>
        <finalName>SpringMVCTiles</finalName>
        <plugins>
            <plugin>
                <groupId>org.apache.maven.plugins</groupId>
                <artifactId>maven-compiler-plugin</artifactId>
                <version>3.3</version>
                <!-- Must update Maven Project -->
                <configuration>
                    <source>1.8</source>
                    <target>1.8</target>
                </configuration>
            </plugin>
            <!-- Config: Maven Tomcat Plugin -->
            <!-- http://mvnrepository.com/artifact/org.apache.tomcat.maven/tomcat7-maven-plugin -->
            <plugin>
                <groupId>org.apache.tomcat.maven</groupId>
                <artifactId>tomcat7-maven-plugin</artifactId>
                <version>2.2</version>
                <!-- Config: contextPath and Port (Default - /SpringMVCTiles : 8080) -->
                <!--
                     <configuration>
                         <path>/</path>
                         <port>8899</port>
                     </configuration>
                -->
            </plugin>
        </plugins>
    </build>
</project>
6. Configurer Spring MVC
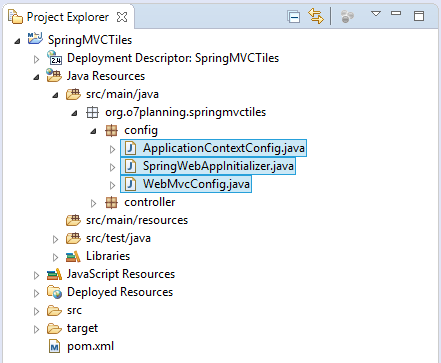
SpringWebAppInitializer.java
package org.o7planning.springmvctiles.config;

import javax.servlet.FilterRegistration;
import javax.servlet.ServletContext;
import javax.servlet.ServletException;
import javax.servlet.ServletRegistration;

import org.springframework.web.WebApplicationInitializer;
import org.springframework.web.context.support.AnnotationConfigWebApplicationContext;
import org.springframework.web.filter.CharacterEncodingFilter;
import org.springframework.web.servlet.DispatcherServlet;

public class SpringWebAppInitializer implements WebApplicationInitializer {

    @Override
    public void onStartup(ServletContext servletContext) throws ServletException {
        AnnotationConfigWebApplicationContext appContext = new AnnotationConfigWebApplicationContext();
        appContext.register(ApplicationContextConfig.class);

        ServletRegistration.Dynamic dispatcher = servletContext.addServlet("SpringDispatcher",
                new DispatcherServlet(appContext));
        dispatcher.setLoadOnStartup(1);
        dispatcher.addMapping("/");

        // UtF8 Charactor Filter.
        FilterRegistration.Dynamic fr = servletContext.addFilter("encodingFilter", CharacterEncodingFilter.class);

        fr.setInitParameter("encoding", "UTF-8");
        fr.setInitParameter("forceEncoding", "true");
        fr.addMappingForUrlPatterns(null, true, "/*");
    }

}
Si vous voulez String interagir avec Apache Titles vous devez déclarer deux Spring BEAN qui sont viewResolver et tilesConfigurer.
ApplicationContextConfig.java
package org.o7planning.springmvctiles.config;

import org.springframework.context.annotation.Bean;
import org.springframework.context.annotation.ComponentScan;
import org.springframework.context.annotation.Configuration;
import org.springframework.web.servlet.ViewResolver;
import org.springframework.web.servlet.view.UrlBasedViewResolver;
import org.springframework.web.servlet.view.tiles3.TilesConfigurer;
import org.springframework.web.servlet.view.tiles3.TilesView;

@Configuration
@ComponentScan("org.o7planning.springmvctiles.*")
public class ApplicationContextConfig {

    @Bean(name = "viewResolver")
    public ViewResolver getViewResolver() {
        UrlBasedViewResolver viewResolver = new UrlBasedViewResolver();

        // TilesView 3
        viewResolver.setViewClass(TilesView.class);

        return viewResolver;
    }

    @Bean(name = "tilesConfigurer")
    public TilesConfigurer getTilesConfigurer() {
        TilesConfigurer tilesConfigurer = new TilesConfigurer();

        // TilesView 3
        tilesConfigurer.setDefinitions("/WEB-INF/tiles.xml");

        return tilesConfigurer;
    }

}
WebMvcConfig.java
package org.o7planning.springmvctiles.config;

import org.springframework.context.annotation.Configuration;
import org.springframework.web.servlet.config.annotation.DefaultServletHandlerConfigurer;
import org.springframework.web.servlet.config.annotation.EnableWebMvc;
import org.springframework.web.servlet.config.annotation.ResourceHandlerRegistry;
import org.springframework.web.servlet.config.annotation.WebMvcConfigurerAdapter;

@Configuration
@EnableWebMvc
public class WebMvcConfig extends WebMvcConfigurerAdapter {


    @Override
    public void addResourceHandlers(ResourceHandlerRegistry registry) {

        // Default..
    }

    @Override
    public void configureDefaultServletHandling(DefaultServletHandlerConfigurer configurer) {
        configurer.enable();
    }


}
7. La configuration d'Apache Tiles
tiles.xml définit les pages complètes. Une page complète est faite par différents fragments jsp.
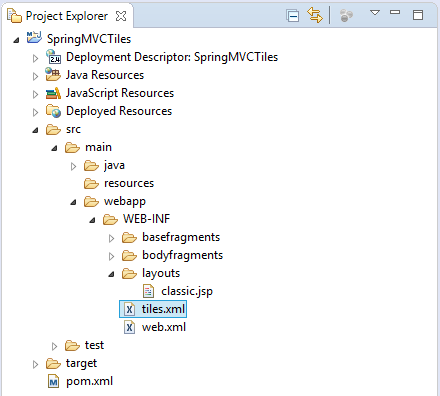
/WEB-INF/tiles.xml
<?xml version="1.0" encoding="UTF-8" ?>
<!DOCTYPE tiles-definitions PUBLIC
      "-//Apache Software Foundation//DTD Tiles Configuration 3.0//EN"
      "http://tiles.apache.org/dtds/tiles-config_3_0.dtd">
<tiles-definitions>

   <!-- Base Define -->
   <definition name="base.definition"
       template="/WEB-INF/layouts/classic.jsp">
       <put-attribute name="title" value="" />
       <put-attribute name="header" value="/WEB-INF/basefragments/_header.jsp" />
       <put-attribute name="menu" value="/WEB-INF/basefragments/_menu.jsp" />
       <put-attribute name="body" value="" />
       <put-attribute name="footer" value="/WEB-INF/basefragments/_footer.jsp" />
   </definition>

   <!-- Home Page -->
   <definition name="homePage" extends="base.definition">
       <put-attribute name="title" value="Home Page" />
       <put-attribute name="body" value="/WEB-INF/bodyfragments/_home.jsp" />
   </definition>

   <!-- ContactUs Page -->
   <definition name="contactusPage" extends="base.definition">
       <put-attribute name="title" value="Contact Us" />
       <put-attribute name="body" value="/WEB-INF/bodyfragments/_contactus.jsp" />
   </definition>


</tiles-definitions>
8. Tiles Layout
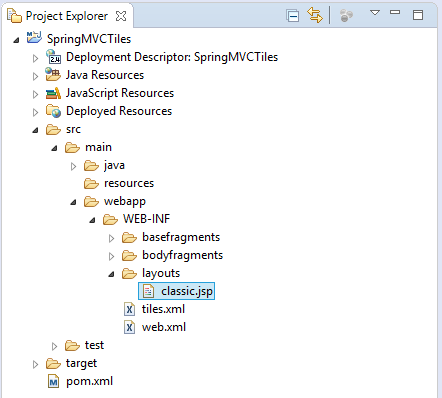

/WEB-INF/layouts/classic.jsp
<%@ taglib uri="http://tiles.apache.org/tags-tiles" prefix="tiles"%>
<html>
<head>
<title><tiles:getAsString name="title" /></title>
</head>

<body>
    <table width="100%">
        <tr>
            <td colspan="2">
                <tiles:insertAttribute name="header" />
            </td>
        </tr>
        <tr>
            <td width="20%" nowrap="nowrap">
                 <tiles:insertAttribute name="menu" />
             </td>
            <td width="80%">
                 <tiles:insertAttribute name="body" />
             </td>
        </tr>
        <tr>
            <td colspan="2">
                 <tiles:insertAttribute name="footer" />
            </td>
        </tr>
    </table>
</body>
</html>
9. JSP Fragments
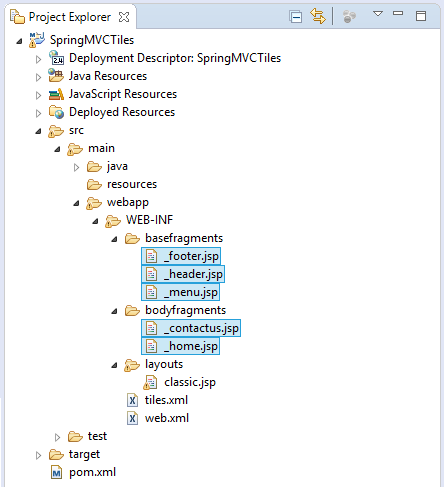
_header.jsp
<div style="background: #E0E0E0; height: 55px; padding: 5px;">
  <div style="float: left">
     <h1>My Site</h1>
  </div>

  <div style="float: right; padding: 10px; text-align: right;">

     Search <input name="search">

  </div>

</div>
_menu.jsp
<div style="padding: 5px;">

   <ul>

       <li><a href="${pageContext.request.contextPath}/">Home</a></li>
       <li><a href="${pageContext.request.contextPath}/contactus">Contact Us</a></li>

   </ul>

</div>
_footer.jsp
<div
  style="background: #E0E0E0; text-align: center; padding: 5px; margin-top: 10px;">

  @Copyright o7planning.org

</div>
_home.jsp
<h2>Hi All</h2>

This is Home Page
_contactus.jsp
Contact Us: o7planning.org
<br>
Address: ${address}
<br>
Phone: ${phone}
<br>
Email: ${email}
10. Spring MVC Controller
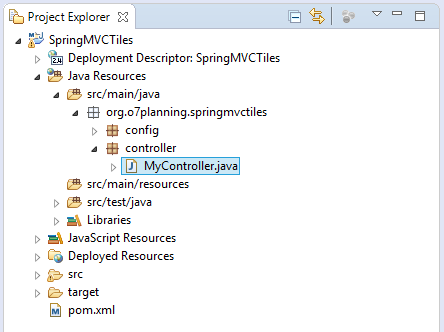
MyController.java
package org.o7planning.springmvctiles.controller;

import org.springframework.stereotype.Controller;
import org.springframework.ui.Model;
import org.springframework.web.bind.annotation.RequestMapping;
import org.springframework.web.bind.annotation.RequestMethod;

@Controller
public class MyController {

    @RequestMapping(value = { "/", "/home" }, method = RequestMethod.GET)
    public String homePage(Model model) {
        return "homePage";
    }


    @RequestMapping(value = { "/contactus" }, method = RequestMethod.GET)
    public String contactusPage(Model model) {
        model.addAttribute("address", "Vietnam");
        model.addAttribute("phone", "...");
        model.addAttribute("email", "...");
        return "contactusPage";
    }

}
11. Exécuter de l'application
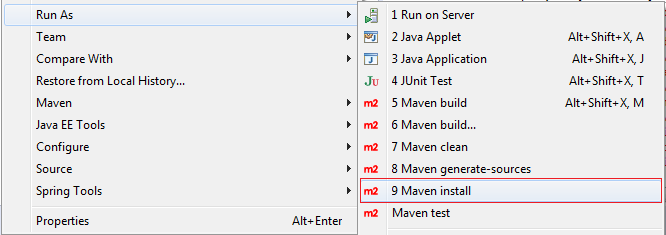
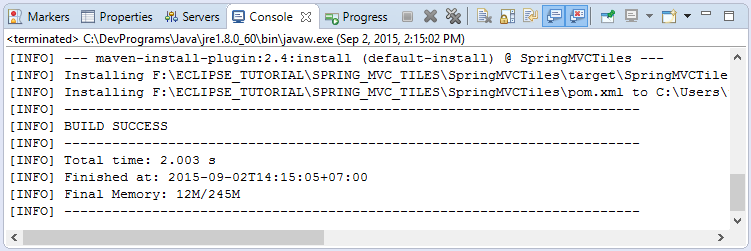
Dans le premier temps, avant d'exécuter l'application, vous devez build l'ensemble du projet.
Cliquez sur le bouton droit du projet et sélectionnez:
- Run As/Maven install
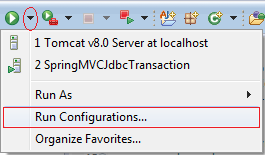
Des configuration pour exécuter des applications:

Saisissez:
- Name: Run SpringMVCTiles
- Base directory: ${workspace_loc:/SpringMVCTiles}
- Goals: tomcat7:run
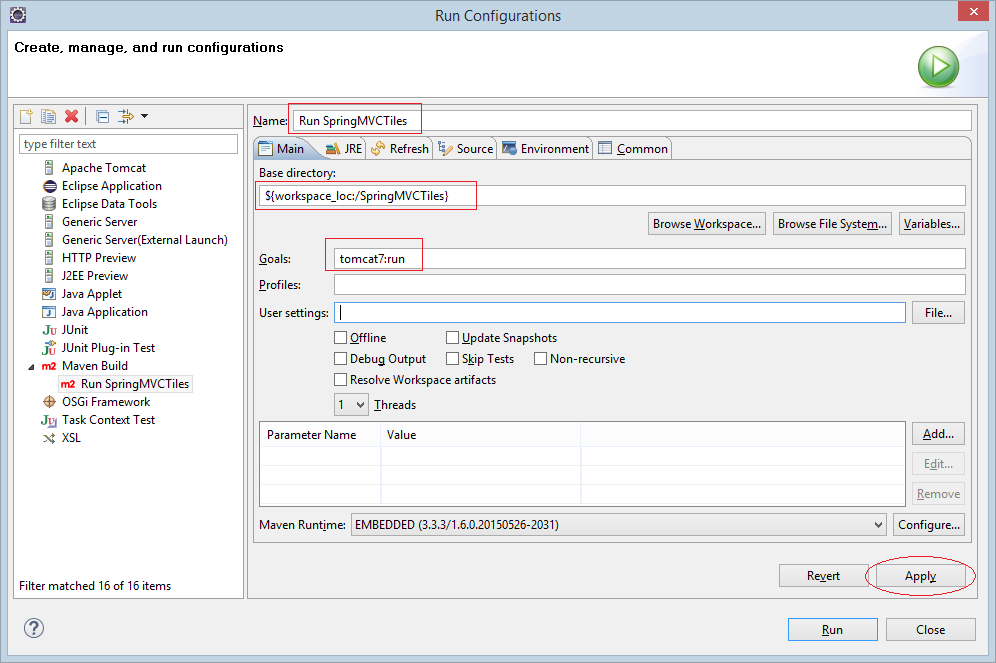
Cliquez sur Run pour exécuter:

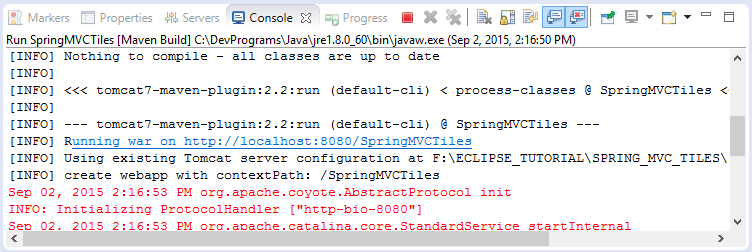
Dans la première exécution, le programme prendra quelques minutes, alors téléchargez la bibliothèque de tomcat plugin pour pouvoir l'exécuter.
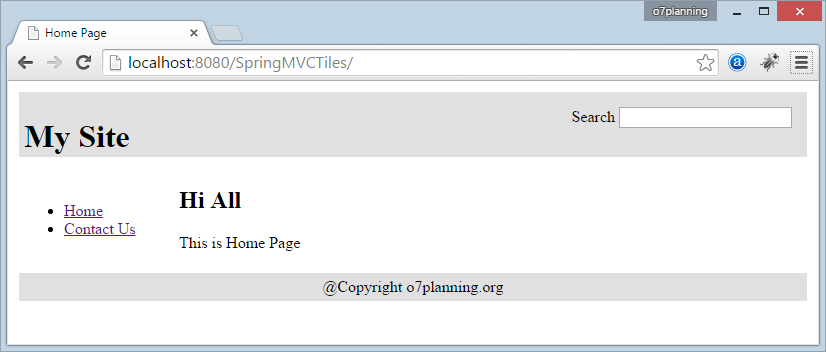
Tout était prêt:
Exécutez URL:
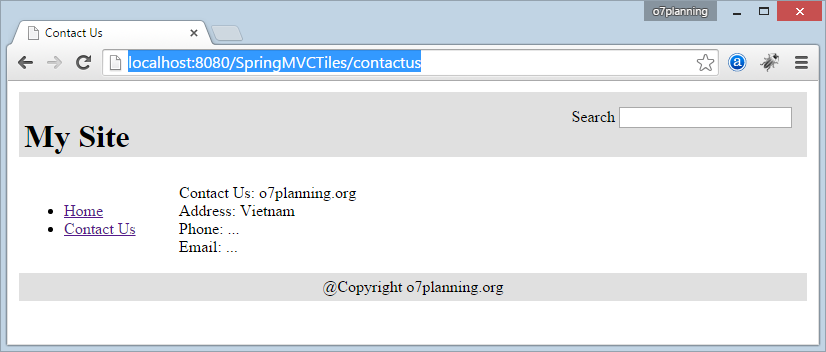
Tutoriels Spring MVC
- Le Tutoriel de Spring pour débutant
- Installer Spring Tool Suite pour Eclipse
- Configurer les ressources statiques dans Spring MVC
- Le Tutoriel de Spring MVC Interceptor
- Créer une application Web multilingue avec Spring MVC
- Le Tutoriel de File Download avec Spring MVC
- Simple login Java Web Application utilisant Spring MVC, Spring Security et Spring JDBC
- Application de connexion Java Web simple utilise Spring MVC, Spring Security et Spring JDBC
- Le Tutoriel de Spring MVC et FreeMarker
- Utiliser Template dans Spring MVC avec ApacheTiles
- Utiliser plusieurs DataSources dans Spring MVC
- Le Tutoriel de Spring MVC Form et Hibernate
- Exécuter des tâches planifiées en arrière-plan dans Spring
- Créer une application Web Java Shopping Cart en utilisant Spring MVC et Hibernate
- Exemple de CRUD simple avec Spring MVC RESTful Web Service
- Déployer Spring MVC sur Oracle WebLogic Server
Show More