Créer Eclipse RAP Widget à partir de ClientScripting widget
2. ClientScripting-Based Widget
Supposons que vous ayez un Widget écrit en JavaScript, vous souhaitez créer un RAP Widget basé sur le JavaScript widget ci-dessus. C'est tout à fait possible.
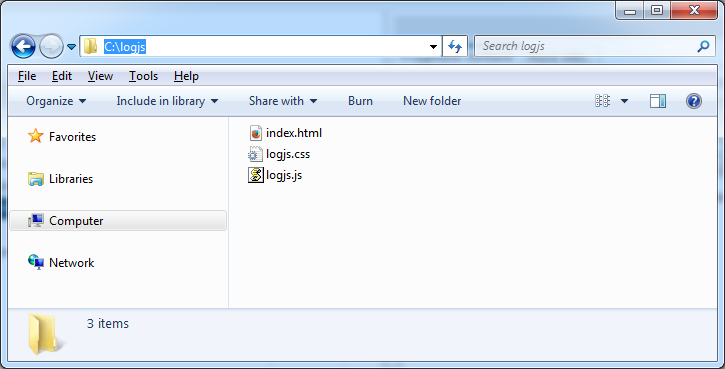
L'exemple LogJS est un widget écrit en javascript, il comprend 2 fichiers logjs.js & logjs.css. Notre objectif est de créer un widget sur RAP qui utilise LogJS.
L'exemple LogJS est un widget écrit en javascript, il comprend 2 fichiers logjs.js & logjs.css. Notre objectif est de créer un widget sur RAP qui utilise LogJS.
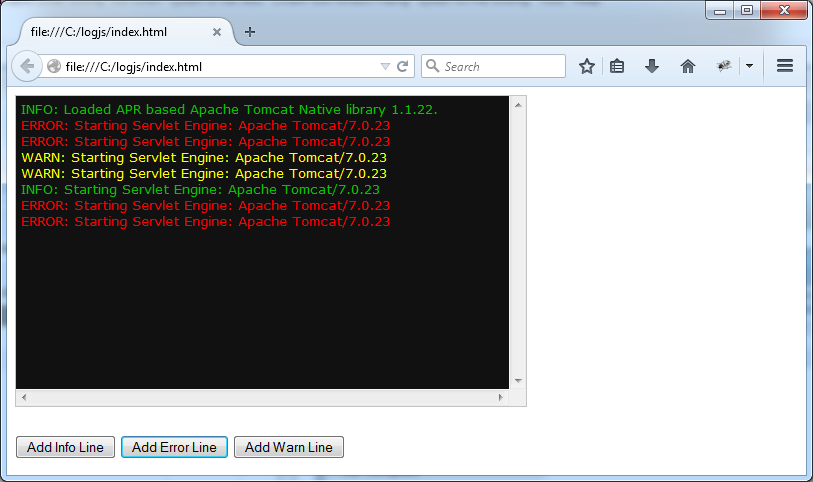
L'image de LogJS sur des pages html
logjs.js
function LogJS(element)  {

   this.div = document.createElement("div");
   this.div.className = 'logjs';

   element.appendChild(this.div);

   this.div.innerHTML = "<p>INFO: Loaded APR based Apache Tomcat Native library 1.1.22.</p>";


   this.appendInfo = function(text)  {
       this.div.innerHTML = this.div.innerHTML
        + "<p class='info'>INFO: "+ text +"</p>";
   };

   this.appendErr = function(text)  {
       this.div.innerHTML = this.div.innerHTML
        + "<p class='err'>ERROR: "+ text +"</p>";
   };

   this.appendWarn = function(text)  {
       this.div.innerHTML = this.div.innerHTML
        + "<p class='warn'>WARN: "+ text +"</p>";
   };

   this.clearAll = function()  {
       this.div.innerHTML = "";
   };
}
logjs.css
.logjs {
 width: 100%;
 height: 100%;
 margin: 0px;
 padding: 5px;
 border: 1px solid #C4C4C4;
 color: #0AC005;
 background-color: #111111;
 font: 13px Verdana, "Lucida Sans", Arial, Helvetica, sans-serif;
 white-space: nowrap;
 overflow-y: scroll;
 overflow-x: scroll;
}

.logjs p {
   margin: 0px;
   padding: 0px;
}

.logjs .info {

}

.logjs .err {
 color: red;
}

.logjs .warn {
 color: yellow;
}
index.html
<html>

<head>
 <script type="text/javascript" src="logjs.js"></script>
 <link rel="stylesheet" type="text/css" href="logjs.css" />
</head>
<body>


   <div id="logjs1" style="width: 500px; height: 300px;"></div>
   <br><br>
   <button onclick="appendInfo('Starting Servlet Engine: Apache Tomcat/7.0.23')">Add Info Line</button>
   <button onclick="appendErr('Starting Servlet Engine: Apache Tomcat/7.0.23')">Add Error Line</button>
   <button onclick="appendWarn('Starting Servlet Engine: Apache Tomcat/7.0.23')">Add Warn Line</button>


  <script type="text/javascript">
     var element = document.getElementById('logjs1');

     var logjs = new LogJS(element);

     function appendErr(text)  {
        logjs.appendErr(text);
     }
     function appendWarn(text)  {
        logjs.appendWarn(text);
     }

     function appendInfo(text)  {
        logjs.appendInfo(text);
     }
  </script>


</body>
</html>
3. RAPTarget
Tout d'abord, nous devons créer un projet pour configurer l'environnement RAP. Essentiellement, c'est la déclaration de la bibliothèque RAP.
Créez un Java project - RAPTarget.

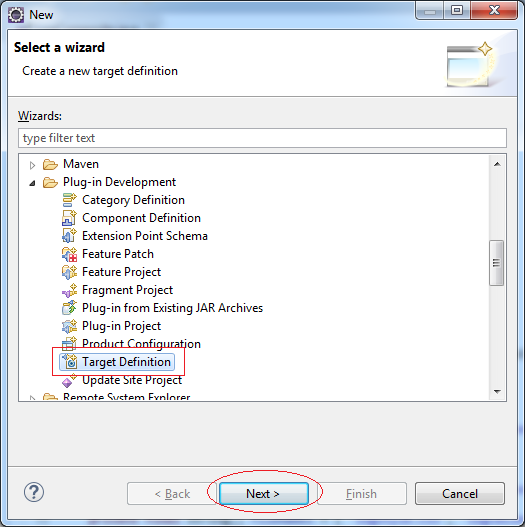
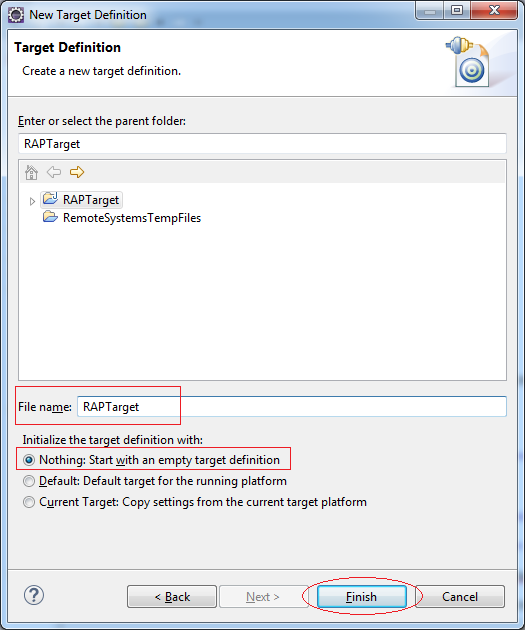
Create file "Target Define"
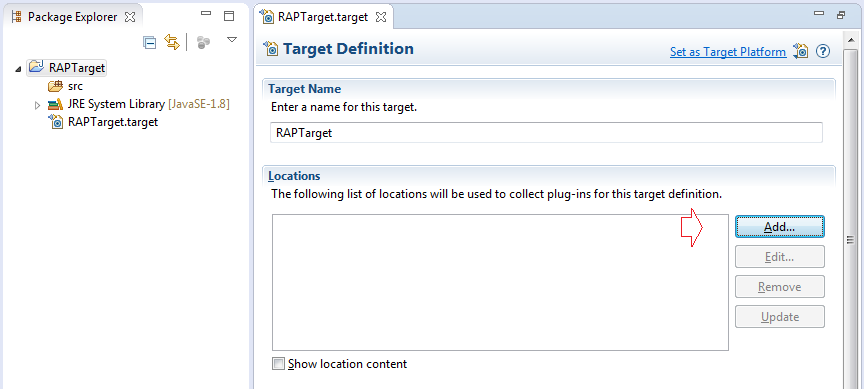
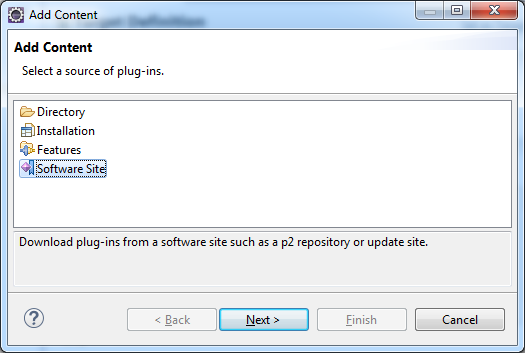
Ajoutez la bibliothèque
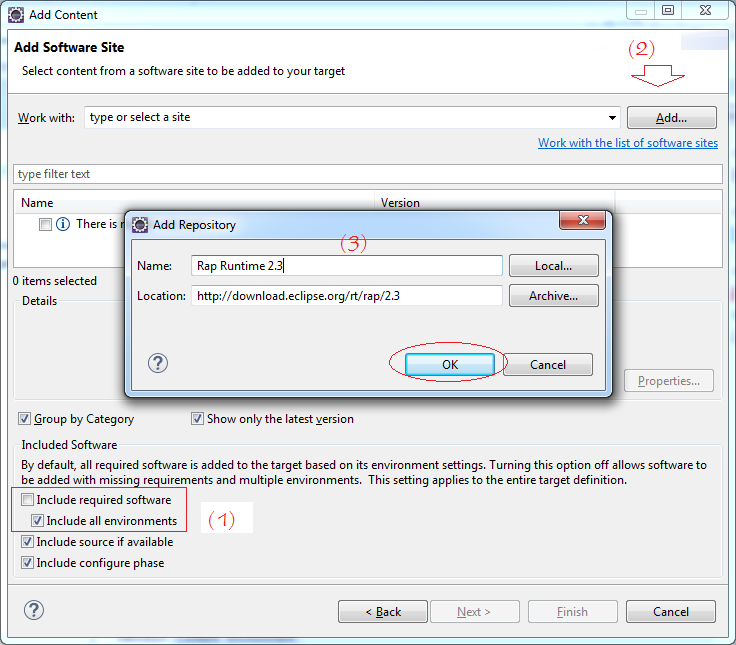
Déclarez la bibliothèque RAP
- Name: RAP Runtime 2.3
- Location: http://download.eclipse.org/rt/rap/2.3

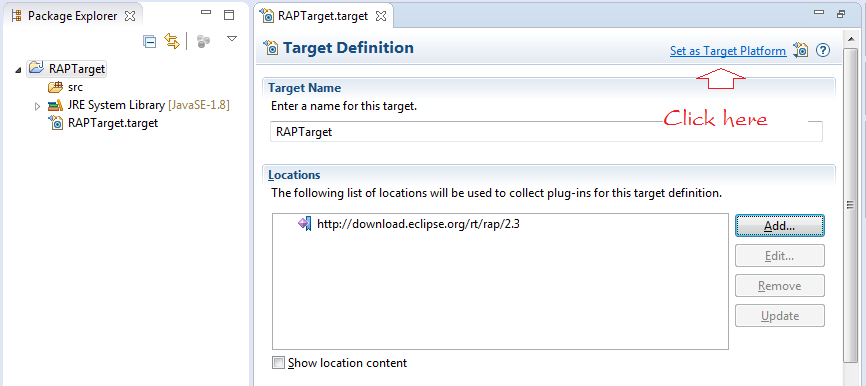
Cliquez sur "Set as Target Platform" pour que la bibliothèque RAP fonctionne avec tout projet dans l'espace de travail (workspace).
4. Créer un Plugin Project - LogComposite
- File/New/Other...
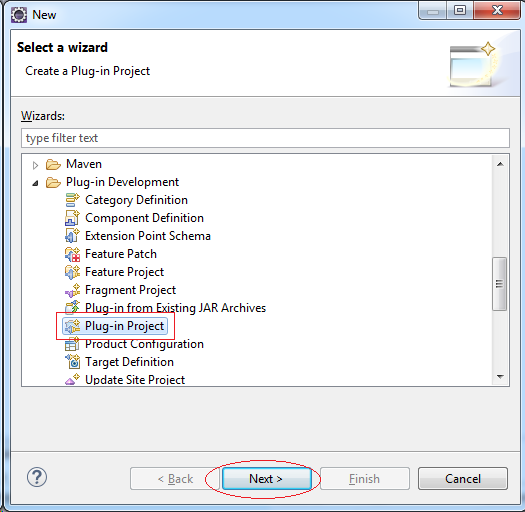
Saisissez :
- Project Name: LogComposite
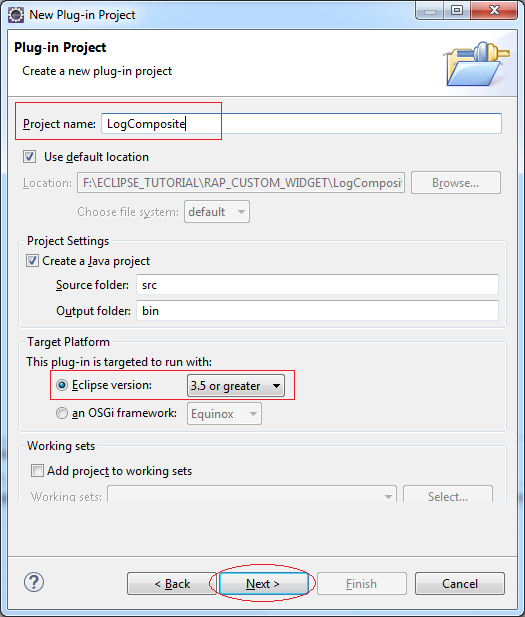
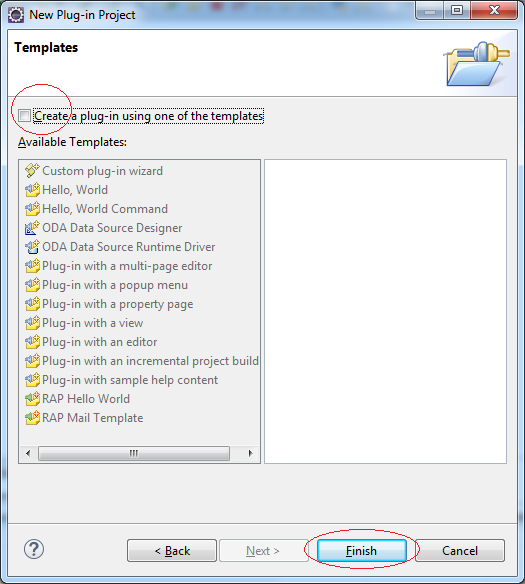
Ne sélectionnez aucun modèle (Template).
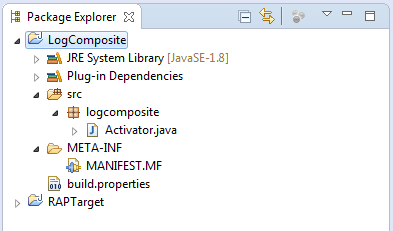
Votre projet a été créé :
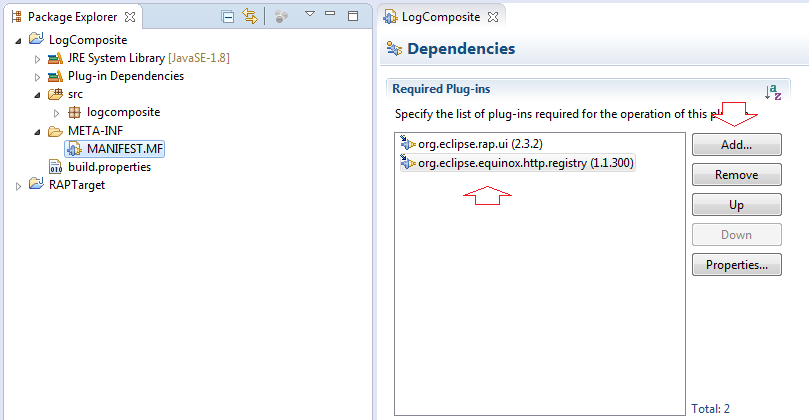
Déclarez les plugins requis pour ce plugin :
- org.eclipse.rap.ui
- org.eclipse.equinox.http.registry
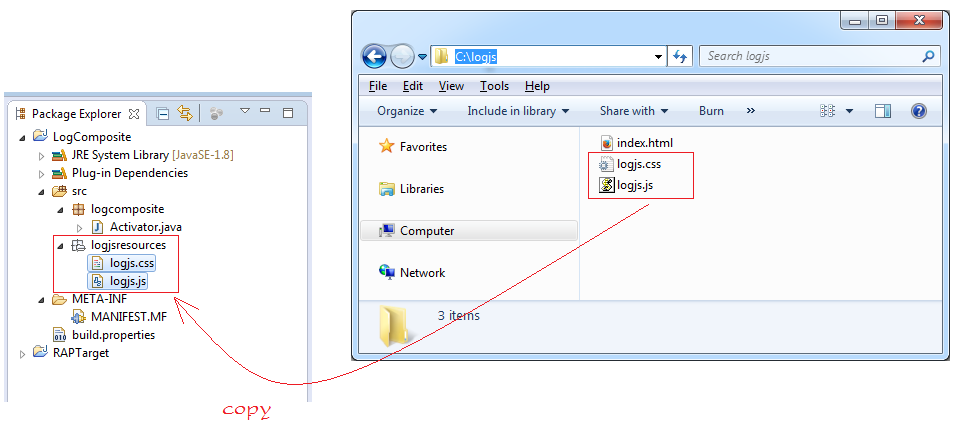
Vous devez créer un paquet logjsreources et copier les fichiers javascript, style relatifs dans ce package. Comme l'illustration ci-dessous :
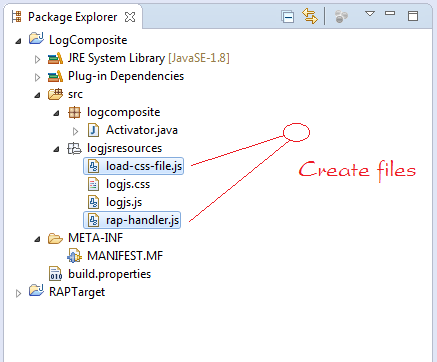
Ensuite, créez 2 fichiers javascript :
- rap-handler.js
- Agissant comme l'intermédiaire de communication entre RAP Widget et ClientScripting-based Widget.
- load-css-file.js
- Ce fichier fait la tâche de charger des fichiers css sur la page Web (en particulier, c'est logjs.css).
load-css-file.js
//
var cssId = 'logjs-css-file';


if (!document.getElementById(cssId))
{
   var head  = document.getElementsByTagName('head')[0];
   var link  = document.createElement('link');
   link.id   = cssId;
   link.rel  = 'stylesheet';
   link.type = 'text/css';
   link.href = '/rwt-resources/logjs/logjs.css';
   link.media = 'all';
   head.appendChild(link);
}
rap-handler.js
(function() {
   'use strict';

   rap.registerTypeHandler("o7planning.LogComposite", {

       factory : function(properties) {
           return new o7planning.LogComposite(properties);
       },

       destructor : "destroy",

       properties : [ "abc" ],

       events : [],

       methods : [ 'appendWarn', 'appendErr', 'appendInfo', 'clearAll' ]

   });

   if (!window.o7planning) {
       window.o7planning = {};
   }


   // Constructor
   o7planning.LogComposite = function(properties) {

       bindAll(this, [ "layout", "onReady", "onSend", "onRender", "onChange" ]);// @custom
       this.parent = rap.getObject(properties.parent);
       this.element = document.createElement("div");
       this.parent.append(this.element);
       this.parent.addListener("Resize", this.layout);

       this.logjs = new LogJS(this.element);


       // Render interface
       rap.on("render", this.onRender);
   };

   o7planning.LogComposite.prototype = {

       ready : false,

       onChange : function() {

       },

       onReady : function() {

       },


       // Render interface in Client
       onRender : function() {
           if (this.element.parentNode) {
               rap.off("render", this.onRender);

               rap.on("render", this.onRender);
               rap.on("send", this.onSend);
           }
       },

       //
       onSend : function() {

       },

       destroy : function() {
           rap.off("send", this.onSend);
           try {
               this.element.parentNode.removeChild(this.element);
           } catch (e) {
               try {
                   console
                           .log('error call this.element.parentNode.removeChild(this.element) :'
                                   + e);
               } catch (e) {
               }
           }
       },

       layout : function() {
           if (this.ready) {
               var area = this.parent.getClientArea();
               this.element.style.left = area[0] + "px";
               this.element.style.top = area[1] + "px";
               this.editor.resize(area[2], area[3]);
           }
       },

       setAbc : function(abc) {
       },

       appendErr : function(json) {
           var text= json["text"];
           this.logjs.appendErr(text);
       },

       appendWarn : function(json) {
           var text= json["text"];
           this.logjs.appendWarn(text);
       },

       appendInfo : function(json) {
           var text= json["text"];
           this.logjs.appendInfo(text);
       },

       clearAll : function()  {
           this.logjs.clearAll();
       }
   };

   var bind = function(context, method) {
       return function() {
           return method.apply(context, arguments);
       };
   };

   var bindAll = function(context, methodNames) {
       for (var i = 0; i < methodNames.length; i++) {
           var method = context[methodNames[i]];
           context[methodNames[i]] = bind(context, method);
       }
   };

   var async = function(context, func) {
       window.setTimeout(function() {
           func.apply(context);
       }, 0);
   };

}());
LogComposite est un Widget qui s'étend de la classe Composite et possède une certaine méthode comme LogJS
- appendErr
- appendInfo
- appendWarn
- clearAll
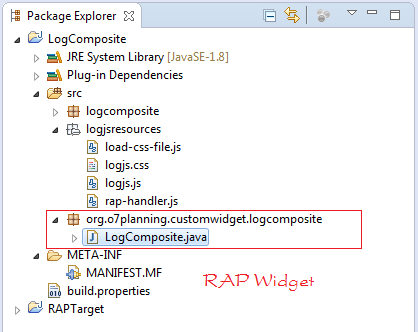
LogComposite.java
package org.o7planning.customwidget.logcomposite;
import java.io.IOException;
import java.io.InputStream;
import org.eclipse.rap.json.JsonObject;
import org.eclipse.rap.json.JsonValue;
import org.eclipse.rap.rwt.RWT;
import org.eclipse.rap.rwt.client.service.JavaScriptLoader;
import org.eclipse.rap.rwt.remote.AbstractOperationHandler;
import org.eclipse.rap.rwt.remote.Connection;
import org.eclipse.rap.rwt.remote.OperationHandler;
import org.eclipse.rap.rwt.remote.RemoteObject;
import org.eclipse.rap.rwt.service.ResourceManager;
import org.eclipse.rap.rwt.widgets.WidgetUtil;
import org.eclipse.swt.widgets.Composite;
public class LogComposite extends Composite {
private static final long serialVersionUID = -8590973451146216709L;
private RemoteObject remoteObject;
// The directory containing the file js, css.
private static final String REAL_RESOURCE_PATH = "logjsresources";
private static final String REGISTER_PATH = "logjs";
private static final String REMOTE_TYPE = "o7planning.LogComposite";
private final String[] FILENAMES = { "logjs.css", "logjs.js" ,"load-css-file.js" , "rap-handler.js" };
private final OperationHandler operationHandler = new AbstractOperationHandler() {
private static final long serialVersionUID = -1979566336567602883L;
@Override
public void handleSet(JsonObject properties) {
System.out.println("##### handleSet ..:");
JsonValue textValue = properties.get("text");
if (textValue != null) {
// text = textValue.asString();
}
}
@Override
public void handleCall(String method, JsonObject parameters) {
System.out.println("##### handleCall ..:" + method);
}
@Override
public void handleNotify(String event, JsonObject properties) {
System.out.println("##### handleNotify ..:" + event);
if (event.equals("dirty")) {
}
}
};
/**
* Create the composite.
*
* @param parent
* @param style
*/
public LogComposite(Composite parent, int style) {
super(parent, style);
// Note: Catching error when viewed on WindowBuilder
try {
registerResources();
loadJavaScript();
Connection connection = RWT.getUISession().getConnection();
remoteObject = connection.createRemoteObject(REMOTE_TYPE);
remoteObject.setHandler(operationHandler);
//
remoteObject.set("parent", WidgetUtil.getId(this));
} catch (Exception e) {
e.printStackTrace();
// throw new RuntimeException(e);
}
}
@Override
public void dispose() {
super.dispose();
// Call destroy() function in rap-handler.js
remoteObject.destroy();
}
// Load the js files required at Client.
private void loadJavaScript() {
JavaScriptLoader jsLoader = RWT.getClient().getService(
JavaScriptLoader.class);
ResourceManager resourceManager = RWT.getResourceManager();
// Load file logjs.js into page
jsLoader.require(resourceManager.getLocation(REGISTER_PATH + "/"
+ "logjs.js"));
// Load file load-css-file.js into page
jsLoader.require(resourceManager.getLocation(REGISTER_PATH + "/"
+ "load-css-file.js"));
// Load file rap-handler.js into page.
jsLoader.require(resourceManager.getLocation(REGISTER_PATH + "/"
+ "rap-handler.js"));
}
private void registerResources() throws IOException {
ResourceManager resourceManager = RWT.getResourceManager();
for (String fileName : FILENAMES) {
// After registering, you can access on your browser:
// (http://localhost:port/rwt-resources/logjs/abc.js )
// logjs/abc.js
String path = REGISTER_PATH + "/" + fileName;
// Check this resource has been registered yet.
boolean isRegistered = resourceManager.isRegistered(path);
if (!isRegistered) {
ClassLoader classLoader = LogComposite.class.getClassLoader();
// Real Path (in src)
// logjsresources/abc.js
String realPath = REAL_RESOURCE_PATH + "/" + fileName;
InputStream inputStream = classLoader
.getResourceAsStream(realPath);
if (inputStream == null) {
throw new IOException("File not found " + realPath);
}
try {
// Register resource
resourceManager.register(path, inputStream);
} finally {
inputStream.close();
}
}
}
}
@Override
protected void checkSubclass() {
}
public void appendWarn(String text) {
System.out.println("appendWarn");
JsonObject obj= new JsonObject();
obj.add("text", text);
this.remoteObject.call("appendWarn", obj);
}
public void appendErr(String text) {
System.out.println("appendErr");
JsonObject obj= new JsonObject();
obj.add("text", text);
this.remoteObject.call("appendErr", obj);
}
public void appendInfo(String text) {
System.out.println("appendInfo");
JsonObject obj= new JsonObject();
obj.add("text", text);
this.remoteObject.call("appendInfo", obj);
}
public void clearAll() {
System.out.println("clearAll");
this.remoteObject.call("clearAll", new JsonObject());
}
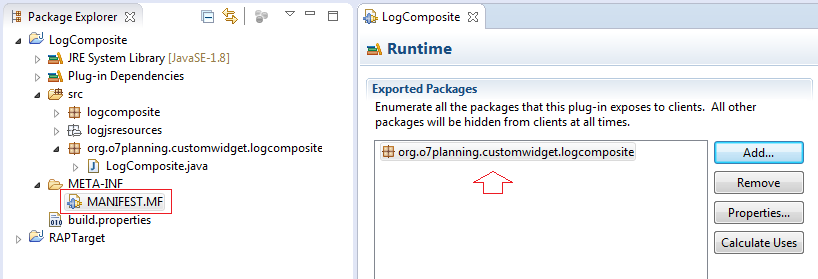
}Vous devez exporter le package org.o7planning.customwidget.logcomposite, pour permettre aux autres plugins à utiliser la classe LogComposite dans ce plugin.
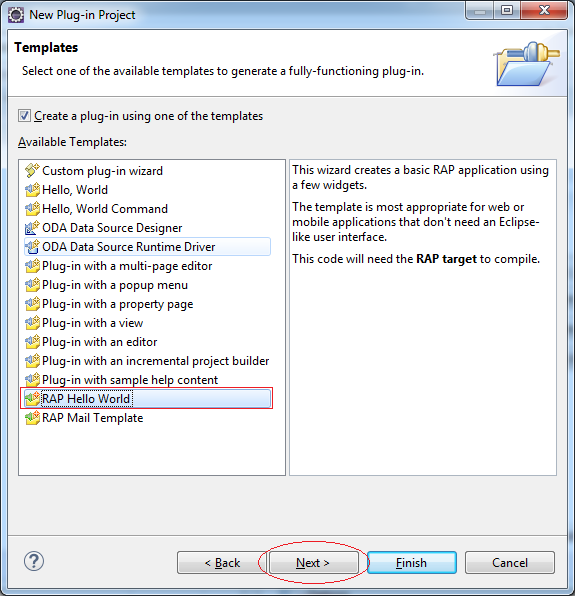
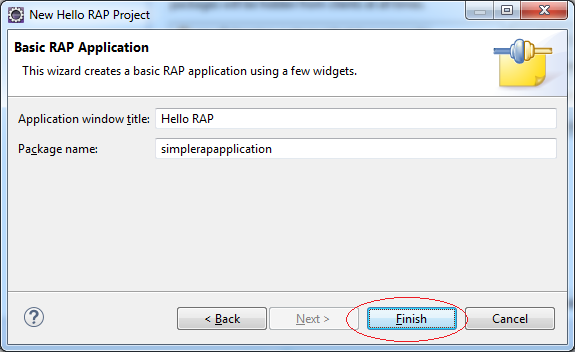
5. Test LogComposite
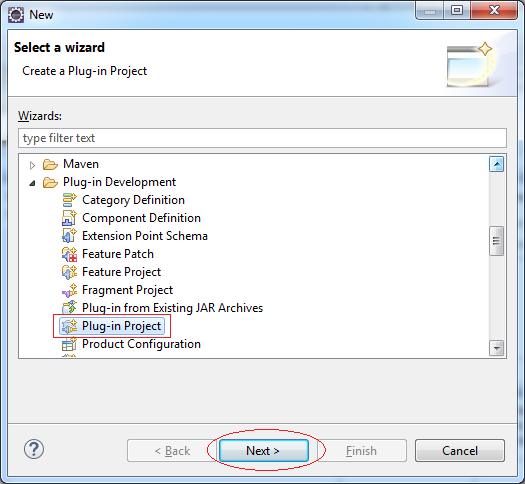
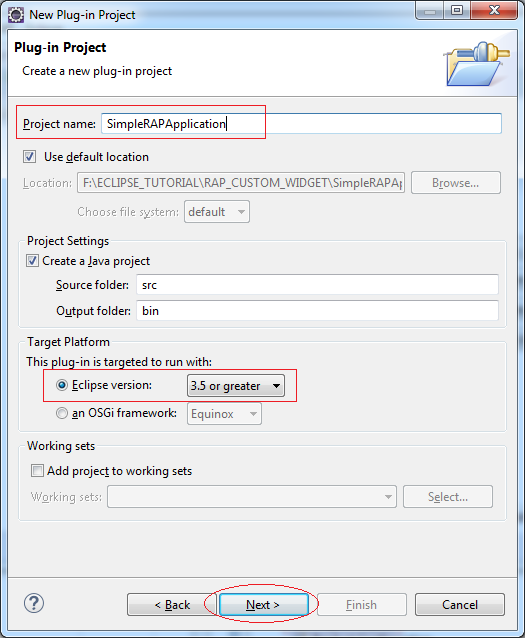
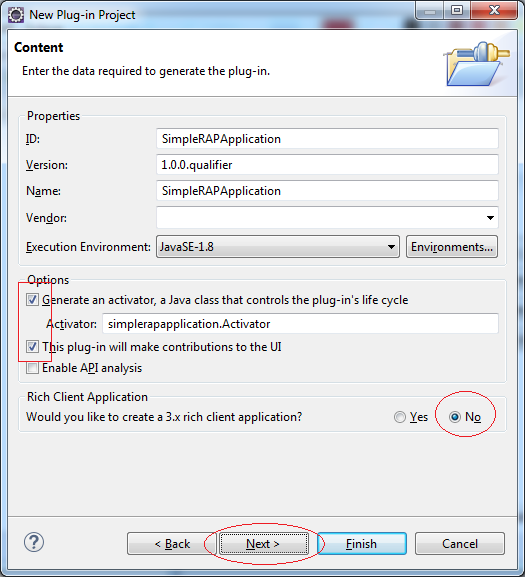
Vous devez créer un projet pour vérifier LogComposite. Ici, je crée une basic RAP application.
- File/New/Other...
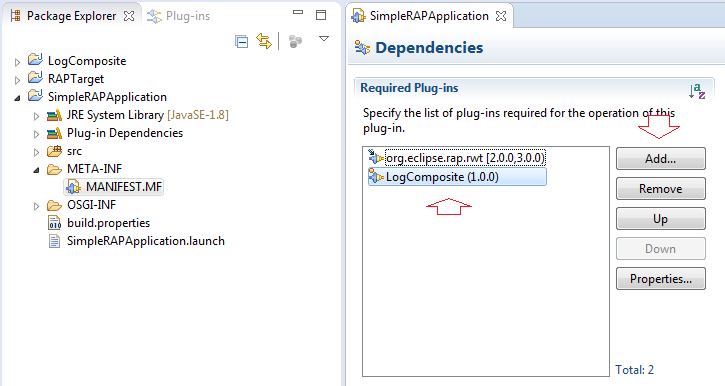
Enregistrez pour utiliser LogComposite plugin
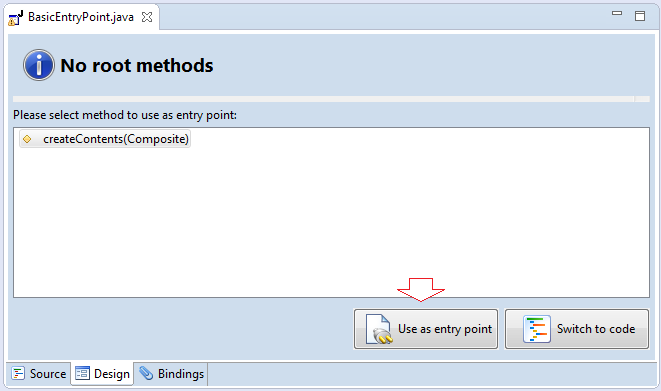
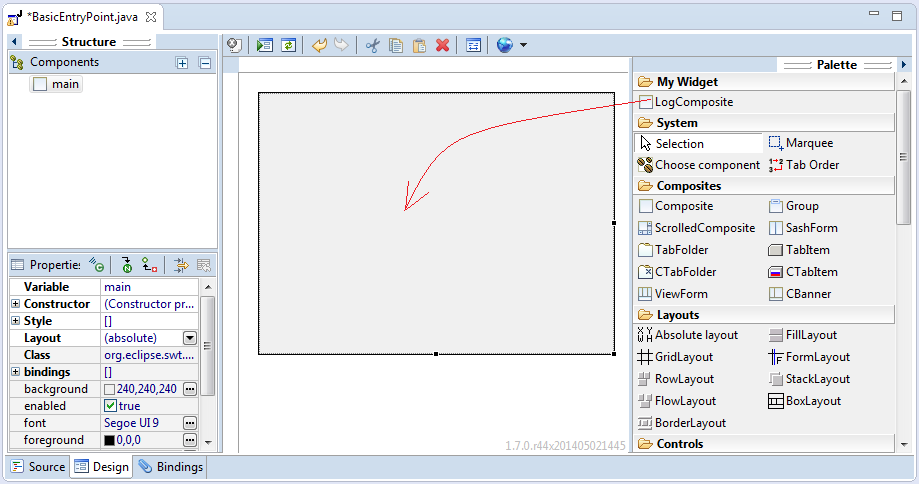
L'ouverture du code de la classe BasicEntryPoint modifié qui vous permet de concevoir l'interface sur WindowBuilder.
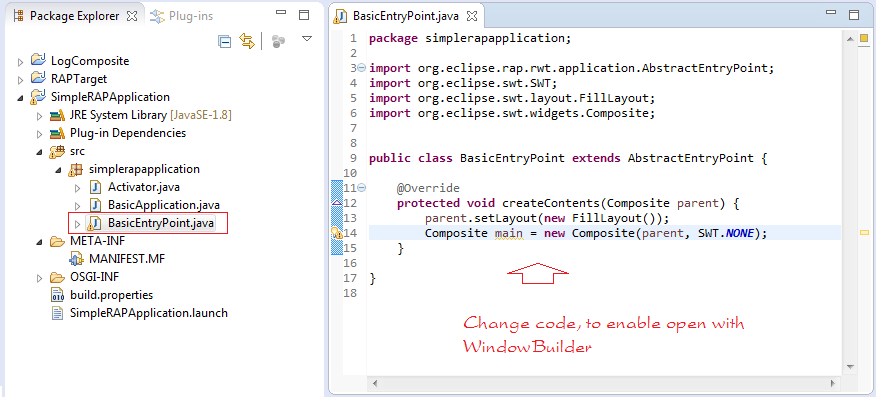
@Override
protected void createContents(Composite parent) {
// Change code, to enable open with WindowBuilder.
parent.setLayout(new FillLayout());
Composite main = new Composite(parent, SWT.NONE);
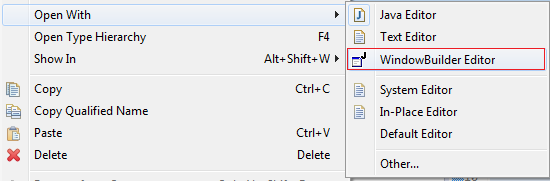
}Cliquez sur le bouton droit de la class BasicEntryPoint et sélectionnez "Open with/WindowBuilder Editor".

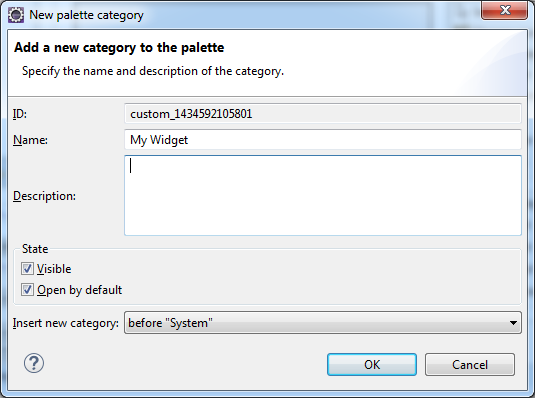

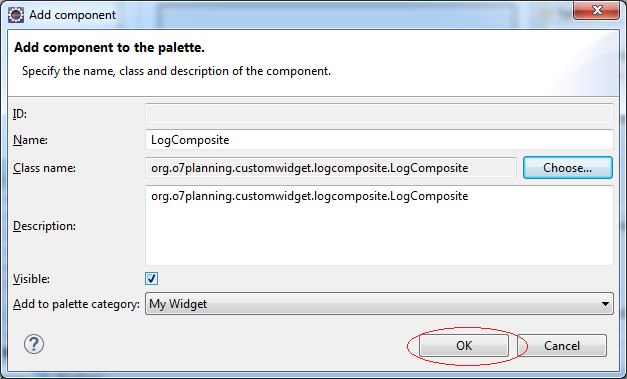
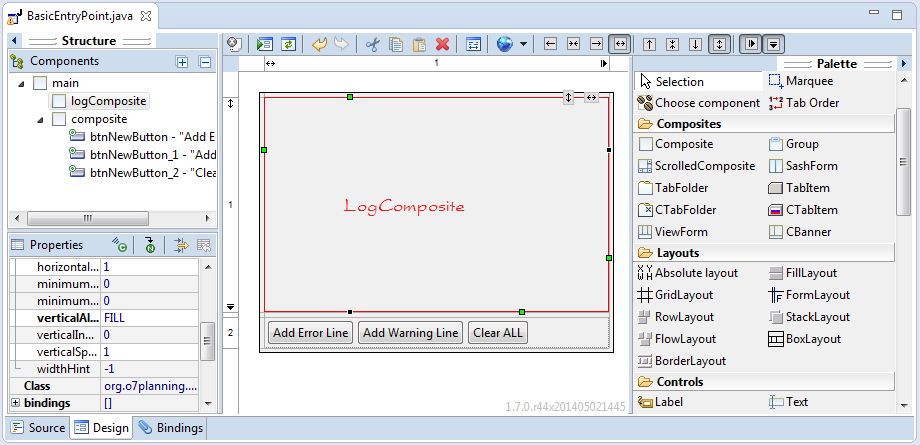
LogComposite est disponible sur Palette, comme les autres Widget, vous pouvez facilement le glisser et déposer dans votre interface de conception.
BasicEntryPoint.java
package simplerapapplication;
import org.eclipse.rap.rwt.application.AbstractEntryPoint;
import org.eclipse.swt.SWT;
import org.eclipse.swt.events.SelectionAdapter;
import org.eclipse.swt.events.SelectionEvent;
import org.eclipse.swt.layout.FillLayout;
import org.eclipse.swt.layout.GridData;
import org.eclipse.swt.layout.GridLayout;
import org.eclipse.swt.layout.RowLayout;
import org.eclipse.swt.widgets.Button;
import org.eclipse.swt.widgets.Composite;
import org.o7planning.customwidget.logcomposite.LogComposite;
public class BasicEntryPoint extends AbstractEntryPoint {
private LogComposite logComposite;
/**
* @wbp.parser.entryPoint
*/
@Override
protected void createContents(Composite parent) {
parent.setLayout(new FillLayout());
Composite main = new Composite(parent, SWT.NONE);
main.setLayout(new GridLayout(1, false));
logComposite = new LogComposite(main, SWT.BORDER);
logComposite.setLayoutData(new GridData(SWT.FILL, SWT.FILL, true, true, 1, 1));
Composite composite = new Composite(main, SWT.NONE);
composite.setLayout(new RowLayout(SWT.HORIZONTAL));
composite.setLayoutData(new GridData(SWT.FILL, SWT.CENTER, true, false, 1, 1));
Button btnNewButton = new Button(composite, SWT.NONE);
btnNewButton.addSelectionListener(new SelectionAdapter() {
@Override
public void widgetSelected(SelectionEvent e) {
allErrorLine();
}
});
btnNewButton.setText("Add Error Line");
Button btnNewButton_1 = new Button(composite, SWT.NONE);
btnNewButton_1.addSelectionListener(new SelectionAdapter() {
@Override
public void widgetSelected(SelectionEvent e) {
addWarningLine();
}
});
btnNewButton_1.setText("Add Warning Line");
Button btnNewButton_2 = new Button(composite, SWT.NONE);
btnNewButton_2.addSelectionListener(new SelectionAdapter() {
@Override
public void widgetSelected(SelectionEvent e) {
clearAll();
}
});
btnNewButton_2.setText("Clear ALL");
}
private void allErrorLine() {
logComposite.appendErr("Starting Servlet Engine: Apache Tomcat/7.0.23");
}
private void addWarningLine() {
logComposite.appendWarn("Starting Servlet Engine: Apache Tomcat/7.0.23");
}
private void clearAll() {
logComposite.clearAll();
}
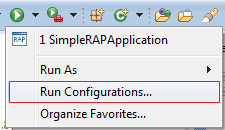
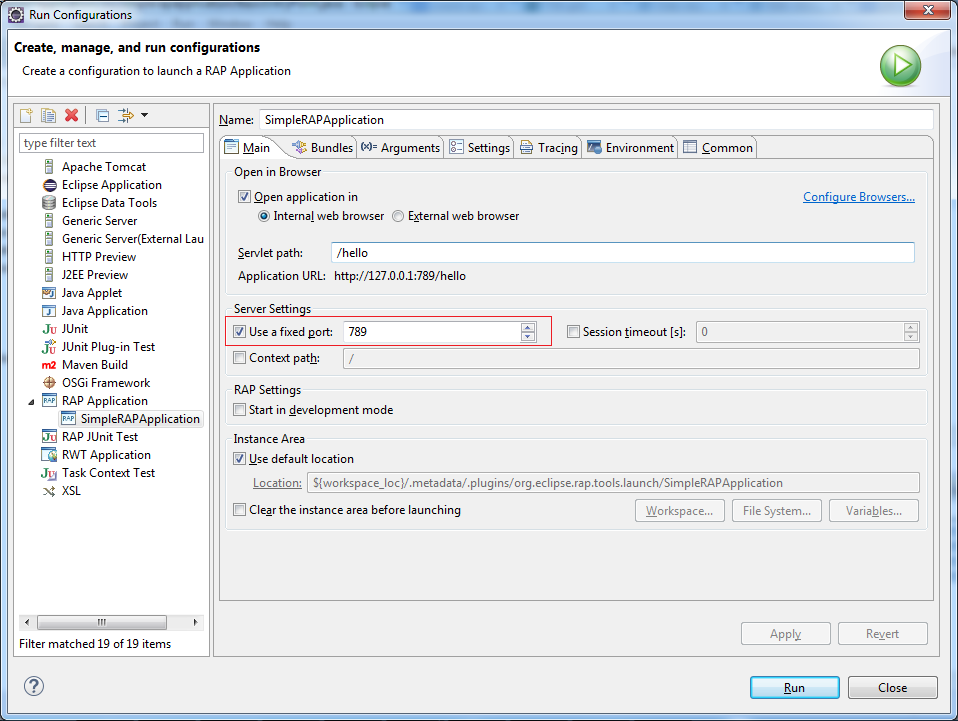
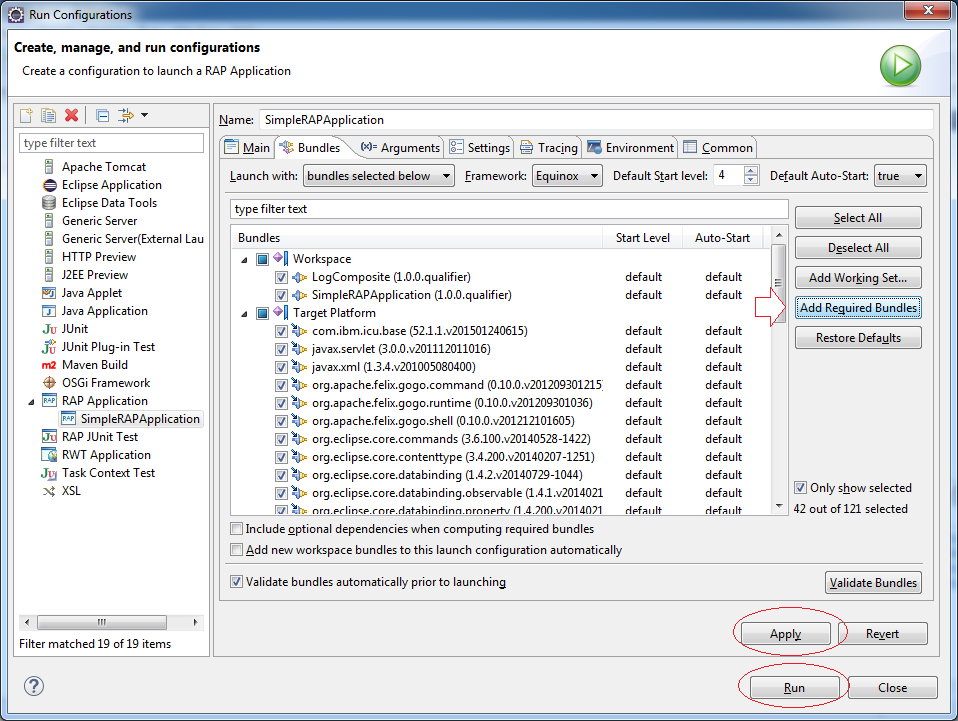
}Exécution de l’application :
Cliquez sur le bouton droit sur le projet "SimpleRAPApplication", sélectionnez :
- Run As/RAP Application
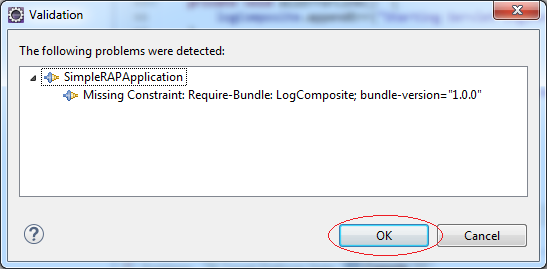
L'erreur ci-dessus montre que vous avez besoin de configurer RAPruntime avant d'exécuter l'application.
Le résultat de l'exécution de l'application :

Eclipse RAP
- Installer RAP Tools pour Eclipse
- Quelle plate-forme devez-vous choisir pour développer des applications de bureau Java?
- Le Tutoriel Eclipse RAP pour débutant - Application e4 Workbench
- Installation de la plate-forme cible Eclipse RAP (RAP Target Platform)
- Créer Eclipse RAP Widget à partir de ClientScripting widget
- Installer RAP e4 Tooling pour Eclipse
Show More
Tutoriels Eclipse Technology
- Installer Tycho pour Eclipse
- Tutoriel Java OSGi pour débutant
- Créer un projet Java OSGi avec Maven et Tycho
- Installer WindowBuilder pour Eclipse
- Quelle plate-forme devez-vous choisir pour développer des applications de bureau Java?
- Programmation de l'application Java Desktop à l'aide de SWT
- Le Tutoriel de Eclipse JFace
- Installation de la plate-forme cible Eclipse RAP (RAP Target Platform)
- Installer RAP e4 Tooling pour Eclipse
- Créer Eclipse RAP Widget à partir de ClientScripting widget
- Le Tutoriel Eclipse RCP 4 pour débutant - Application e4 Workbench
- Installer RAP Tools pour Eclipse
- Le Tutoriel Eclipse RAP pour débutant - Application e4 Workbench
Show More