Exemple CRUD Restful WebService avec Spring Boot
1. Objectif de l'exemple
Ce document est basé sur :
Spring Boot 2.x
Eclipse 4.7 Oxygen
Voir plus :
Dans cet article, je vous montrerai comment créer une application Restful Web Serviceà l'aide deSpring Boot, et ayant 4 fonctionnements Create, Read, Update, Delete (CRUD).
Read (GET method)
We will build an URI that is assigned to return the user an employee list and defines another URI that returns the user the information of a particular employee. The data that the user will be received is in XML or JSON format. These URIs only accept the requests with GET method.
- GET http://localhost:8080/employees
- GET http://localhost:8080/employee/E01
Update (PUT method).
Build an URI to process the request for changing an employee's information. This URI accepts only the requests with PUT method. The data attached with the request is the new information of the employee, which is in XML or JSON format.
- PUT http://localhost:8080/employee
Create (POST method)
Construire un URI pour traiter les demandes (request) dans but de créer un employé (employee). Ce URI n'accepte que les demandes avec la méthode POST. Les données attachées de cette demande est l'information de l'employé crée. Elle est sous format de XML ou JSON.
- POST http://localhost:8080/employee
Delete (DELETE method).
Construisez un URI pour traiter une demande (request) de suppression d'un employé (employee). Ce URI n'accepte que les demandes utilisant la méthode DELETE.
Remarque: Aucune donnée n'est jointe à la demande dans ce cas (comme les données attachées avec la méthode POST), car la demande avec la méthode DELETE ne peut pas être attachée avec des données. Les informations de l'employé à supprimer seront situées sur l'URI ou la QueryString de l'URL.
- DELETE http://localhost:8080/employee/{empNo}
2. Créer len projet Spring Boot
Sur Eclipse, sélectionnez :
- File/New/Other..
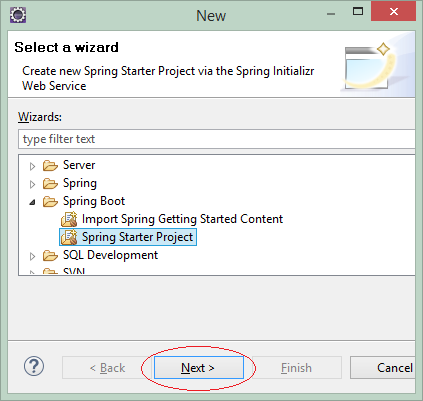
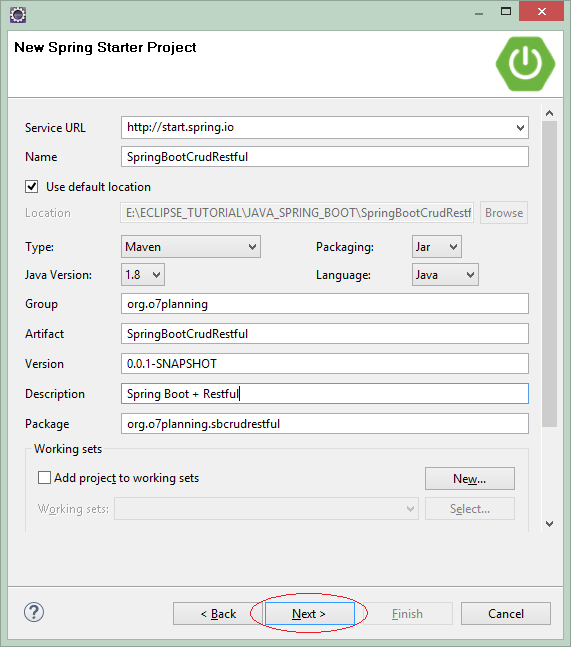
Saisissez :
- Name: SpringBootCrudRestful
- Group: org.o7planning
- Package: org.o7planning.sbcrudrestful
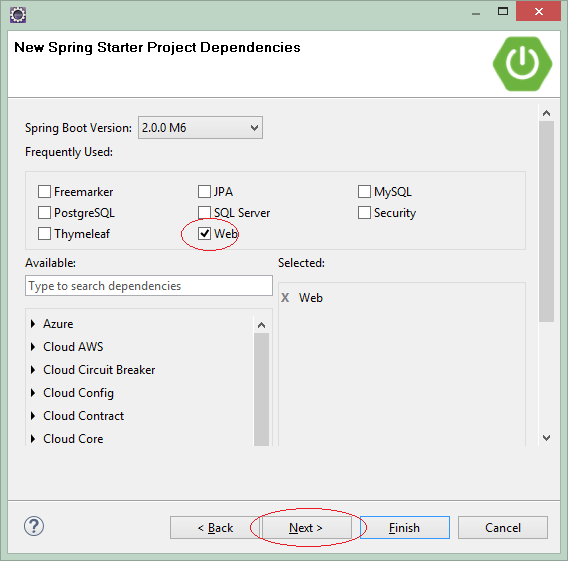
Dans les étaptes suivantes, vous devez sélectionnez les technologies utilisées.
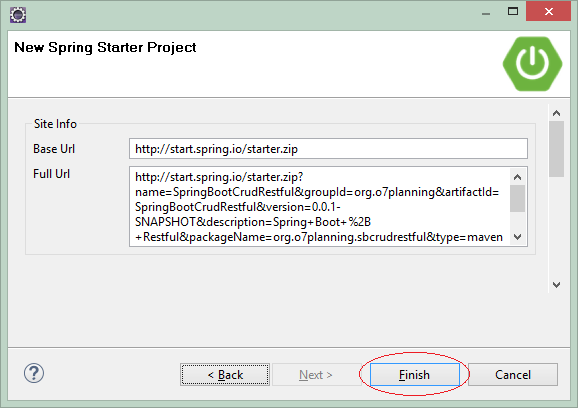
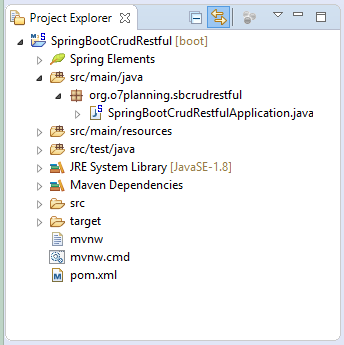
OK, le projet a été créé.
3. Configurer le fichier pom.xml
Dans cet example, nous avons besoin d'une bibliothèque de convertir (convert) XML en objet Java et vice versa. Et une autre bibliothèque de convertir JSON en Java et vice versa.
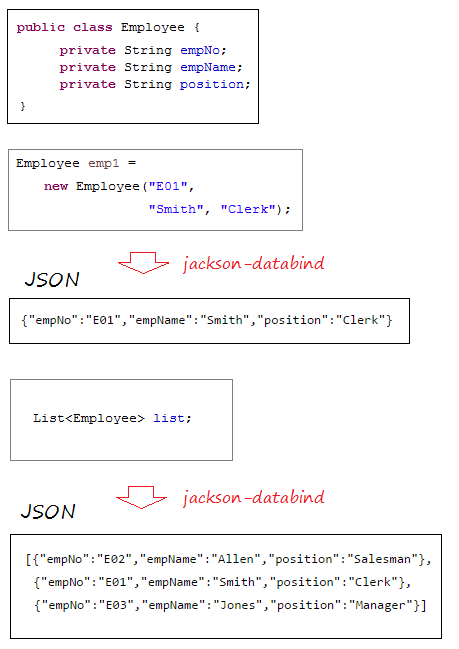
JSON <==> Java
spring-boot-starter-web a construit dans jackson-databind, cette bibliothèque convertit JSON en objet Java et vice versa.
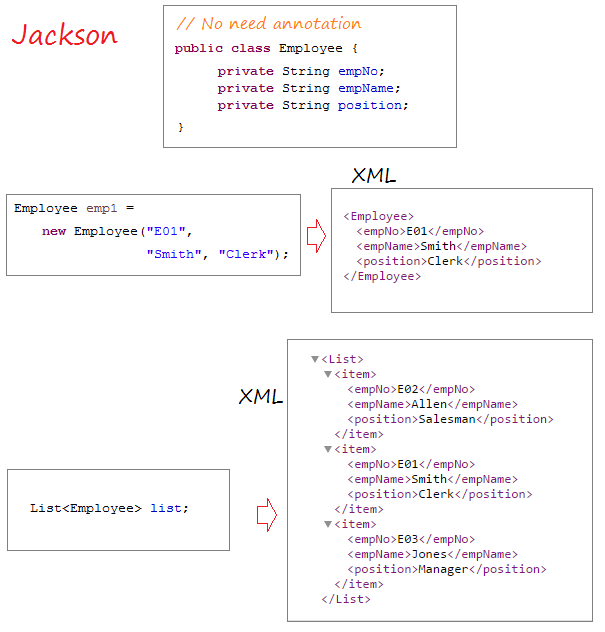
XML <==> Java
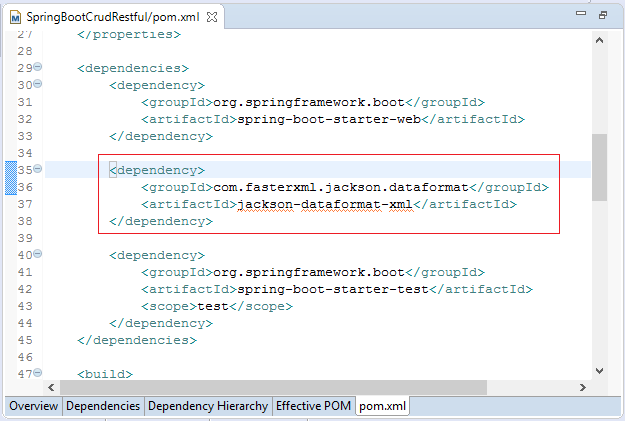
Spring Boot utilise JAXB (Disponible dans JDK) comme une bibliothèque par défaut pour convertir XML et Java. Pourtant, des classes de Java ont besoin d'être annotées (annotated) par @XmlRootElement,... Donc mon conseil est que vous devriez utiliser jackson-dataformat-xml comme une biblothèque de convertir XML et Java. Afin d'utiliser jackson-dataformat-xml, vous devez la déclarer dans le fichier pom.xml:
** pom.xml **
...

<dependencies>

        ...

    <dependency>
        <groupId>com.fasterxml.jackson.dataformat</groupId>
        <artifactId>jackson-dataformat-xml</artifactId>
    </dependency>

    ...

</dependencies>

...
pom.xml
<?xml version="1.0" encoding="UTF-8"?>
<project xmlns="http://maven.apache.org/POM/4.0.0"
    xmlns:xsi="http://www.w3.org/2001/XMLSchema-instance"
    xsi:schemaLocation="http://maven.apache.org/POM/4.0.0
                        http://maven.apache.org/xsd/maven-4.0.0.xsd">
    <modelVersion>4.0.0</modelVersion>

    <groupId>org.o7planning</groupId>
    <artifactId>SpringBootCrudRestful</artifactId>
    <version>0.0.1-SNAPSHOT</version>
    <packaging>jar</packaging>

    <name>SpringBootCrudRestful</name>
    <description>Spring Boot + Restful</description>

    <parent>
        <groupId>org.springframework.boot</groupId>
        <artifactId>spring-boot-starter-parent</artifactId>
        <version>2.0.0.RELEASE</version>
        <relativePath/> <!-- lookup parent from repository -->
    </parent>

    <properties>
        <project.build.sourceEncoding>UTF-8</project.build.sourceEncoding>
        <project.reporting.outputEncoding>UTF-8</project.reporting.outputEncoding>
        <java.version>1.8</java.version>
    </properties>

    <dependencies>
        <dependency>
            <groupId>org.springframework.boot</groupId>
            <artifactId>spring-boot-starter-web</artifactId>
        </dependency>

        <dependency>
            <groupId>com.fasterxml.jackson.dataformat</groupId>
            <artifactId>jackson-dataformat-xml</artifactId>
        </dependency>

        <dependency>
            <groupId>org.springframework.boot</groupId>
            <artifactId>spring-boot-starter-test</artifactId>
            <scope>test</scope>
        </dependency>
    </dependencies>

    <build>
        <plugins>
            <plugin>
                <groupId>org.springframework.boot</groupId>
                <artifactId>spring-boot-maven-plugin</artifactId>
            </plugin>
        </plugins>
    </build>

</project>
4. Code de l'application
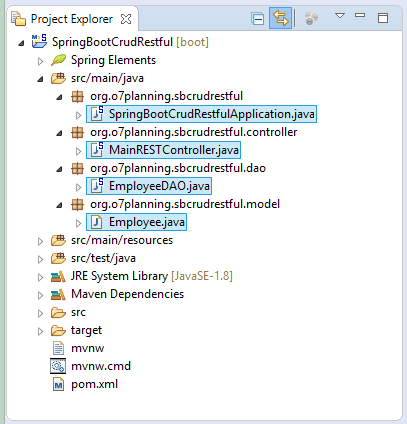
SpringBootCrudRestfulApplication.java
package org.o7planning.sbcrudrestful;

import org.springframework.boot.SpringApplication;
import org.springframework.boot.autoconfigure.SpringBootApplication;

@SpringBootApplication
public class SpringBootCrudRestfulApplication {

    public static void main(String[] args) {
        SpringApplication.run(SpringBootCrudRestfulApplication.class, args);
    }
}
La classe Employee représente un employé.
Employee.java
package org.o7planning.sbcrudrestful.model;

public class Employee {

    private String empNo;
    private String empName;
    private String position;

    public Employee() {

    }

    public Employee(String empNo, String empName, String position) {
        this.empNo = empNo;
        this.empName = empName;
        this.position = position;
    }

    public String getEmpNo() {
        return empNo;
    }

    public void setEmpNo(String empNo) {
        this.empNo = empNo;
    }

    public String getEmpName() {
        return empName;
    }

    public void setEmpName(String empName) {
        this.empName = empName;
    }

    public String getPosition() {
        return position;
    }

    public void setPosition(String position) {
        this.position = position;
    }

}
La classe EmployeeDAO est annotée (annotate) par @Repository afin de notifier le Spring qu'elle est un Spring BEAN. Cette classe comprend les méthodes qui aident à enquêter la liste des employés (employee), à créer des employés, mettre à jour de l'information des employés et à supprimer des employés.
EmployeeDAO.java
package org.o7planning.sbcrudrestful.dao;


import java.util.ArrayList;
import java.util.Collection;
import java.util.HashMap;
import java.util.List;
import java.util.Map;

import org.o7planning.sbcrudrestful.model.Employee;
import org.springframework.stereotype.Repository;

@Repository
public class EmployeeDAO {

    private static final Map<String, Employee> empMap = new HashMap<String, Employee>();

    static {
        initEmps();
    }

    private static void initEmps() {
        Employee emp1 = new Employee("E01", "Smith", "Clerk");
        Employee emp2 = new Employee("E02", "Allen", "Salesman");
        Employee emp3 = new Employee("E03", "Jones", "Manager");

        empMap.put(emp1.getEmpNo(), emp1);
        empMap.put(emp2.getEmpNo(), emp2);
        empMap.put(emp3.getEmpNo(), emp3);
    }

    public Employee getEmployee(String empNo) {
        return empMap.get(empNo);
    }

    public Employee addEmployee(Employee emp) {
        empMap.put(emp.getEmpNo(), emp);
        return emp;
    }

    public Employee updateEmployee(Employee emp) {
        empMap.put(emp.getEmpNo(), emp);
        return emp;
    }

    public void deleteEmployee(String empNo) {
        empMap.remove(empNo);
    }

    public List<Employee> getAllEmployees() {
        Collection<Employee> c = empMap.values();
        List<Employee> list = new ArrayList<Employee>();
        list.addAll(c);
        return list;
    }

}
La classe MainRESTController est annotée (annotate) par @RestController afin d'informer à Spring qu'elle est un Spring Restful Controller,
MainRESTController.java
package org.o7planning.sbcrudrestful.controller;

import java.util.List;

import org.o7planning.sbcrudrestful.dao.EmployeeDAO;
import org.o7planning.sbcrudrestful.model.Employee;
import org.springframework.beans.factory.annotation.Autowired;
import org.springframework.http.MediaType;
import org.springframework.web.bind.annotation.PathVariable;
import org.springframework.web.bind.annotation.RequestBody;
import org.springframework.web.bind.annotation.RequestMapping;
import org.springframework.web.bind.annotation.RequestMethod;
import org.springframework.web.bind.annotation.ResponseBody;
import org.springframework.web.bind.annotation.RestController;

@RestController

public class MainRESTController {

    @Autowired
    private EmployeeDAO employeeDAO;

    @RequestMapping("/")
    @ResponseBody
    public String welcome() {
        return "Welcome to RestTemplate Example.";
    }

    // URL:
    // http://localhost:8080/SomeContextPath/employees
    // http://localhost:8080/SomeContextPath/employees.xml
    // http://localhost:8080/SomeContextPath/employees.json
    @RequestMapping(value = "/employees", //
            method = RequestMethod.GET, //
            produces = { MediaType.APPLICATION_JSON_VALUE, //
                    MediaType.APPLICATION_XML_VALUE })
    @ResponseBody
    public List<Employee> getEmployees() {
        List<Employee> list = employeeDAO.getAllEmployees();
        return list;
    }

    // URL:
    // http://localhost:8080/SomeContextPath/employee/{empNo}
    // http://localhost:8080/SomeContextPath/employee/{empNo}.xml
    // http://localhost:8080/SomeContextPath/employee/{empNo}.json
    @RequestMapping(value = "/employee/{empNo}", //
            method = RequestMethod.GET, //
            produces = { MediaType.APPLICATION_JSON_VALUE, //
                    MediaType.APPLICATION_XML_VALUE })
    @ResponseBody
    public Employee getEmployee(@PathVariable("empNo") String empNo) {
        return employeeDAO.getEmployee(empNo);
    }

    // URL:
    // http://localhost:8080/SomeContextPath/employee
    // http://localhost:8080/SomeContextPath/employee.xml
    // http://localhost:8080/SomeContextPath/employee.json

    @RequestMapping(value = "/employee", //
            method = RequestMethod.POST, //
            produces = { MediaType.APPLICATION_JSON_VALUE, //
                    MediaType.APPLICATION_XML_VALUE })
    @ResponseBody
    public Employee addEmployee(@RequestBody Employee emp) {

        System.out.println("(Service Side) Creating employee: " + emp.getEmpNo());

        return employeeDAO.addEmployee(emp);
    }

    // URL:
    // http://localhost:8080/SomeContextPath/employee
    // http://localhost:8080/SomeContextPath/employee.xml
    // http://localhost:8080/SomeContextPath/employee.json
    @RequestMapping(value = "/employee", //
            method = RequestMethod.PUT, //
            produces = { MediaType.APPLICATION_JSON_VALUE, //
                    MediaType.APPLICATION_XML_VALUE })
    @ResponseBody
    public Employee updateEmployee(@RequestBody Employee emp) {

        System.out.println("(Service Side) Editing employee: " + emp.getEmpNo());

        return employeeDAO.updateEmployee(emp);
    }

    // URL:
    // http://localhost:8080/SomeContextPath/employee/{empNo}
    @RequestMapping(value = "/employee/{empNo}", //
            method = RequestMethod.DELETE, //
            produces = { MediaType.APPLICATION_JSON_VALUE, MediaType.APPLICATION_XML_VALUE })
    @ResponseBody
    public void deleteEmployee(@PathVariable("empNo") String empNo) {

        System.out.println("(Service Side) Deleting employee: " + empNo);

        employeeDAO.deleteEmployee(empNo);
    }

}
Explication:
- produces = { MediaType.APPLICATION_JSON_VALUE, MediaType.APPLICATION_XML_VALUE }
- produces = { "application/json" , "application/xml" }
L'attribut produces sert à spécifier un URL qui créera seulement (renverra au utilisateur) les données sous quel format. Par exemple : "application/json", "application/xml".
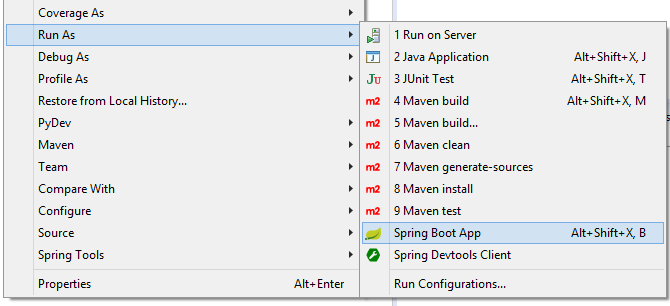
5. Exécuter l'application
Afin d'exécuter l'application, cliquez sur le bouton droit du projet, sélectionnez :
- Run As/Spring Boot App
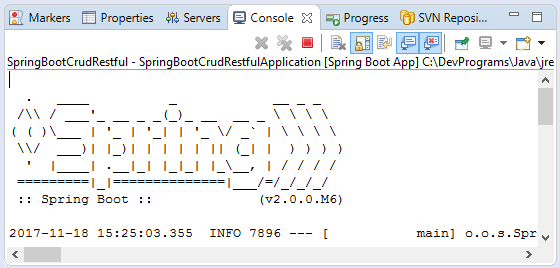
Après d'avoir exécuté l'application, vous pouvez tester ses fonctionnements.
Test GET:
If ERROR==> Please use Spring Boot 2.0.0.M5 temporarily.(And wait for the official version of Spring Boot 2).<parent> <groupId>org.springframework.boot</groupId> <artifactId>spring-boot-starter-parent</artifactId> <version>2.0.0.M5</version> <relativePath/> <!-- lookup parent from repository --> </parent>
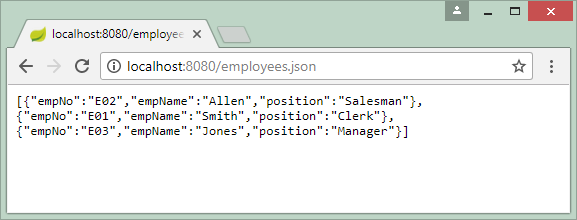
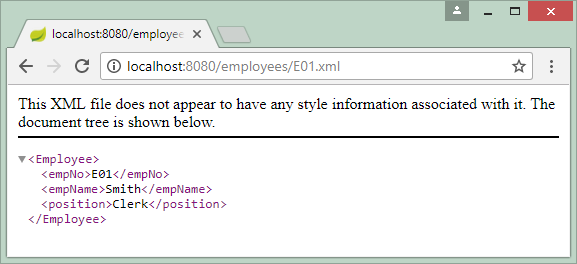
Dans le but d'extraire la liste des employés (employee), l'utilisateur doit envoyer une demande (requête) avec la méthode GET. Vous pouvez tester facilement ce fonctionnement en utilisant un navigateur.
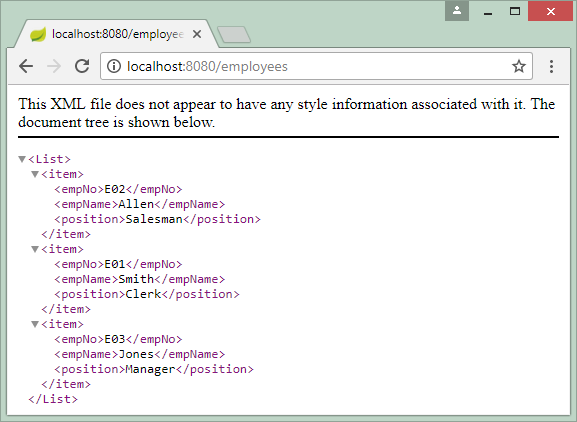
Ou :
Comment créer une demande en utilisant les méthodes POST, PUT ou DELETE?Afin de créer une demande (requête) avec la méthode POST, PUT ou DELETE, vous devez utiliser un outil tel que RestClient, cURL,.. ou écrire votre propre application Rest Client.Voir plus :
Test POST
Afin de créer un employé (employee), vous avez besoin une requête avec la méthode POST, et de l'attacher les information de l'employé qui a été créée. Les données attachées seront sous le format de JSON ou celui de XML :
POST http://localhost:8080/employee
Acept: application/xml

<Employee>
    <empNo>E11</empNo>
    <empName>New Employee</empName>
    <position>Clerk</position>
</Employee>
POST http://localhost:8080/employee
Acept: application/json
{"empNo":"E11","empName":"New Employee","position":"Clerk"}Tutoriels Java Web Service
- Qu'est-ce que RESTful Web Service?
- Tutoriel Java RESTful Web Service pour débutant
- Exemple CRUD simple avec Java RESTful Web Service
- Créer Java RESTful Client avec Jersey Client
- RESTClient Un débogueur pour RESTful Web Service
- Exemple de CRUD simple avec Spring MVC RESTful Web Service
- Exemple CRUD Restful WebService avec Spring Boot
- Exemple Spring Boot Restful Client avec RestTemplate
- Sécurité Spring RESTful Service utilisant Basic Authentication
Show More
Tutoriels Spring Boot
- Installer Spring Tool Suite pour Eclipse
- Le Tutoriel de Spring pour débutant
- Le Tutoriel de Spring Boot pour débutant
- Propriétés communes de Spring Boot
- Le Tutoriel de Spring Boot et Thymeleaf
- Le Tutoriel de Spring Boot et FreeMarker
- Le Tutoriel de Spring Boot et Groovy
- Le Tutoriel de Spring Boot et Mustache
- Le Tutoriel de Spring Boot et JSP
- Le Tutoriel de Spring Boot, Apache Tiles, JSP
- Utiliser Logging dans Spring Boot
- Surveillance des applications avec Spring Boot Actuator
- Créer une application Web multilingue avec Spring Boot
- Utiliser plusieurs ViewResolvers dans Spring Boot
- Utiliser Twitter Bootstrap dans Spring Boot
- Le Tutoriel de Spring Boot Interceptor
- Le Tutoriel de Spring Boot, Spring JDBC et Spring Transaction
- Le Tutoriel de Spring JDBC
- Le Tutoriel de Spring Boot, JPA et Spring Transaction
- Le Tutoriel de Spring Boot et Spring Data JPA
- Le Tutoriel de Spring Boot, Hibernate et Spring Transaction
- Intégration de Spring Spring, JPA et H2 Database
- Le Tutoriel de Spring Boot et MongoDB
- Utiliser plusieurs DataSources avec Spring Boot et JPA
- Utiliser plusieurs DataSources avec Spring Boot et RoutingDataSource
- Créer une application de connexion avec Spring Boot, Spring Security, Spring JDBC
- Créer une application de connexion avec Spring Boot, Spring Security, JPA
- Créer une application d'enregistrement d'utilisateur avec Spring Boot, Spring Form Validation
- Exemple de OAuth2 Social Login dans Spring Boot
- Exécuter des tâches planifiées en arrière-plan dans Spring
- Exemple CRUD Restful WebService avec Spring Boot
- Exemple Spring Boot Restful Client avec RestTemplate
- Exemple CRUD avec Spring Boot, REST et AngularJS
- Sécurité Spring RESTful Service utilisant Basic Authentication
- Sécuriser Spring Boot RESTful Service en utilisant Auth0 JWT
- Exemple Upload file avec Spring Boot
- Le exemple de Download file avec Spring Boot
- Le exemple de Upload file avec Spring Boot et jQuery Ajax
- Le exemple de Upload file avec Spring Boot et AngularJS
- Créer une application Web Panier avec Spring Boot, Hibernate
- Le Tutoriel de Spring Email
- Créer une application Chat simple avec Spring Boot et Websocket
- Déployer le application Spring Boot sur Tomcat Server
- Déployer le application Spring Boot sur Oracle WebLogic Server
- Installer un certificat SSL gratuit Let's Encrypt pour Spring Boot
- Configurer Spring Boot pour rediriger HTTP vers HTTPS
Show More